Welcome to MinutesVault, the ultimate solution for streamlining your meeting management process. Designed to simplify scheduling, it offers clear agendas, efficient attendee management, and automated notifications, ensuring everyone stays informed and prepared. Meeting Plus fosters seamless collaboration with shared agendas, real-time updates, and task assignments. It allows you to track action items, capture meeting minutes effortlessly, and promotes accountability for all team members. Whether you're in the office or on the go, Meeting Plus keeps you connected, providing personalized reminders and notifications to help you stay on top of deadlines and ensure productive, well-managed meetings.
Follow the steps mentioned below to perform different action in the MinutesVault application. Follow the steps outlined below to perform various actions in the MinutesVault application.
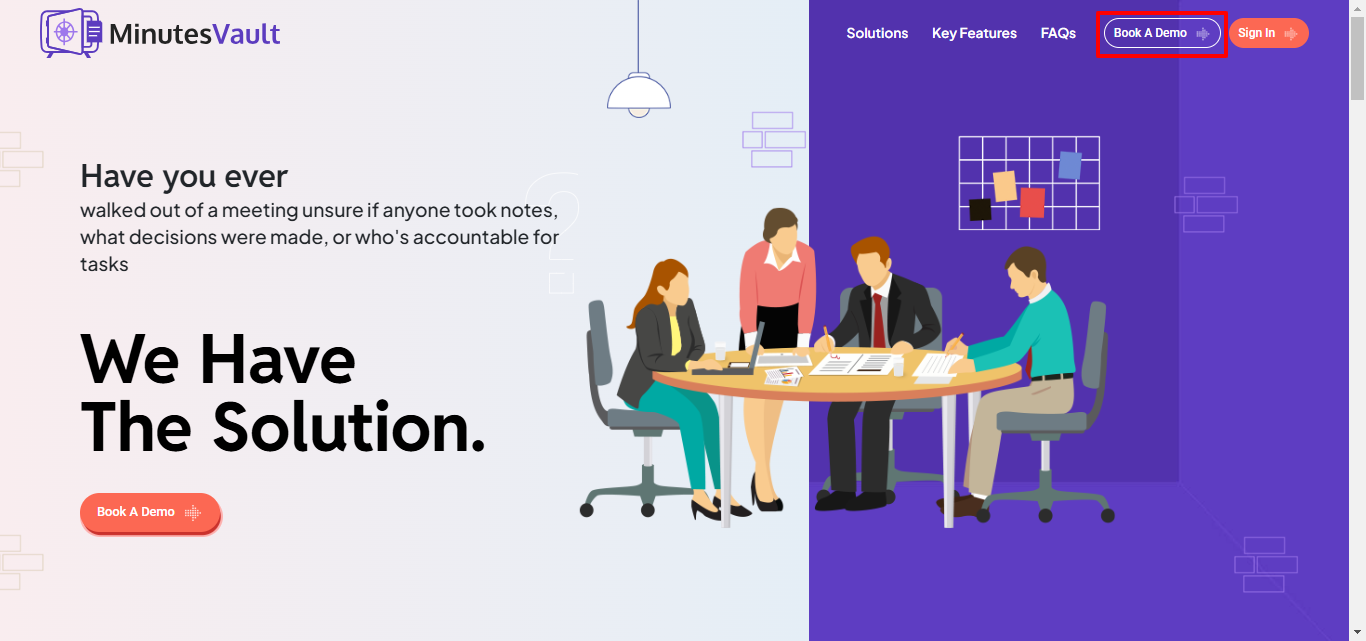
Visit MinutesVault and click on the Book A Demo button to explore how MinutesVault can transform your meeting management.
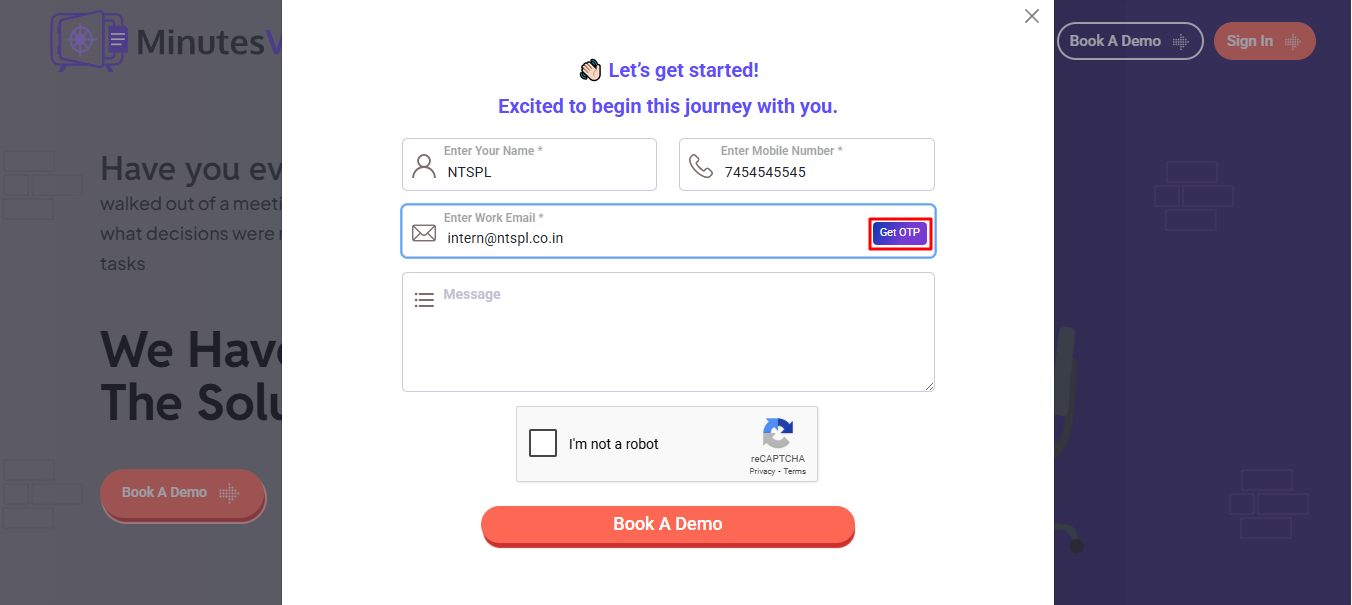
Enter your Name, Mobile number, and Email, then click on the Get OTP button to receive an OTP in your Email.
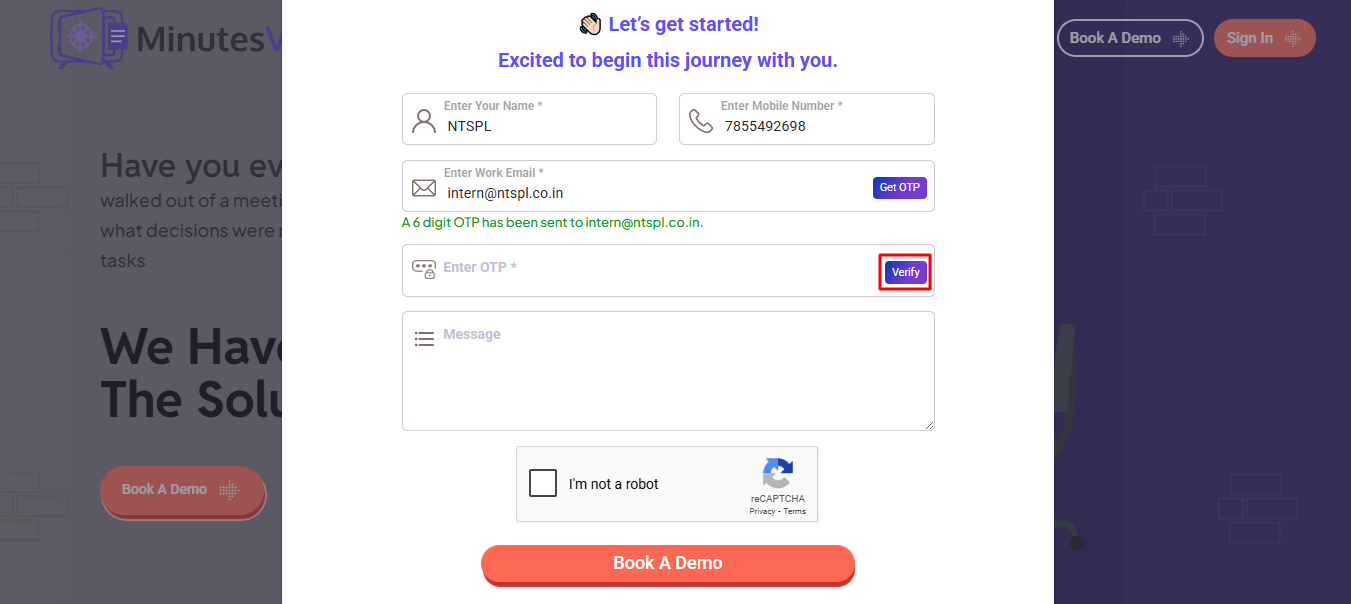
Enter the OTP sent to your email in the designated field and click the Verify button to complete the email verification.
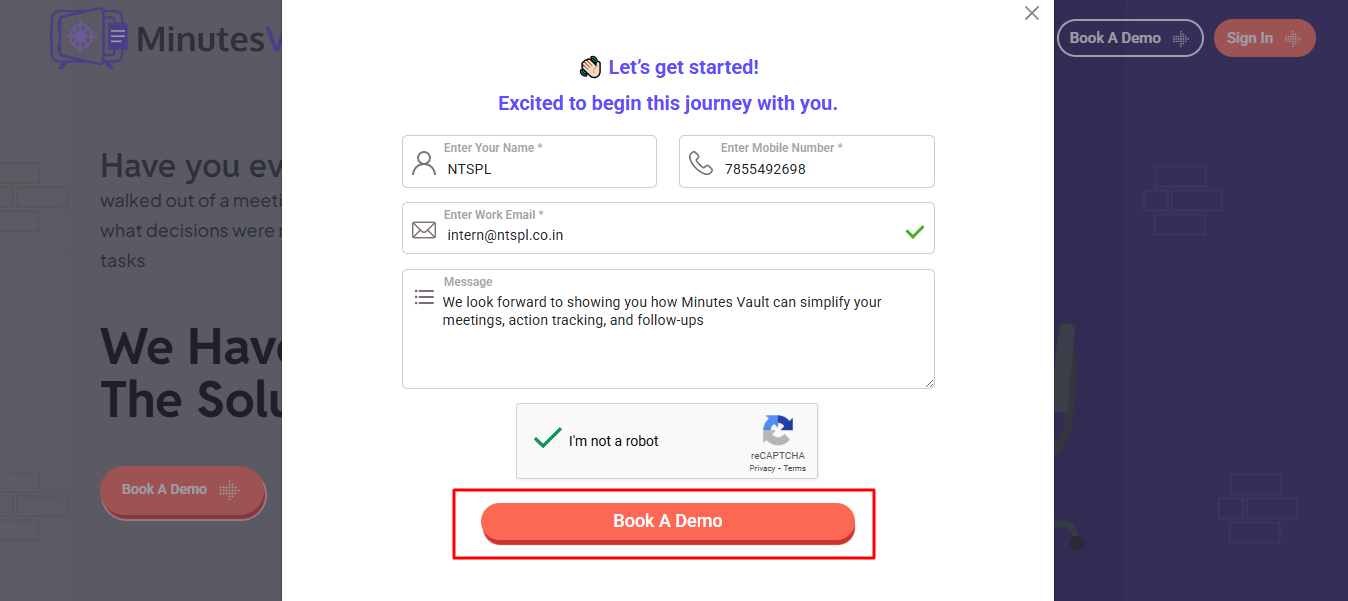
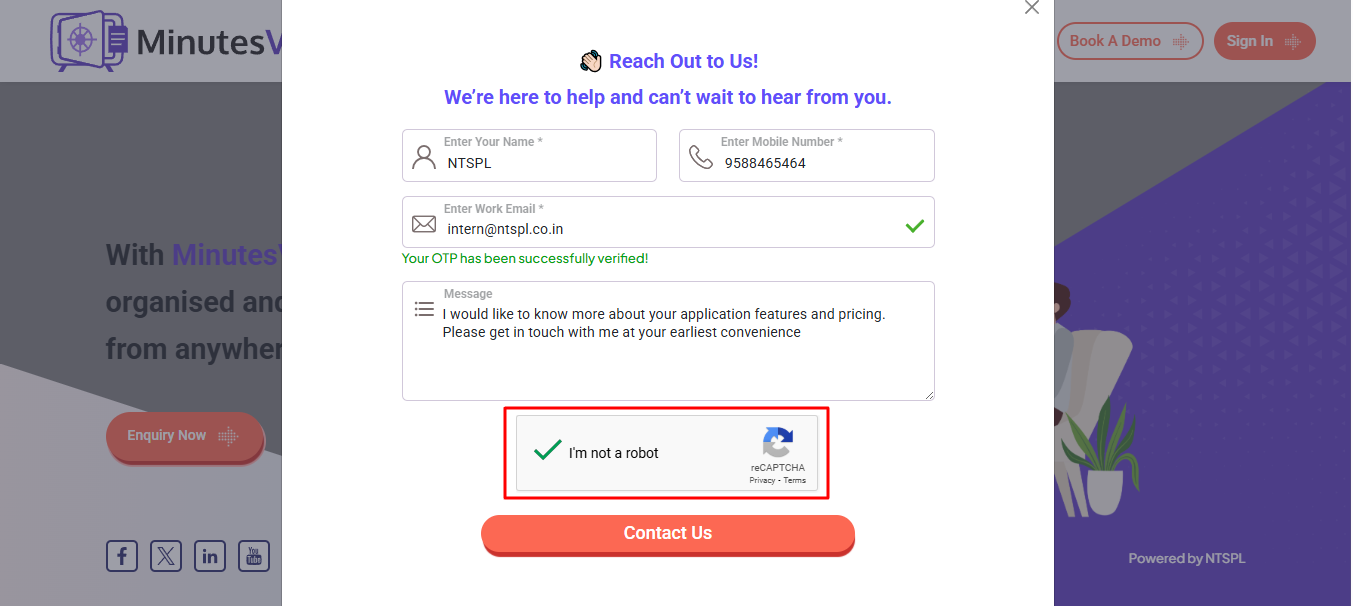
After verifying your email, solve the Captcha to confirm you are not a robot.
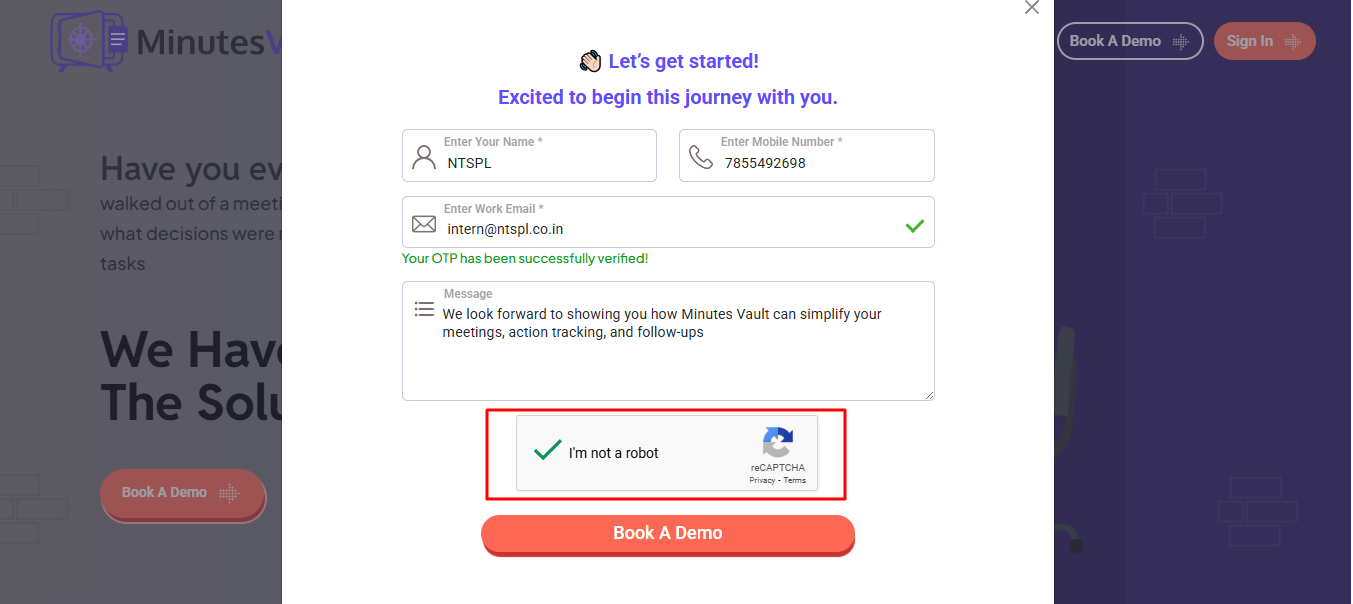
Once the Captcha is successfully verified, enter your message and click the Book A Demo button to complete the demo enquiry process.
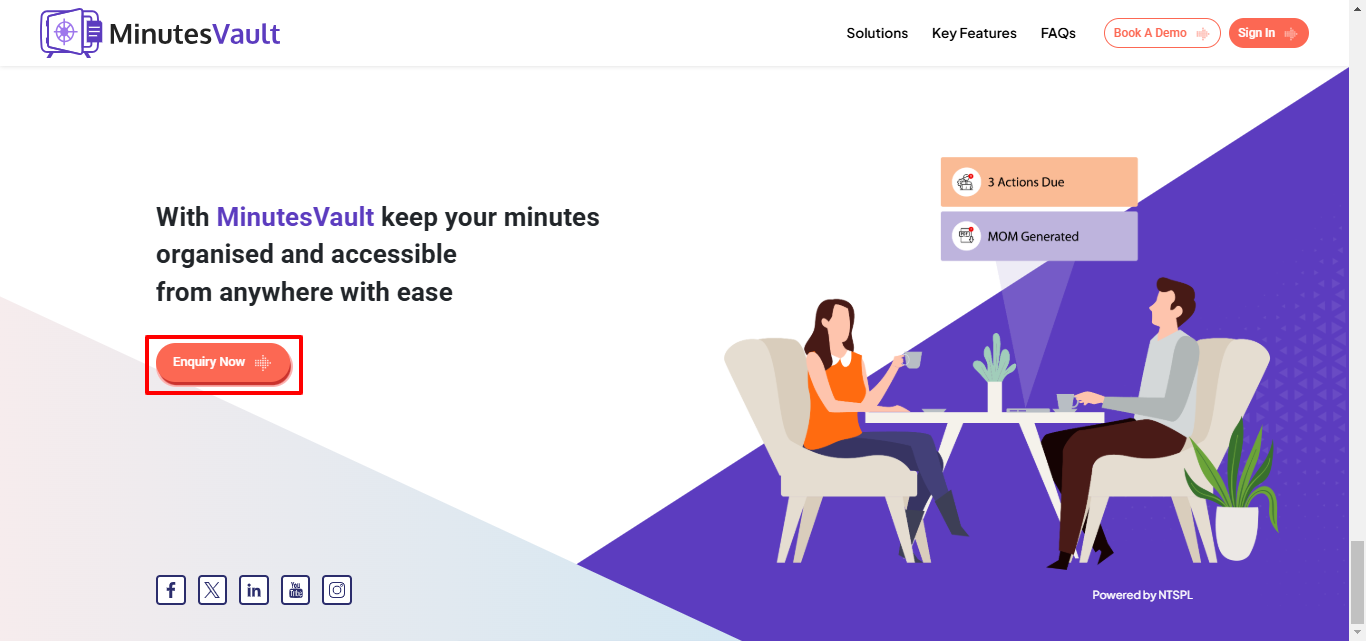
Scroll down to the bottom of the MinutesVault landing page and click the Enquiry Now button to get in touch with us.
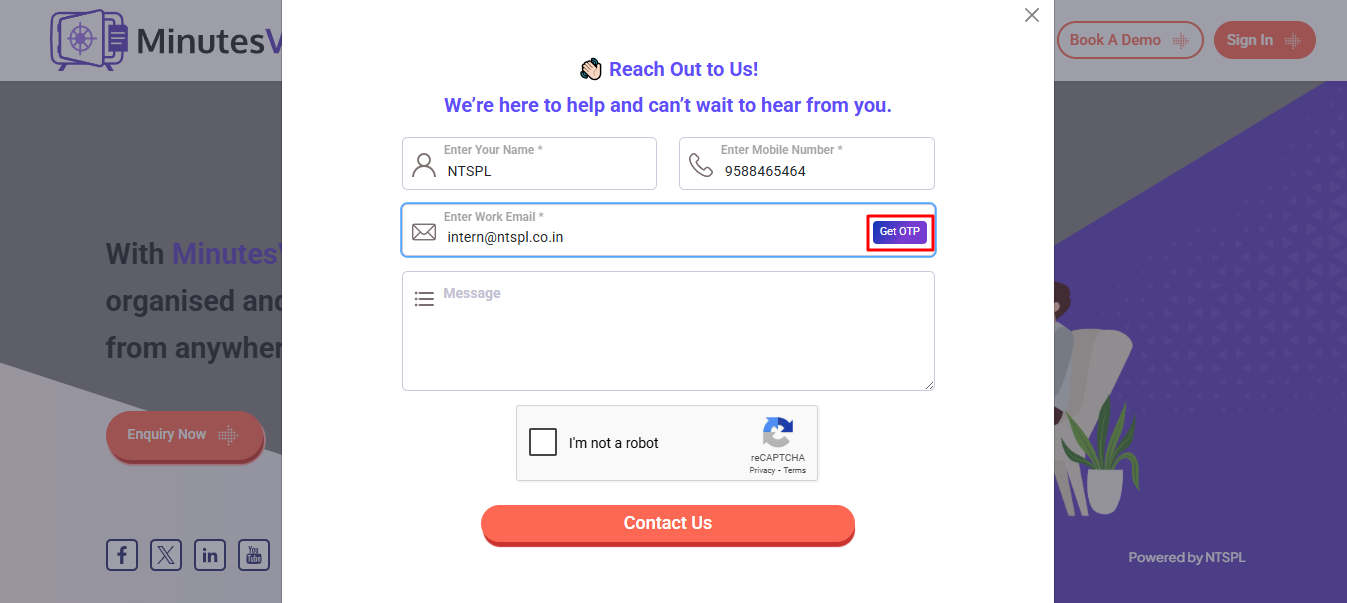
Enter your Name, Mobile Number and Email, then click on the Get OTP button to receive an OTP in your Email.
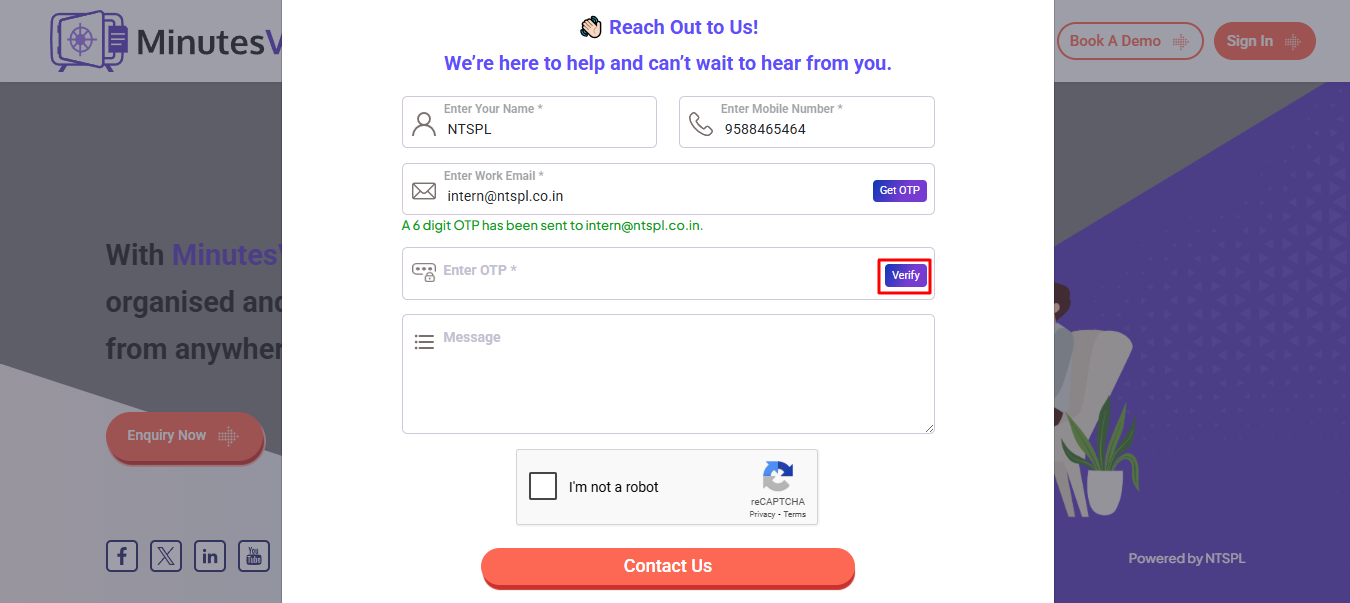
Enter the OTP sent to your email in the designated field and click the Verify button to complete the email verification.
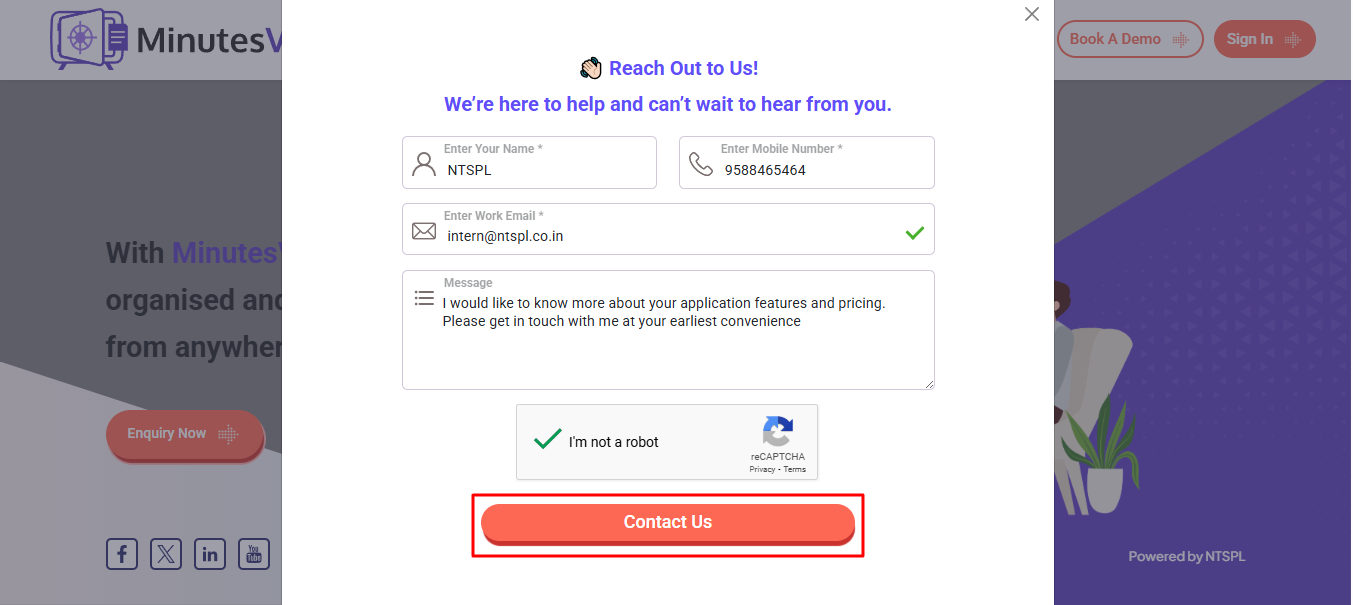
After verifying your email, solve the Captcha to confirm you are not a robot.
Once the Captcha is successfully verified, enter your message and click the Contact Us button to complete the enquiry process.
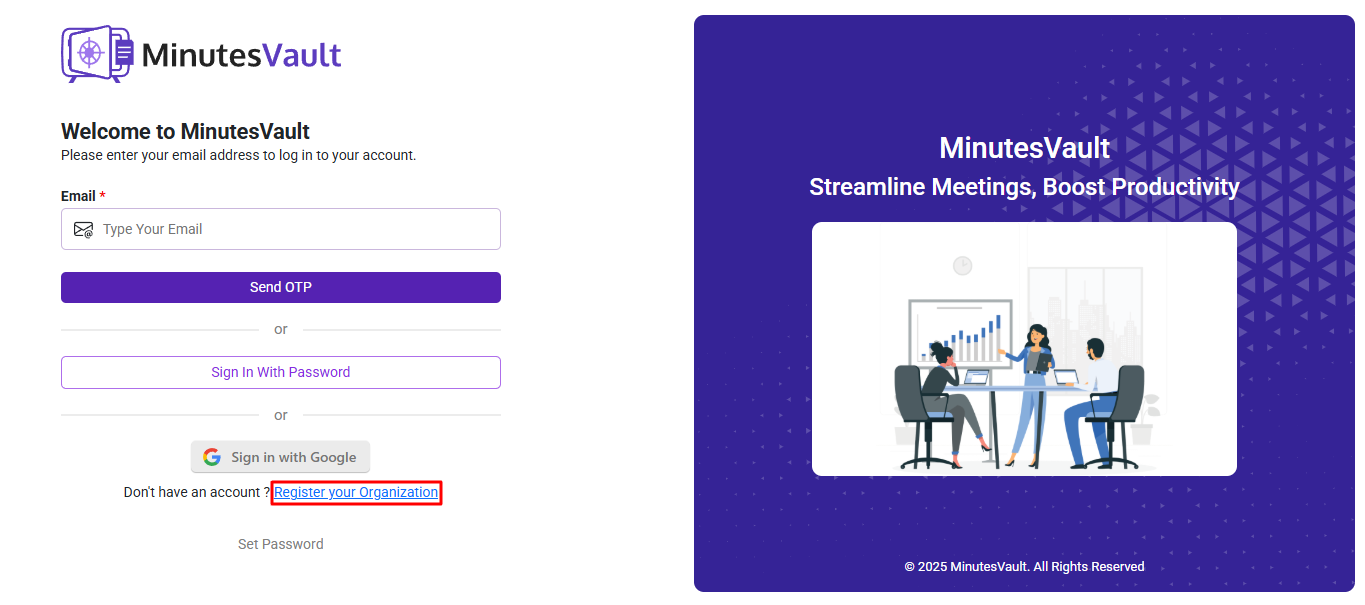
Visit the Sign In page of MinutesVault by clicking the link: Sign In Page URL
Click on Sign Up to Register your Organization.
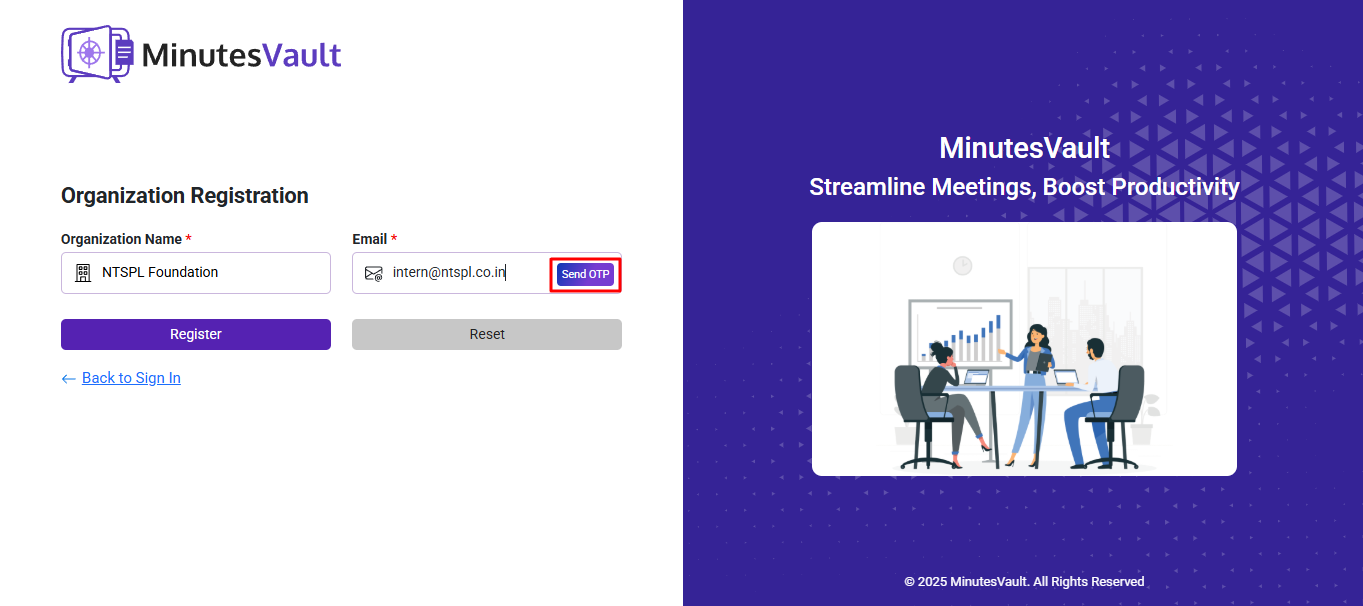
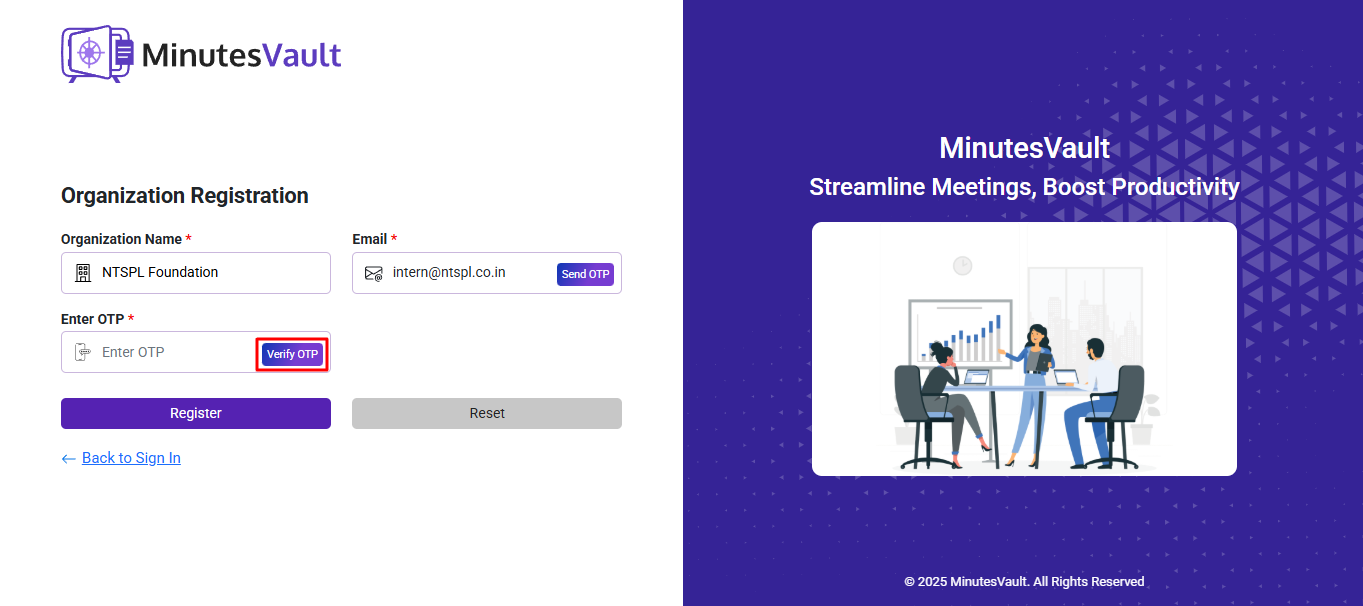
Enter your Organization Name and Email. After entering your email, click Send OTP to receive an OTP in your Email.
Enter the OTP sent to your email in the designated field and click on Verify OTP to verify your Email.
Enter your Organization Name, Email, Phone Number, and Contact Person Name. Contact Number and WhatsApp Number (if available) are optional. After that Click on Register to Register your Organization.

Your organization is now registered. You can proceed to Sign In.
Visit the Sign In page of MinutesVault by clicking the link: Sign In Page URL
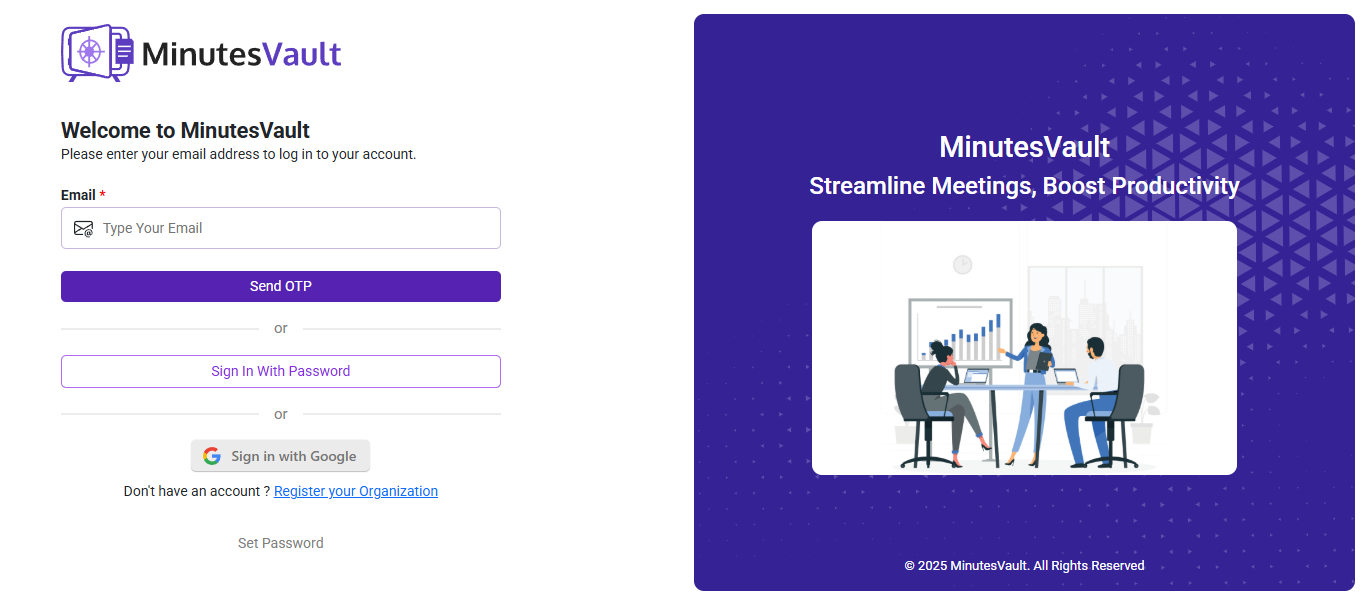
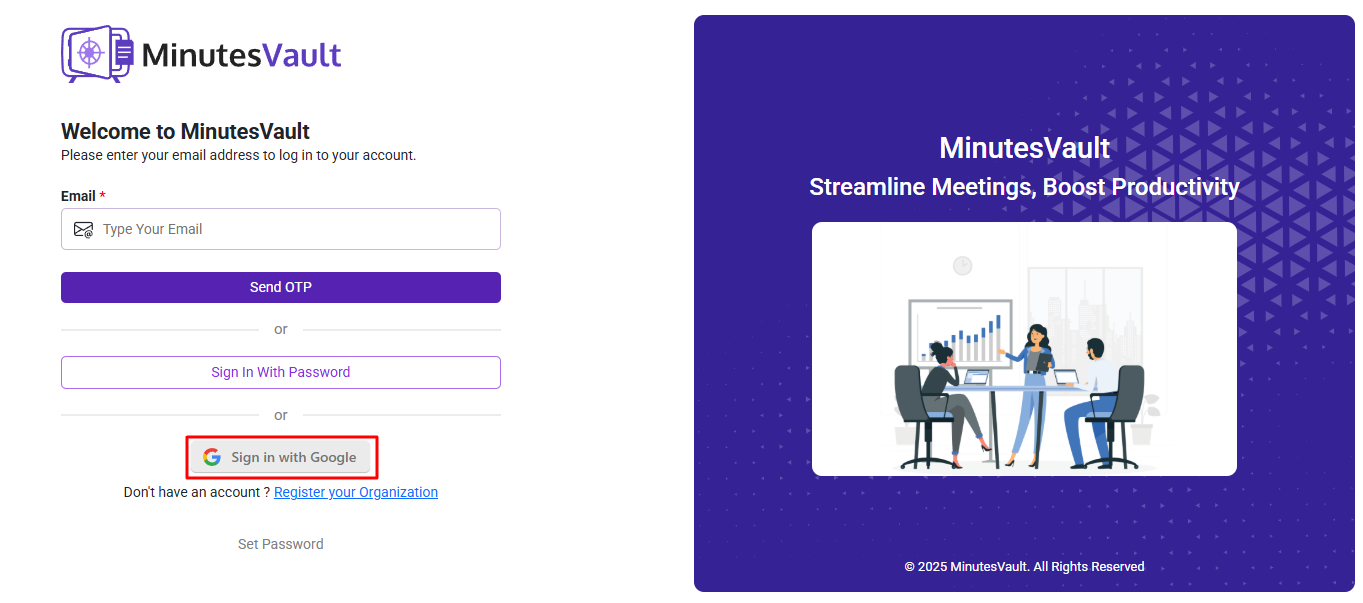
There are three options for signing in: Sign In by OTP, Sign In by Password, and Sign In with Google.
Enter your email address and click the Send OTP button. If you're a registered employee of the organization or have been invited to a scheduled meeting, an OTP will be sent to your email.
This method provides a hassle-free way to avoid remembering a password.
You will receive a 6-digit OTP via email. Enter the OTP in the designated field and click Verify OTP button. Upon successful verification, you will be redirected to the application dashboard.
To resend the OTP, click the Resend OTP button. You can request a maximum of 3 OTPs within a 15-minute period. If this limit is exceeded, you must wait 15 minutes before trying again.

Among the three options on the Sign-In page, click on Sign In With Password. It will redirect you to the password Sign-In page. Enter your email address and password, then click the Sign In button.
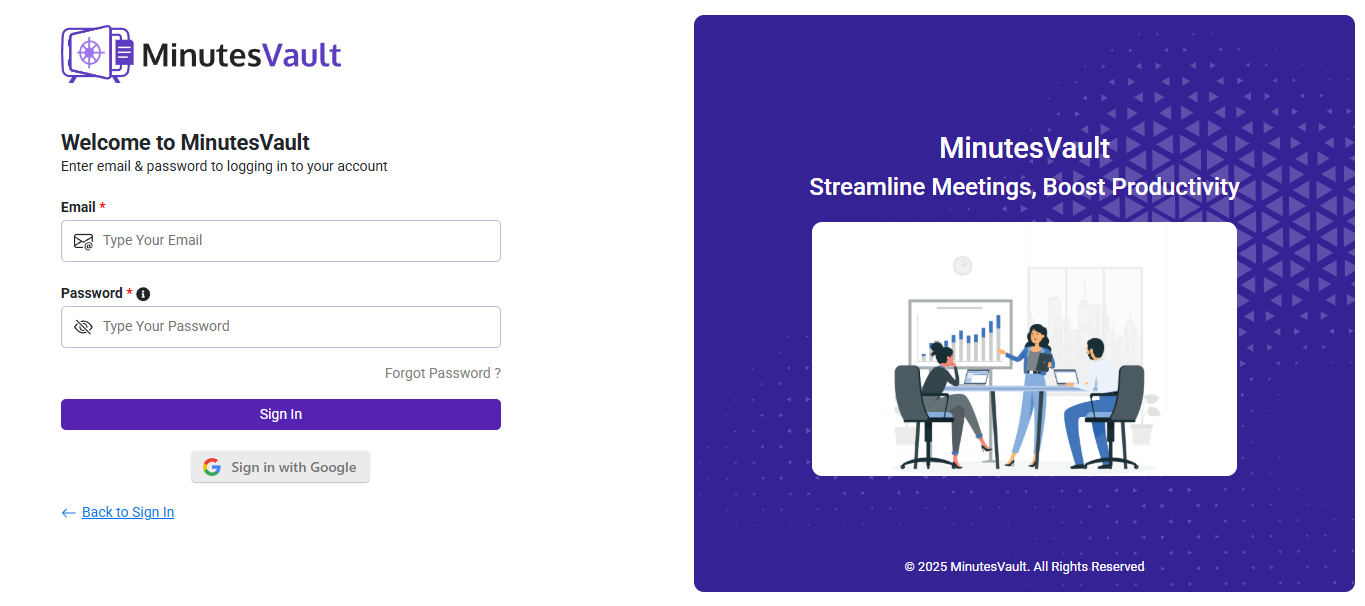
If you have already set a password, this option allows for quick login. However, you must have set the password at least once to use this feature.
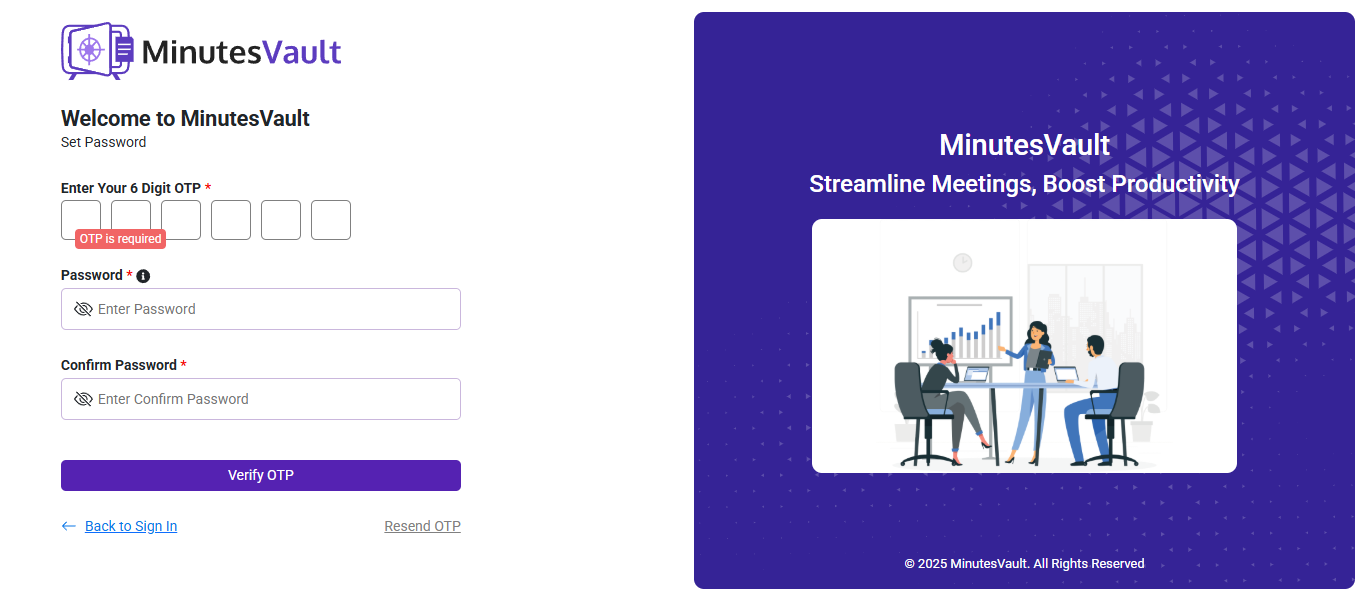
To set a password, enter your email and click on Set Password on the Sign-In page.

It will redirect you to the Set Password page where you can create a new password.
If you forget your password, enter your email address and click the Forgot Password button.
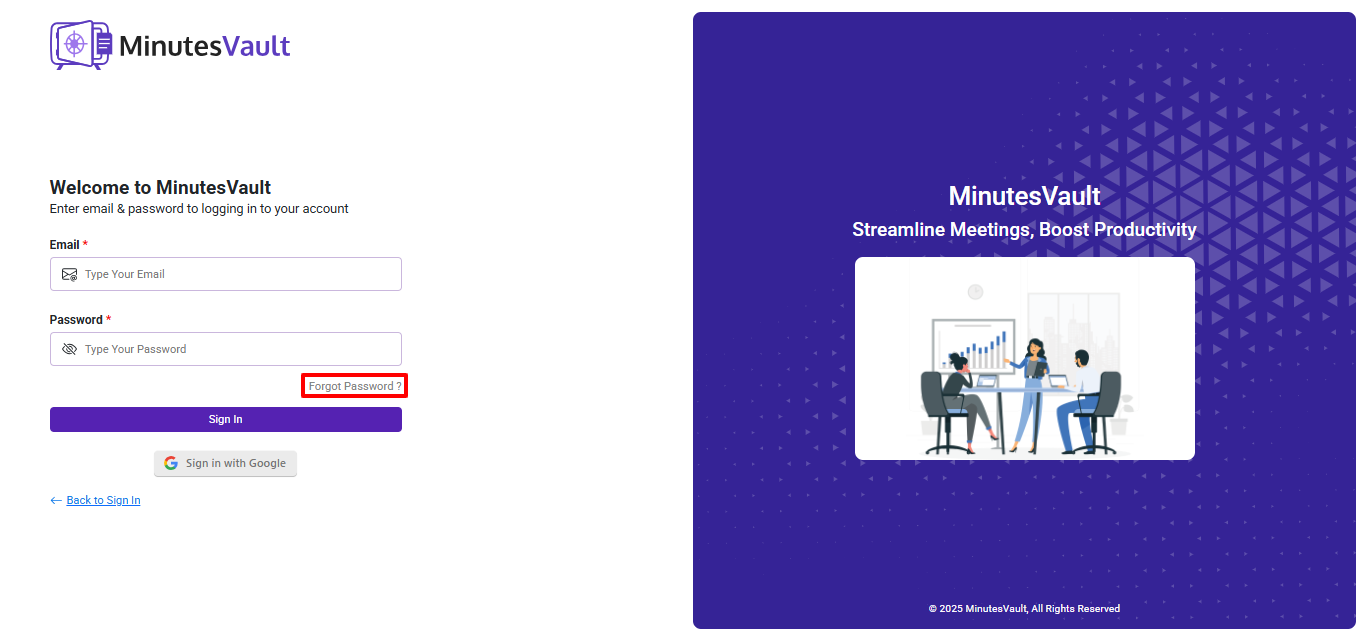
You will receive a 6-digit OTP via email. Enter the OTP in the designated field, then input your password in both the Password and Confirm Password fields, and click the Verify OTP button. Once verified, you will be redirected to the Sign In page.
Click the Sign in with Google button and choose an account to continue with MinutesVault.
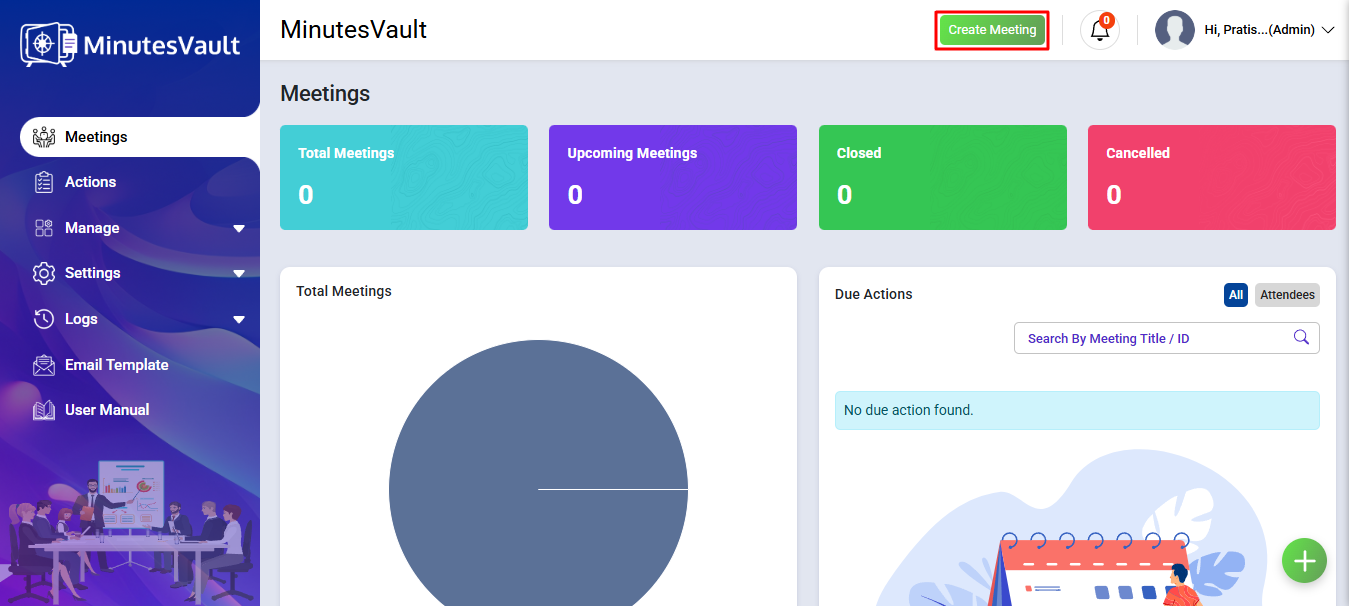
Sign In to the application using any of the method. It will redirected to dashboard page. Click on Create Meeting to create a meeting.
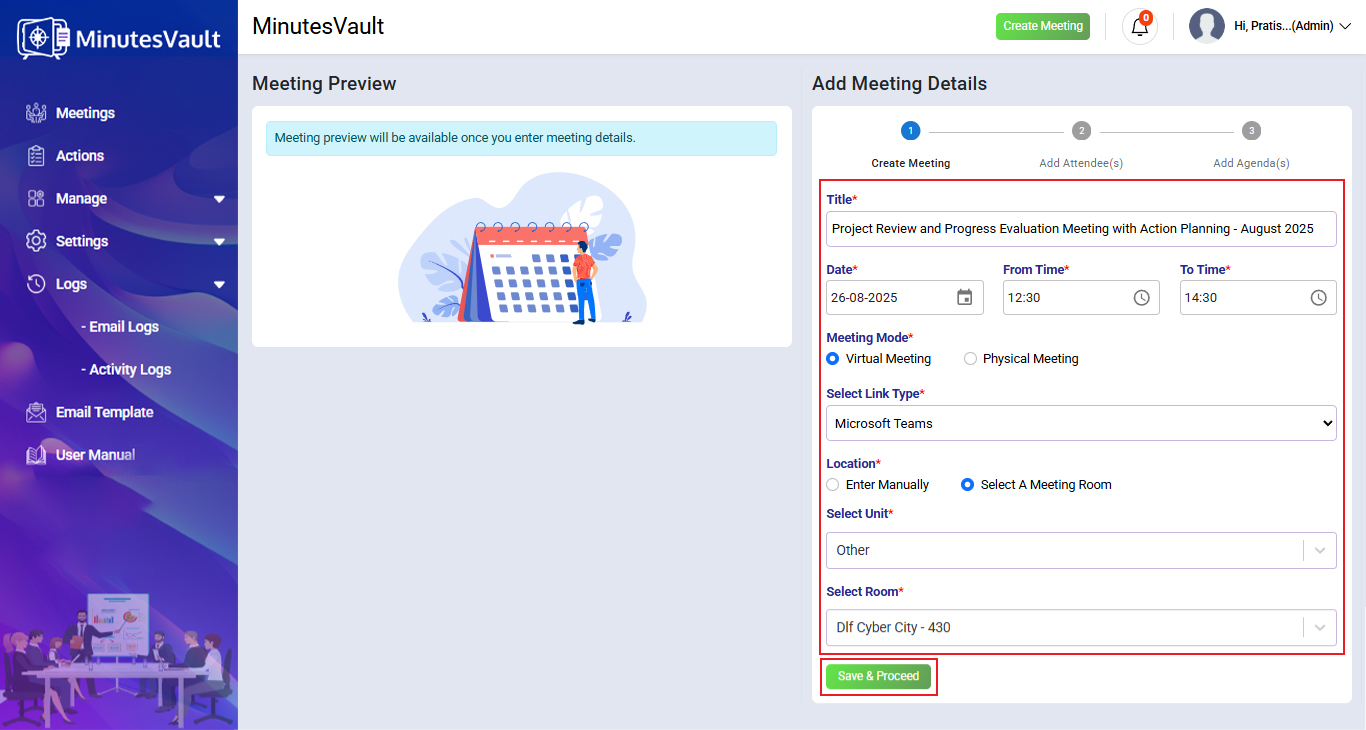
Add meeting details and click on Save & Proceed.
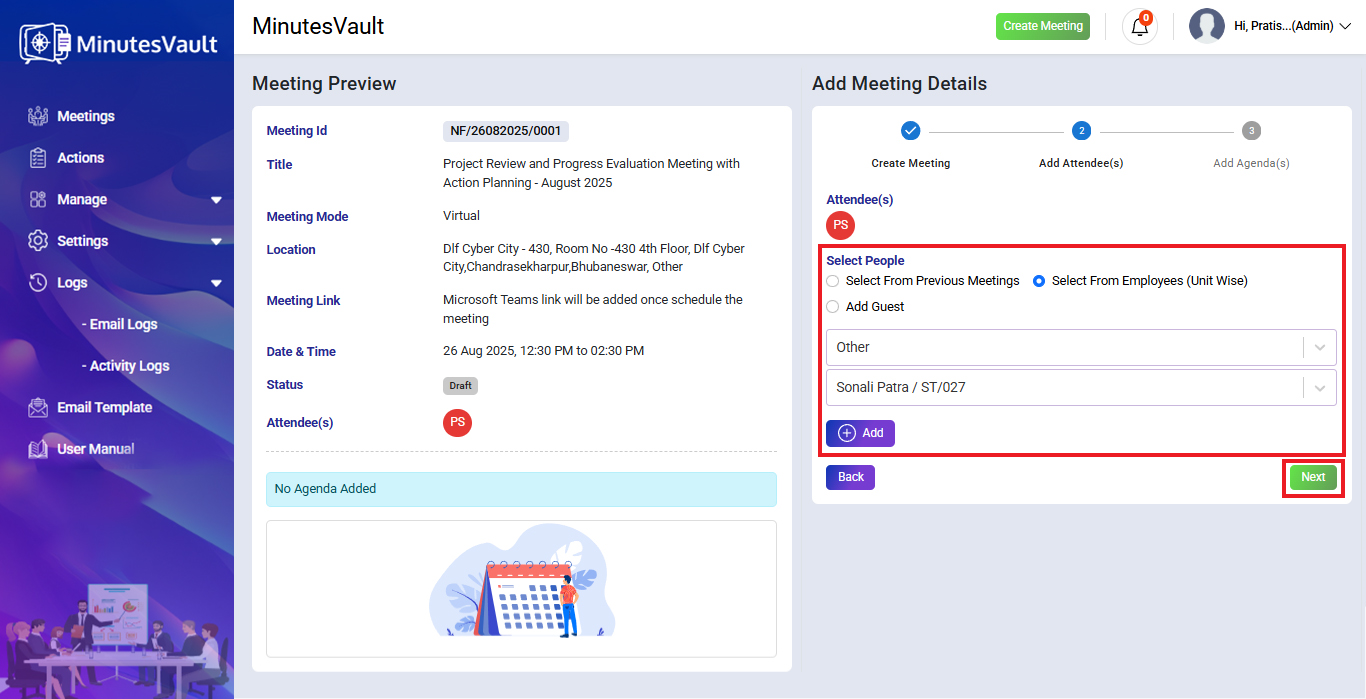
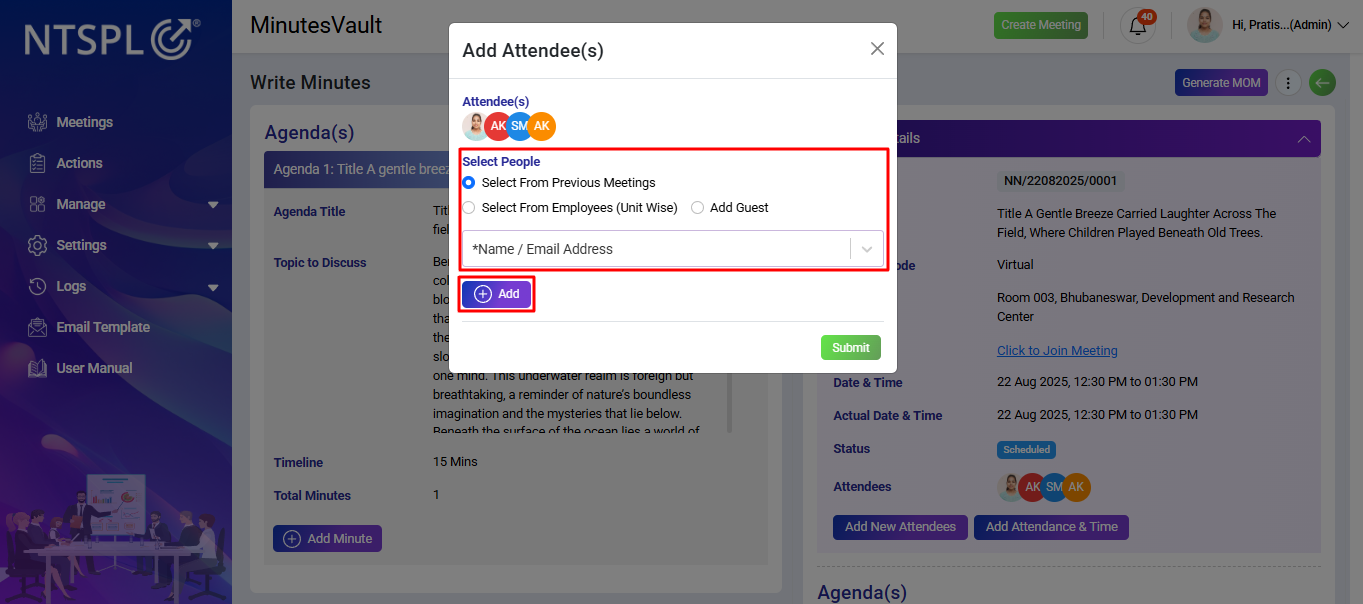
Add attendees for the meeting by selecting people from Select from Previous Meetings or Select from Employees, then click Save & Proceed.
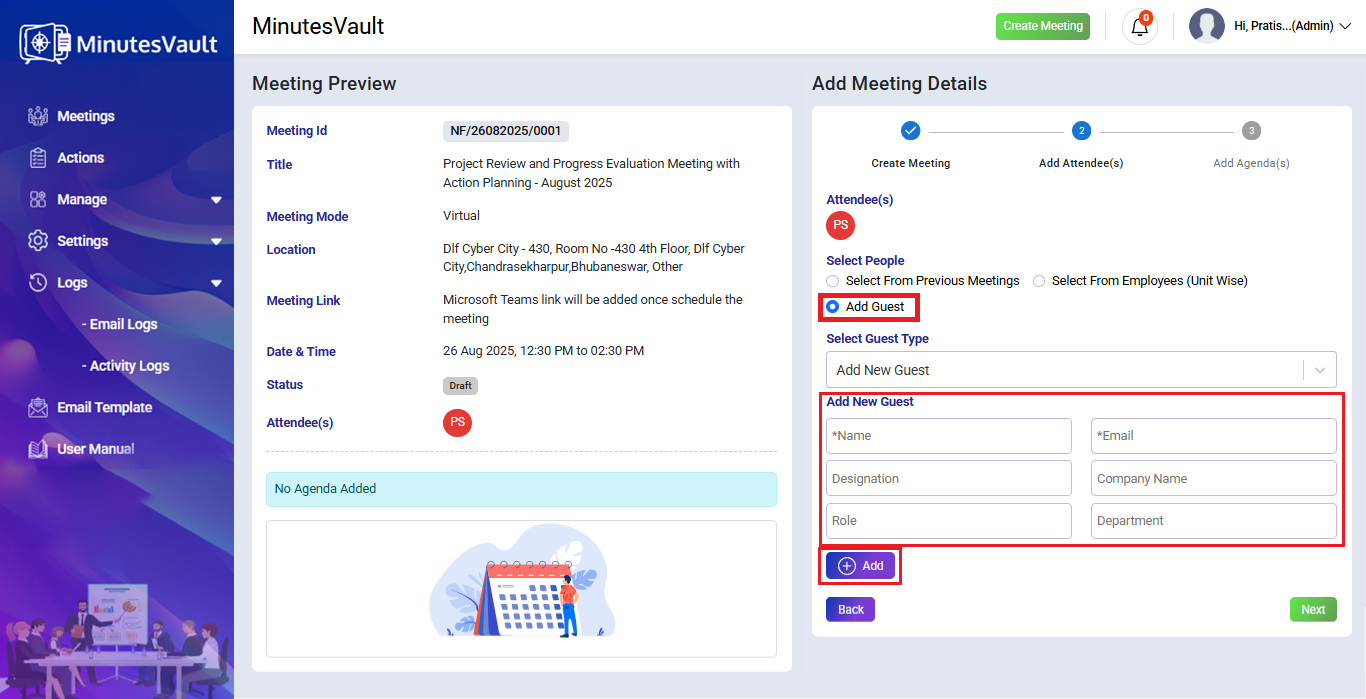
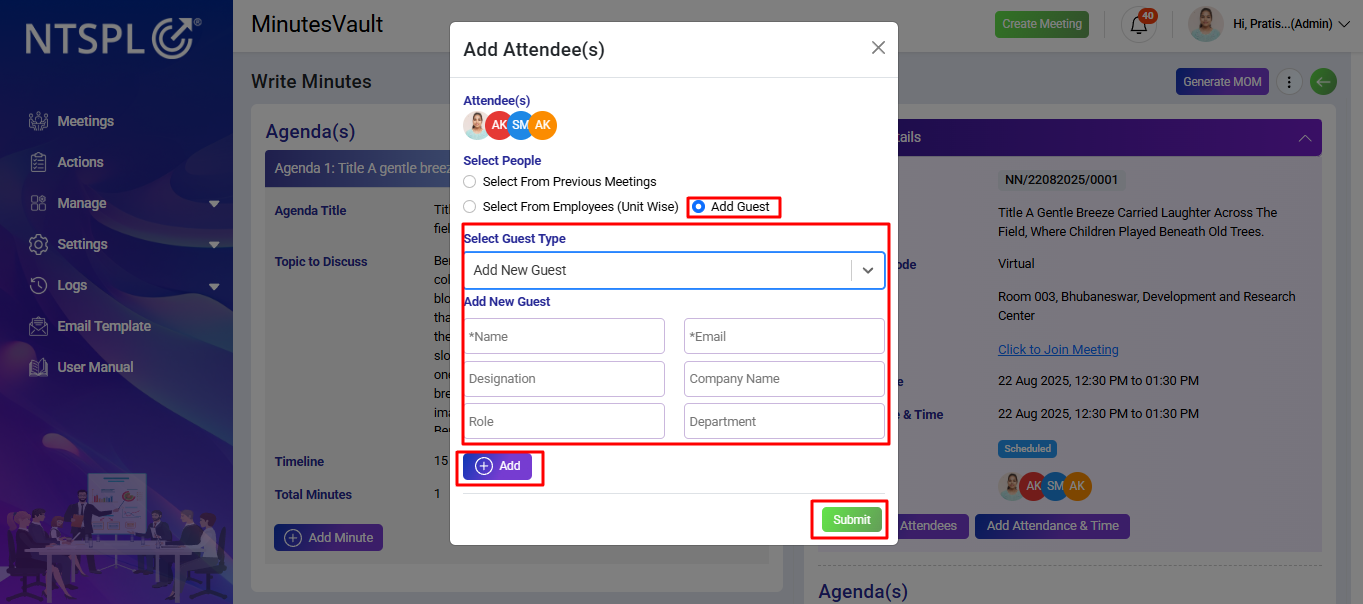
You can also add attendees to the meeting by inviting a new guest.
Fill in the details (Guest Name, Email, Designation, Department, Role and Company Name), then click Submit. You can also select a guest from the existing guest list instead of adding a new one.
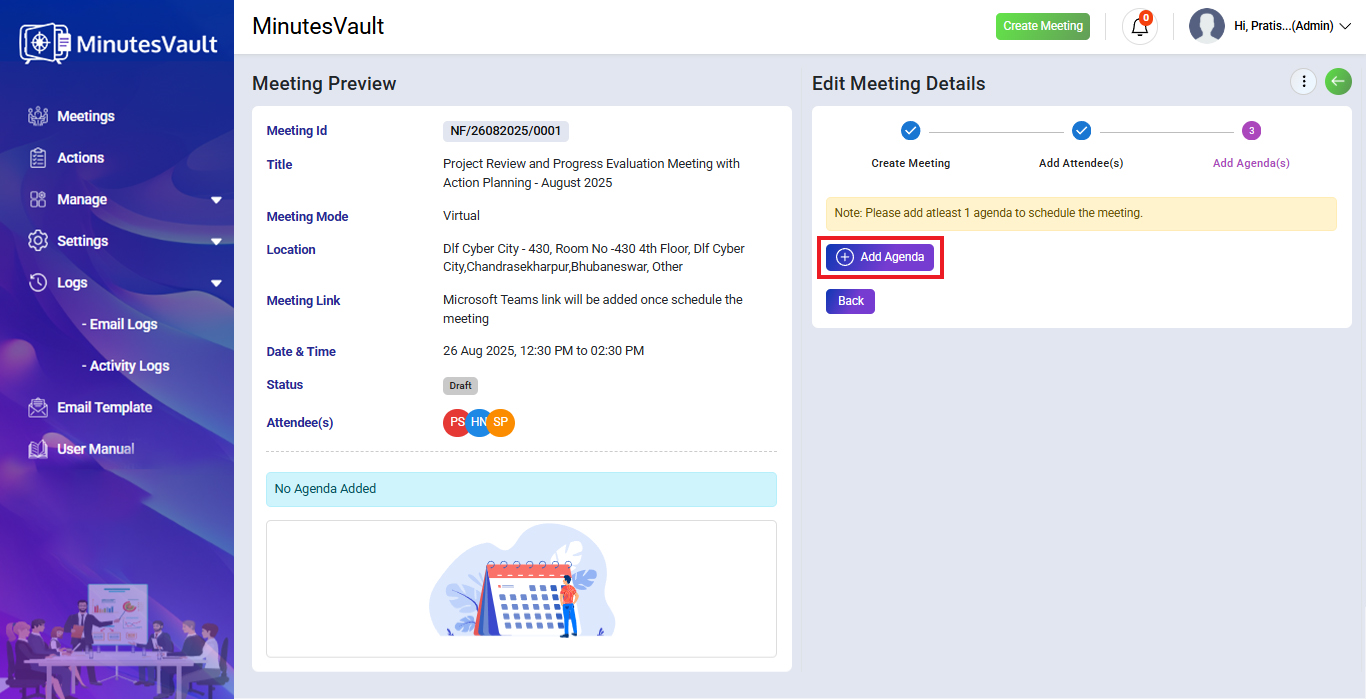
Click on Add Agenda to add Agendas for meeting.
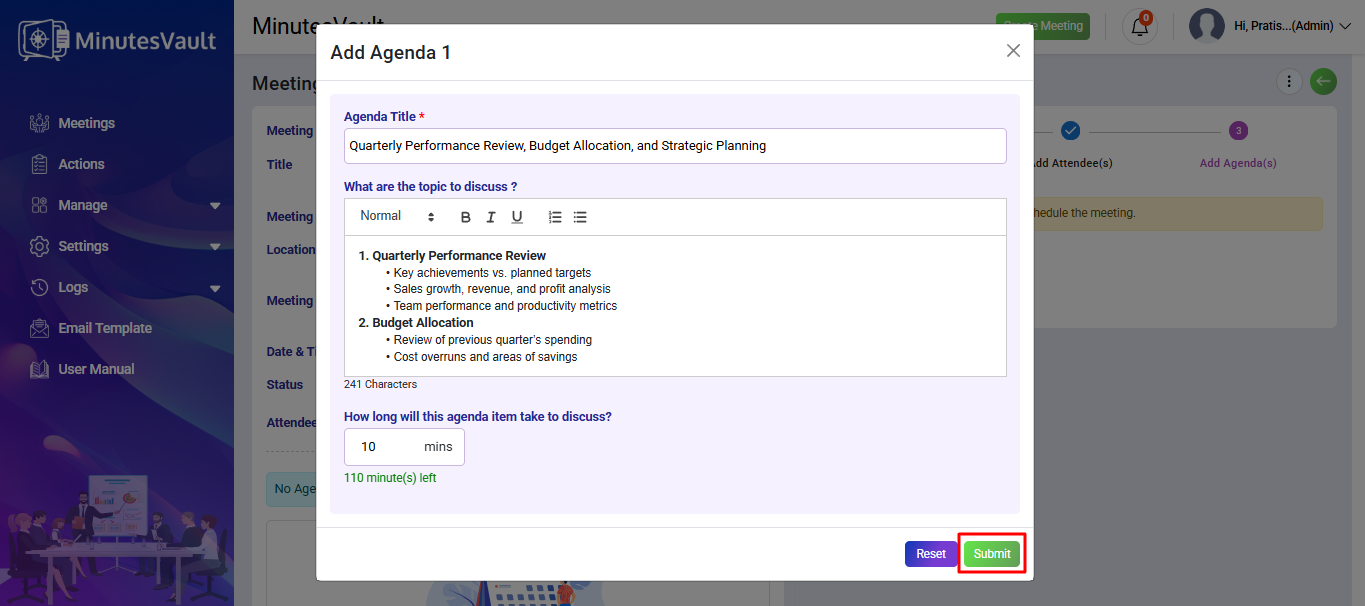
Fill in the agenda title and description, and click Submit.
Note: If you add an agenda time, it must be within the scheduled meeting duration.
You can also add multiple agenda items for the same meeting.
Click on Save & Notify to complete the meeting creation process.
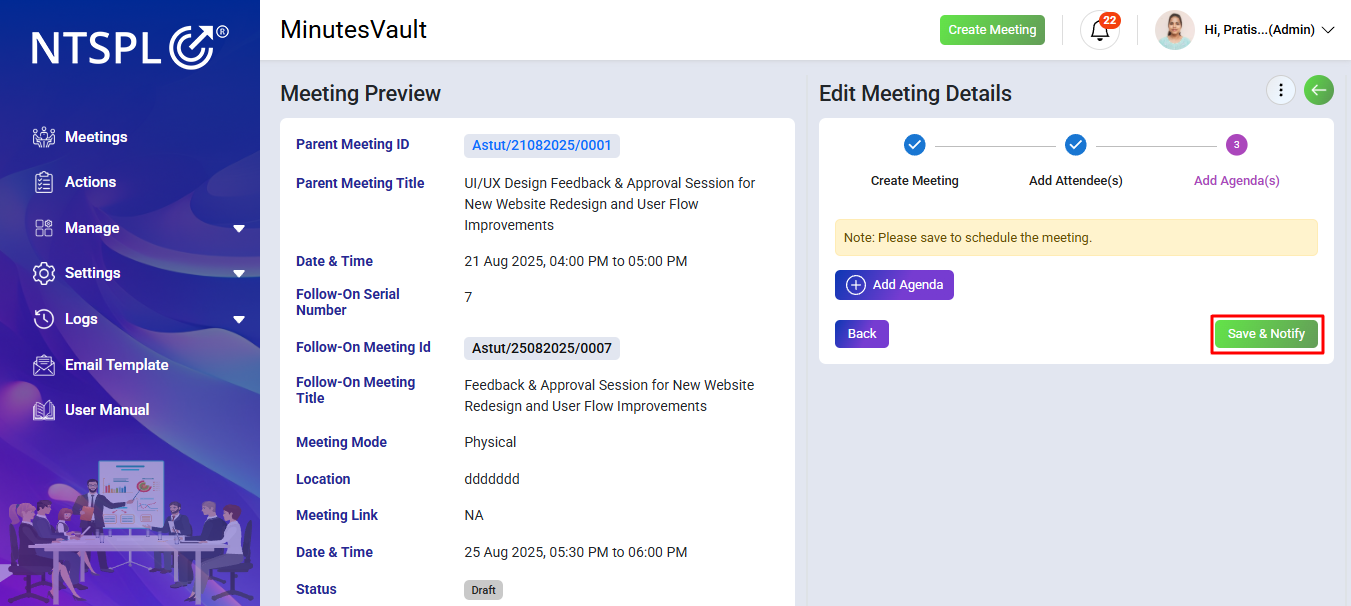
The meeting is now created, and a notification email will be sent to all attendees.
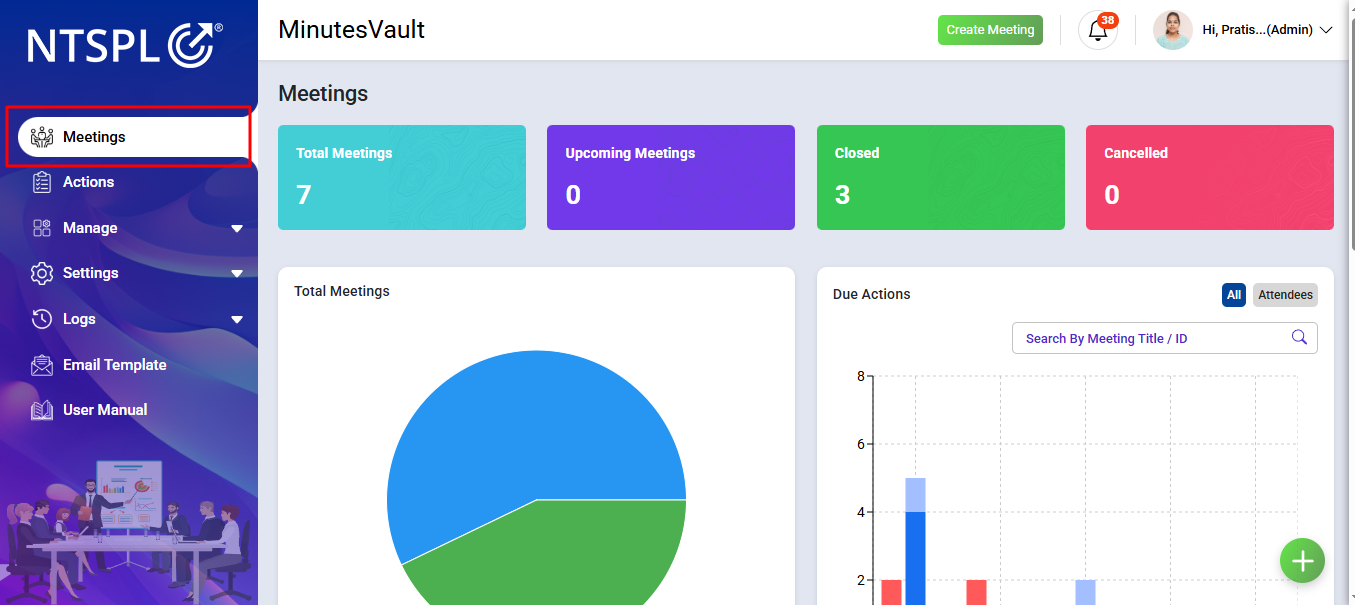
Click on Meetings menu.
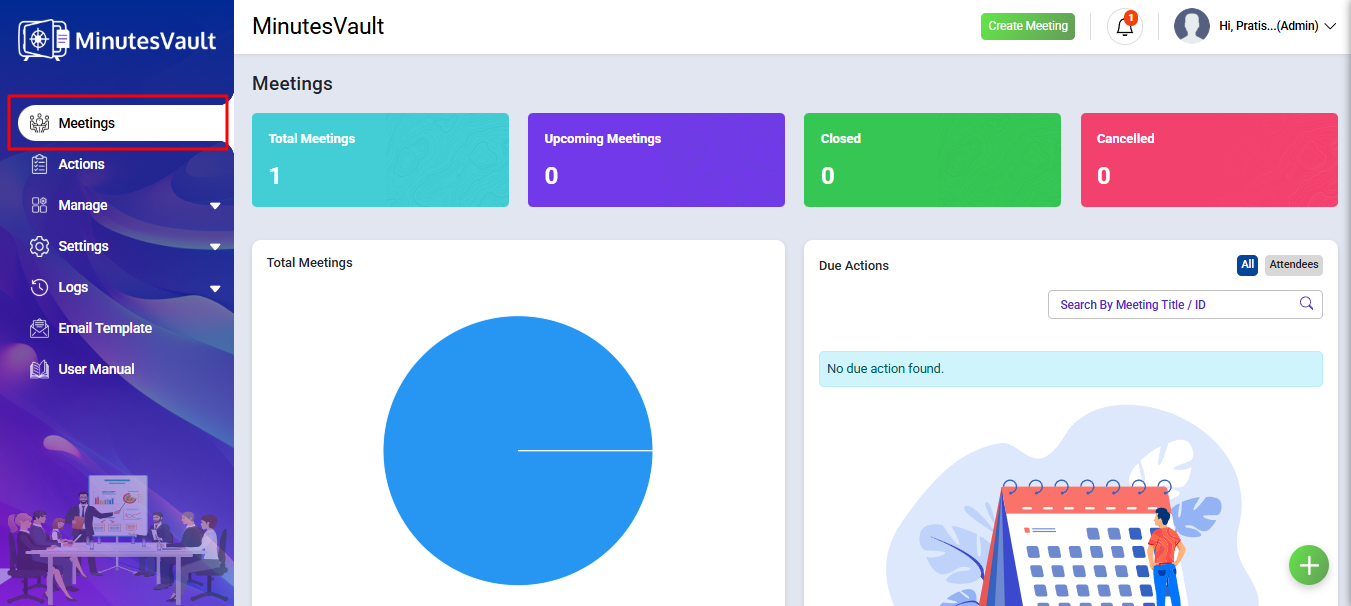
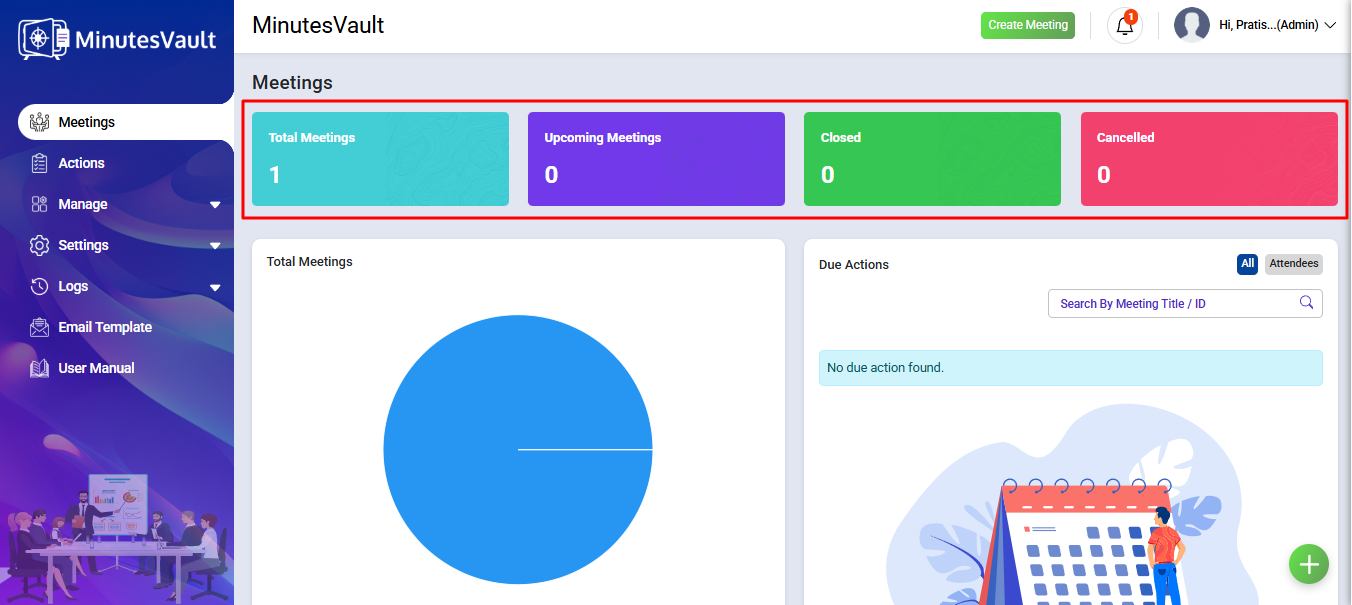
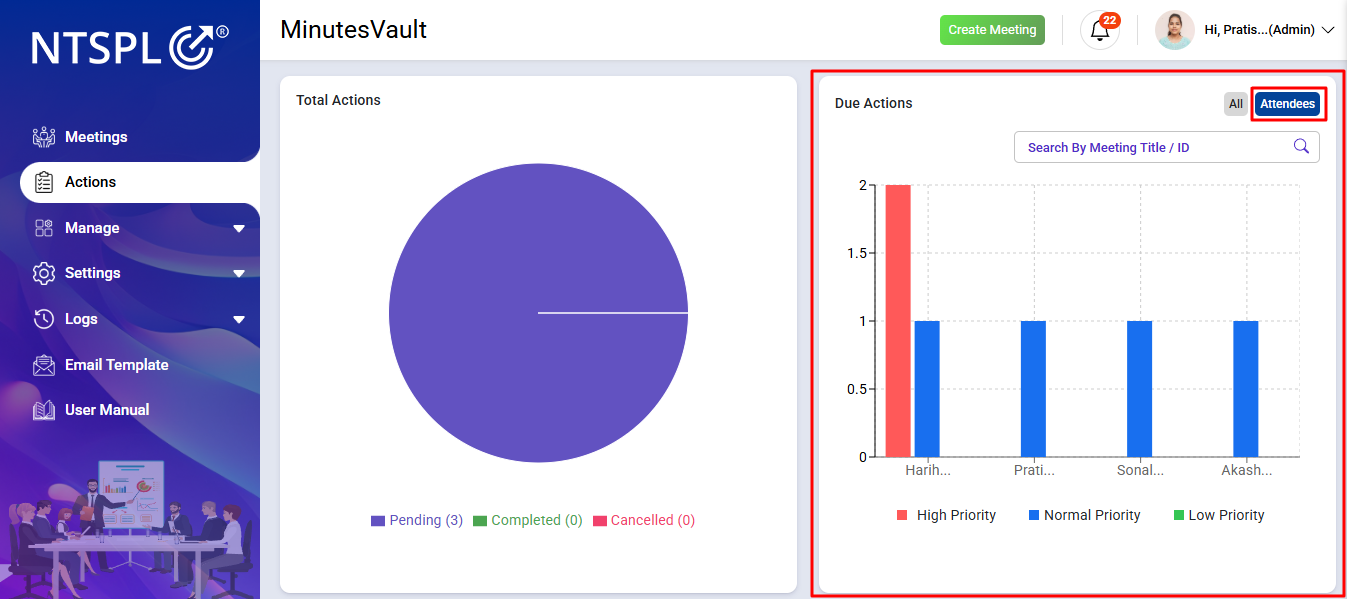
You can see all the meeting status statistics here.
You can see the total meeting status pie chart here.
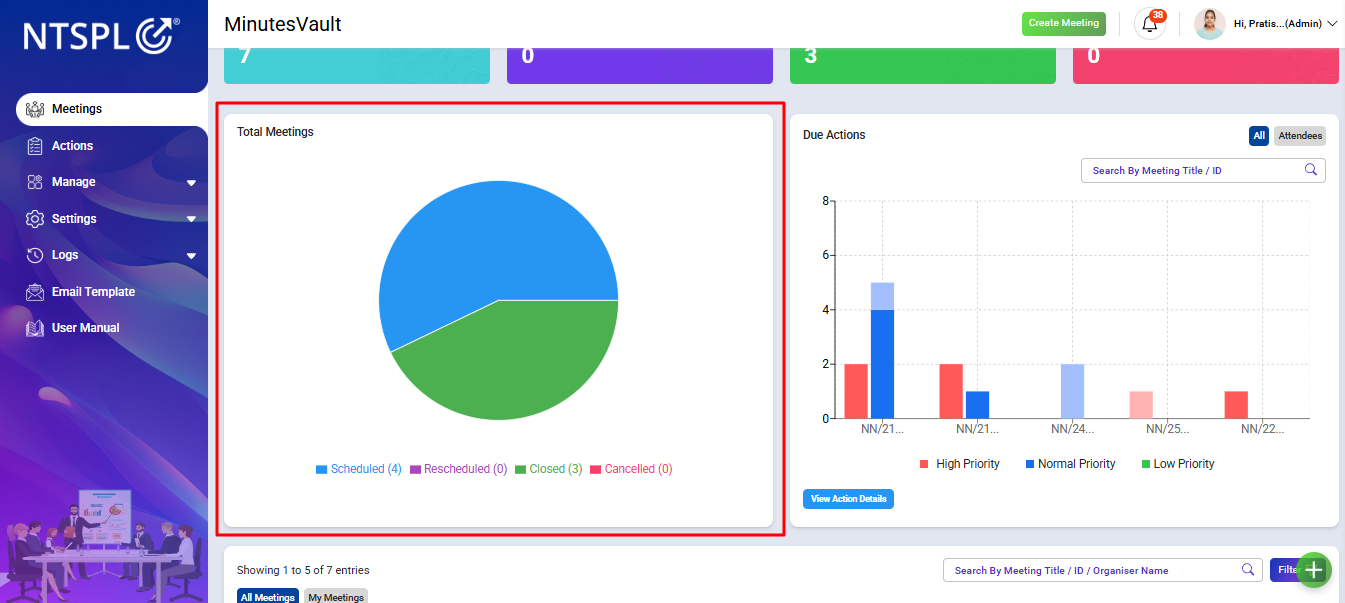
You can view the entire Due Actions Bar Chart.

You can also view the Due Actions Bar Chart for attendees by clicking on Attendees.
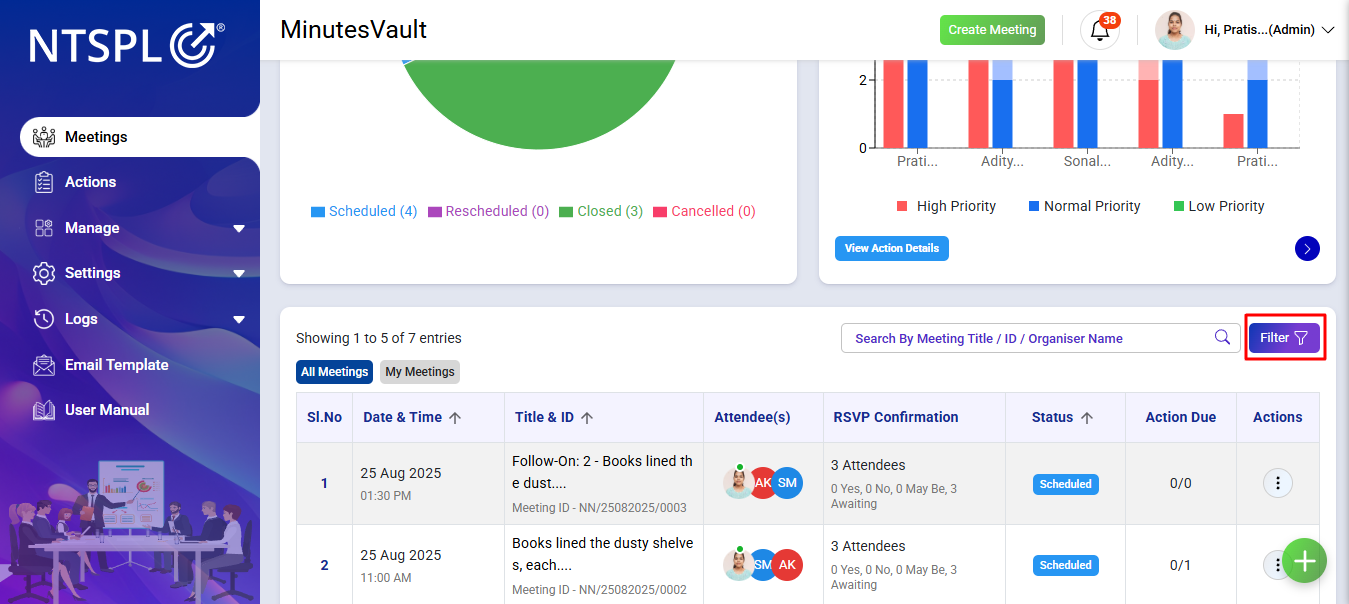
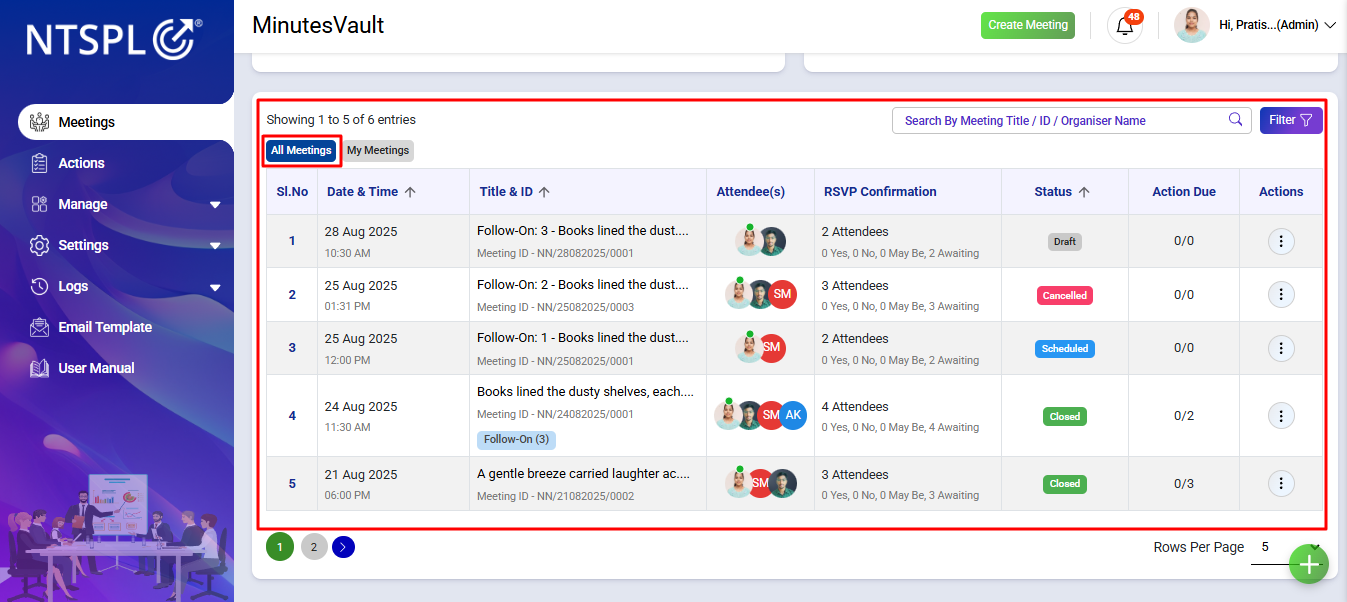
You can search all your meetings here by typing Meeting Title/ID/Organizer Name.

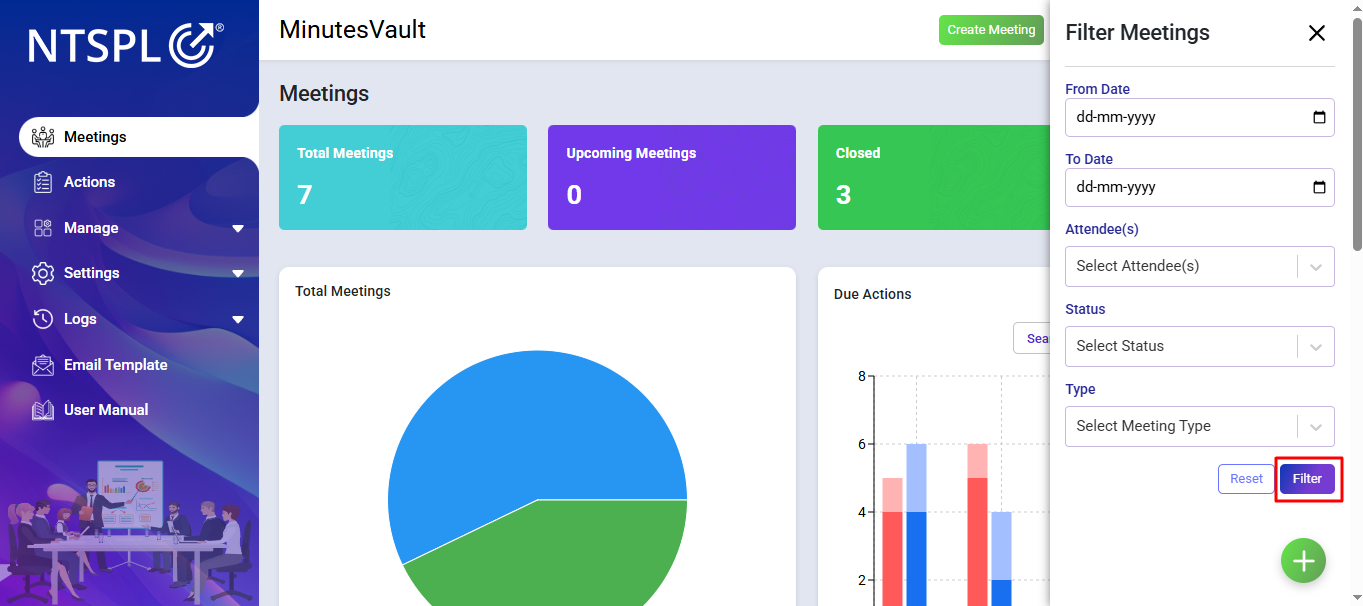
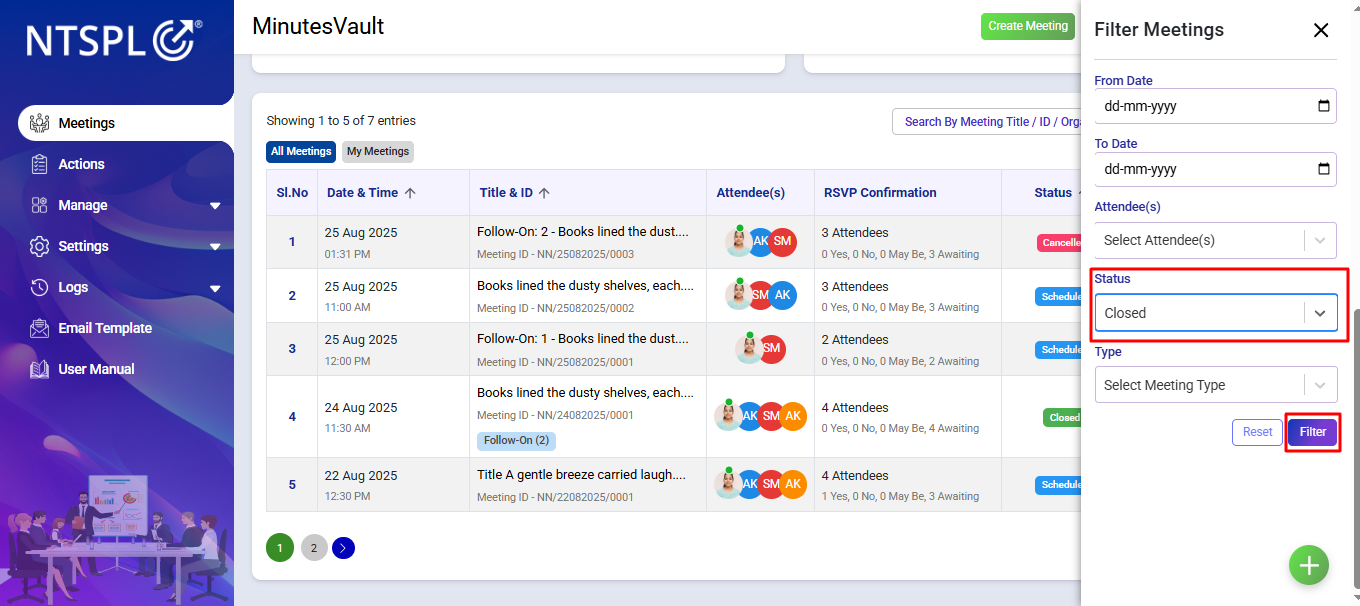
You can filter your meetings by clicking on the Filter button.
Select Meeting Status/Attendees/From Date - To Date and click on Filter to view filtered meetings.
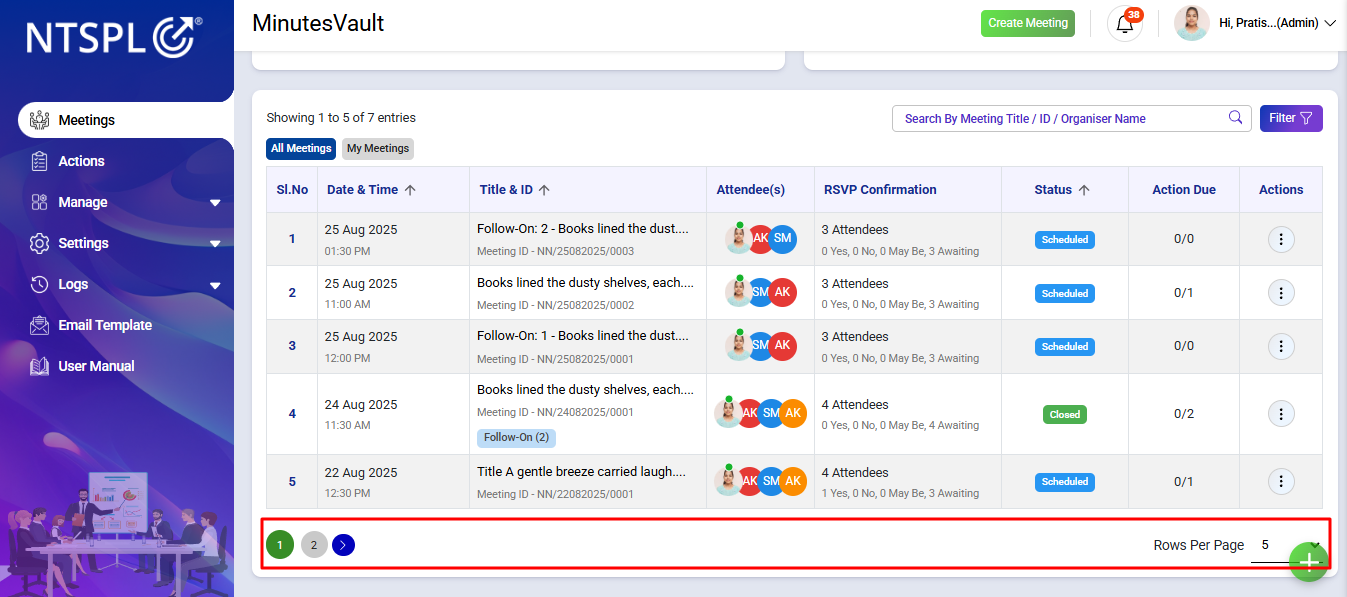
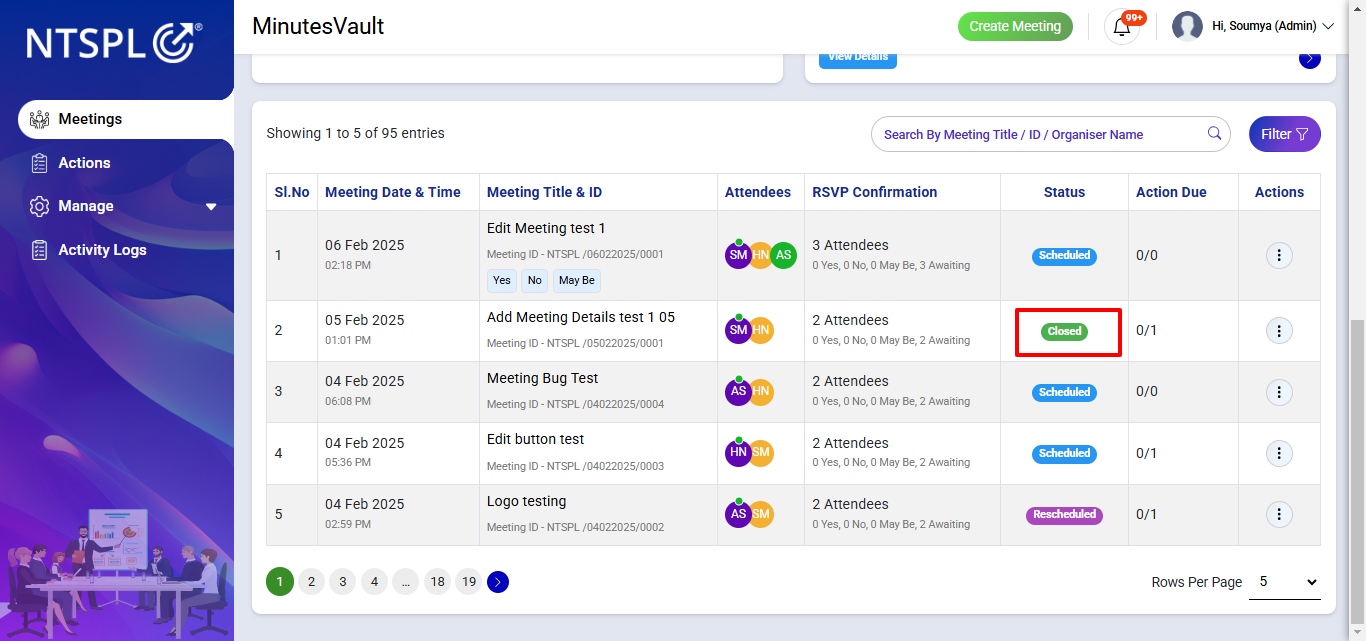
Here you can see the meeting list according to your choice and move to the desired page by clicking on the page number using pagination.
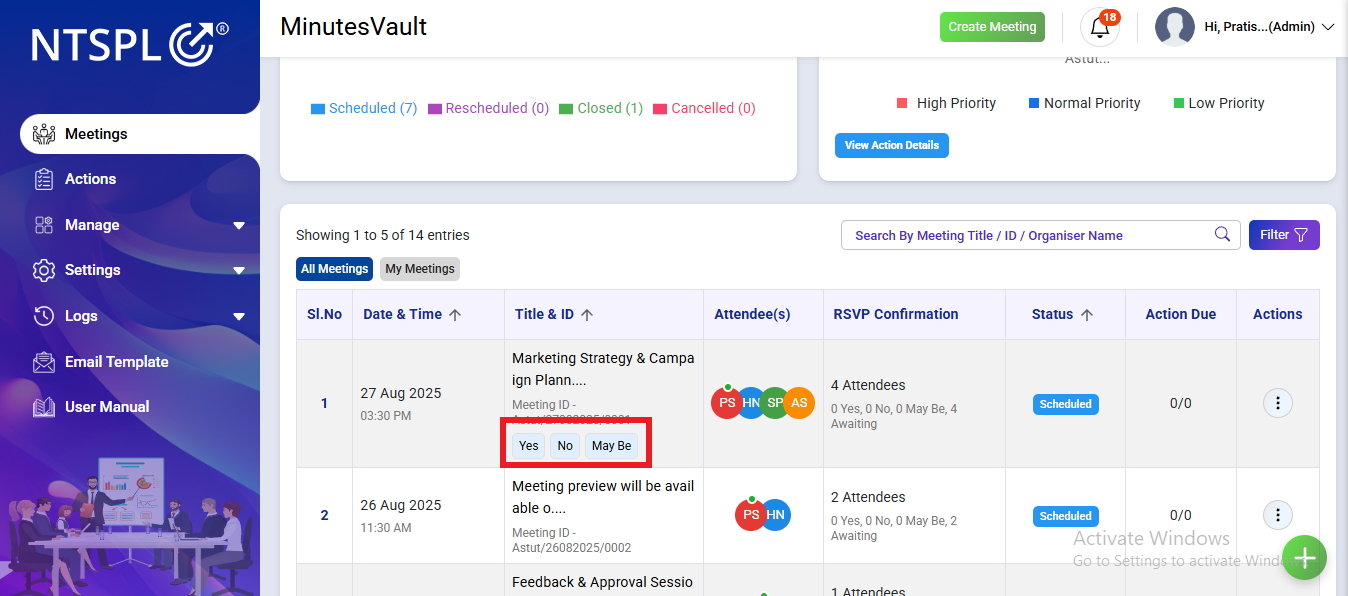
Open the meetings from the Dashboard.
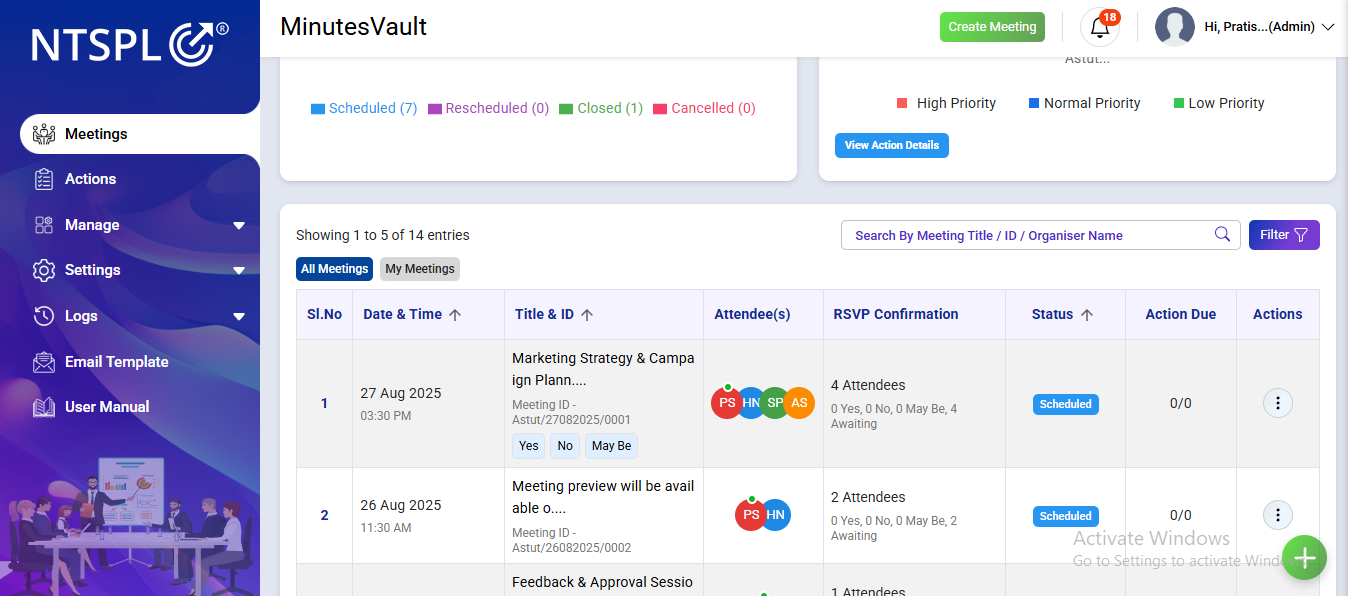
Click on the response for the RSVP under the Meeting Title & ID.
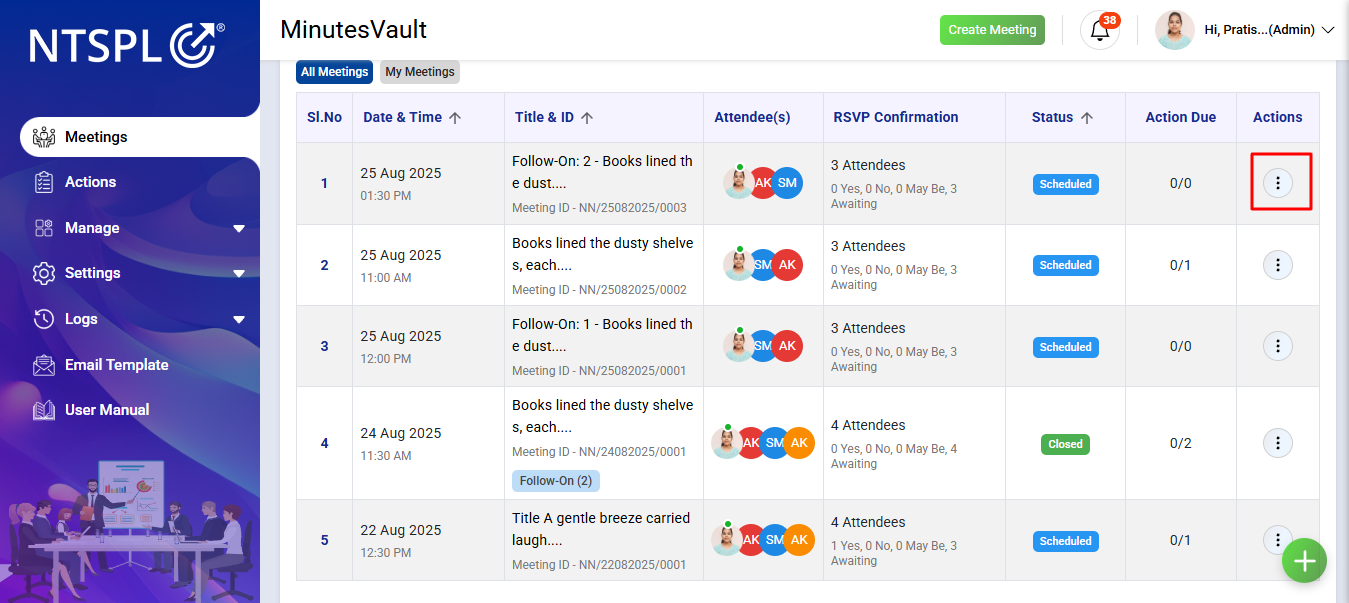
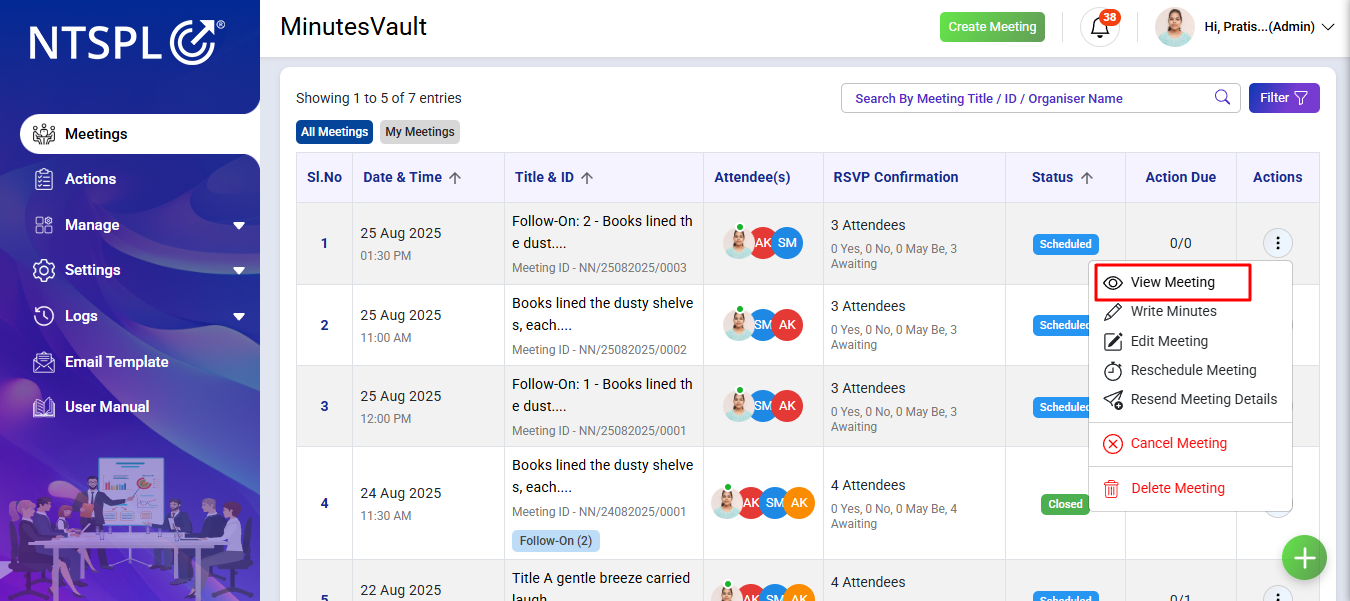
To View a Meeting, Click on the Meetings menu.
Click the button for a particular meeting under the Action menu.
Click on View Meeting to view the meeting details.
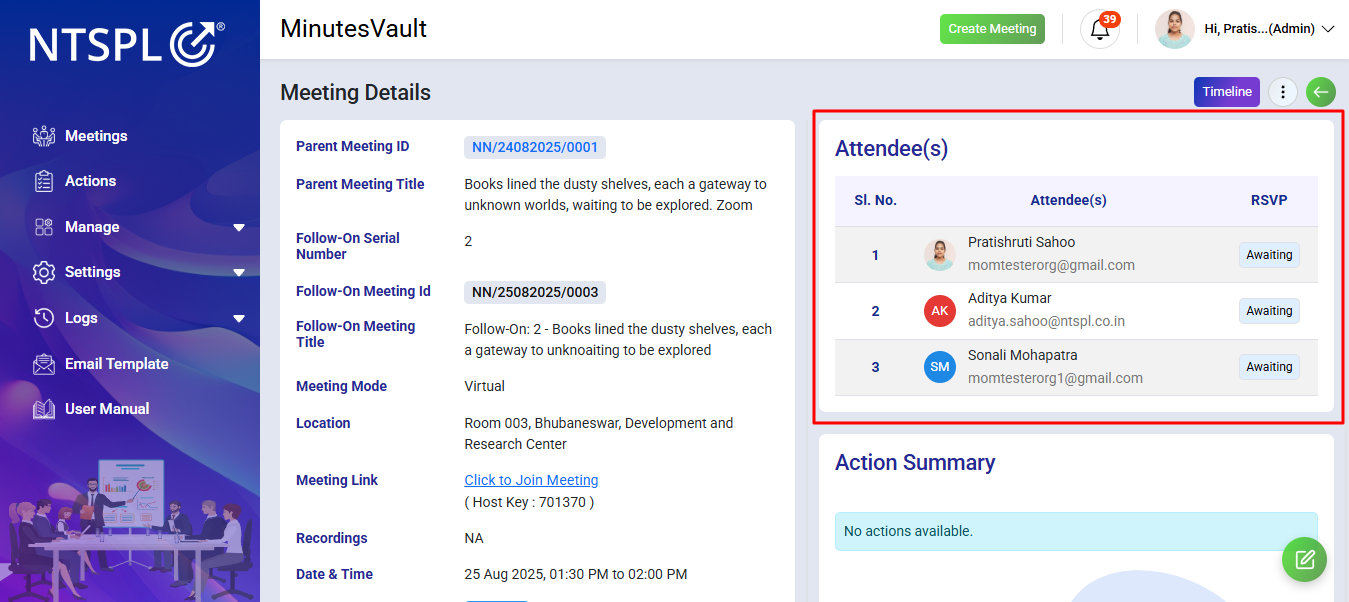
You can see the meeting details here.

Here you can see the RSVP report of meeting.
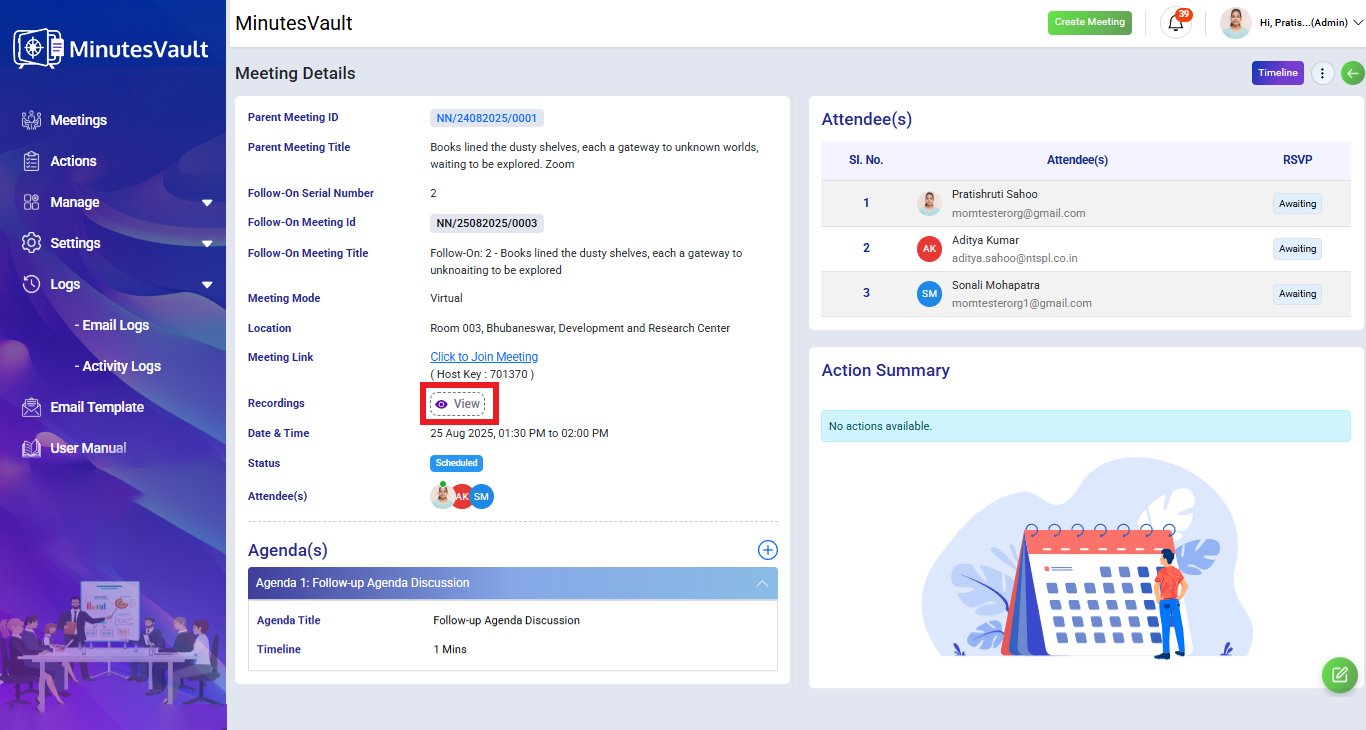
Click on View button to Watch Meeting Recordings.
You can see all Meeting Recordings here.
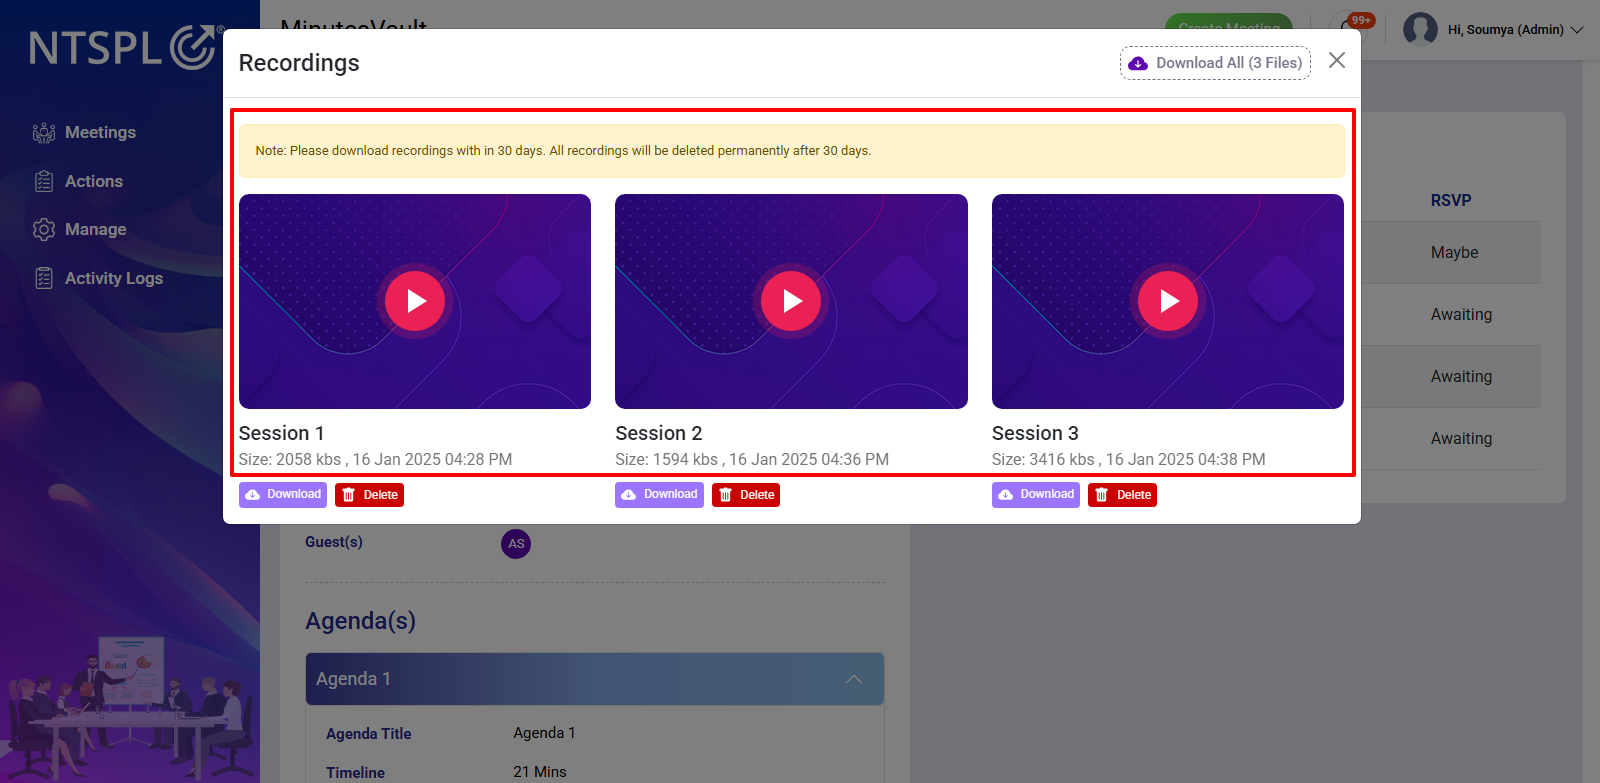
Click on Download All button to Download all Meeting Recordings at a time or You can download recordings individually by clicking on below Download button.
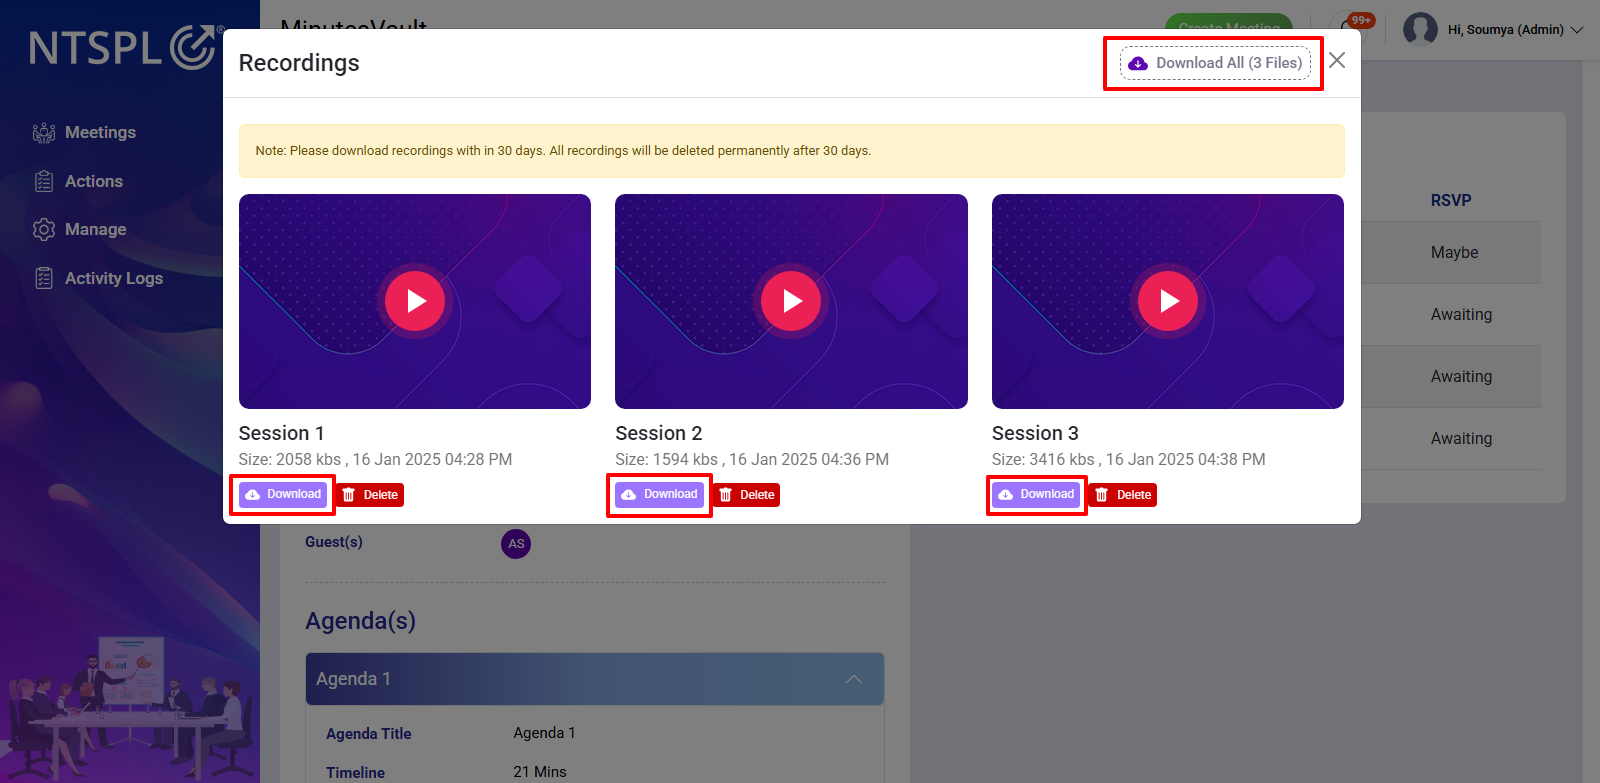
Click on Delete button to delete Meeting Recordings.

There is another feature available in the Meetings section:

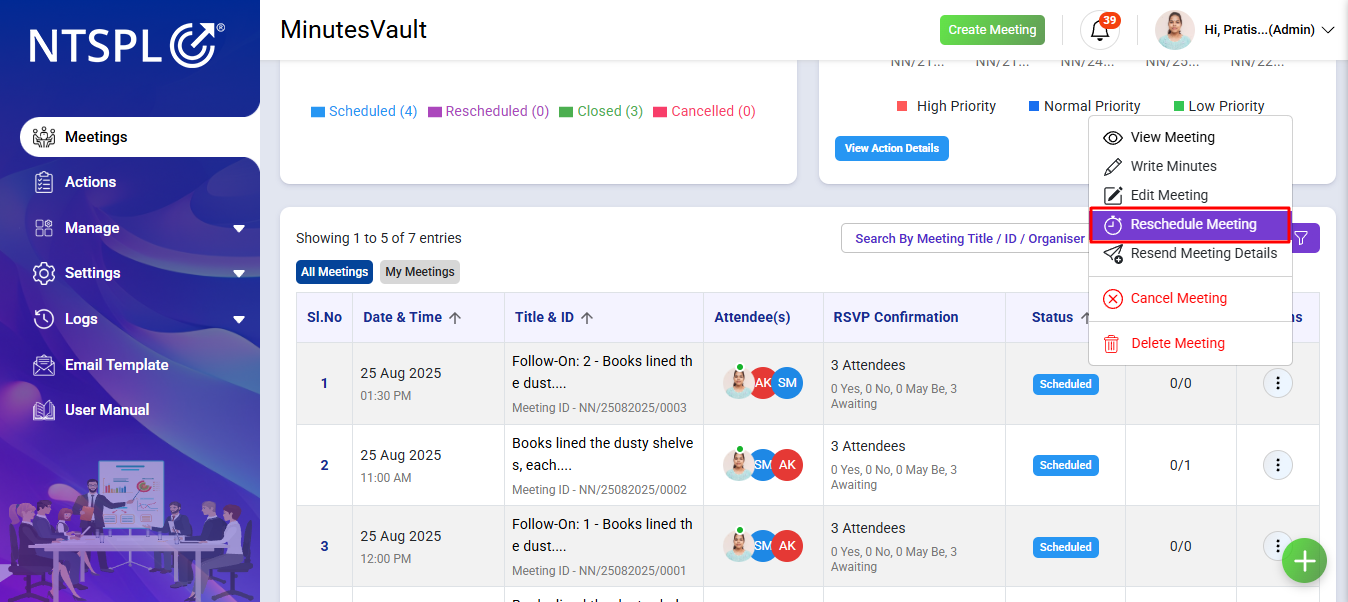
To Reschedule a Meeting, Click on the Meetings Button.
Open the meeting for which you wish to reschedule and click on the Reschedule Meeting button under the action menu.
Enter the reason for rescheduling the meeting, specify the new time details for when the meeting will be held, and then click the Reschedule button to finalize the process.
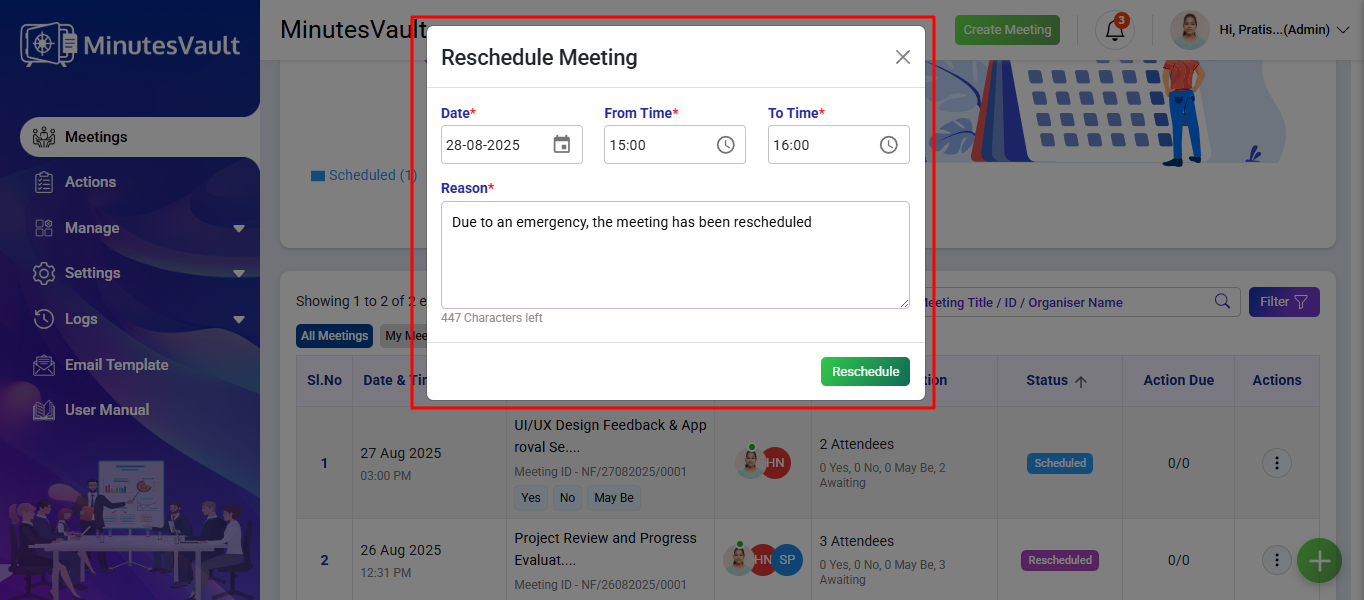
The meeting has been rescheduled.

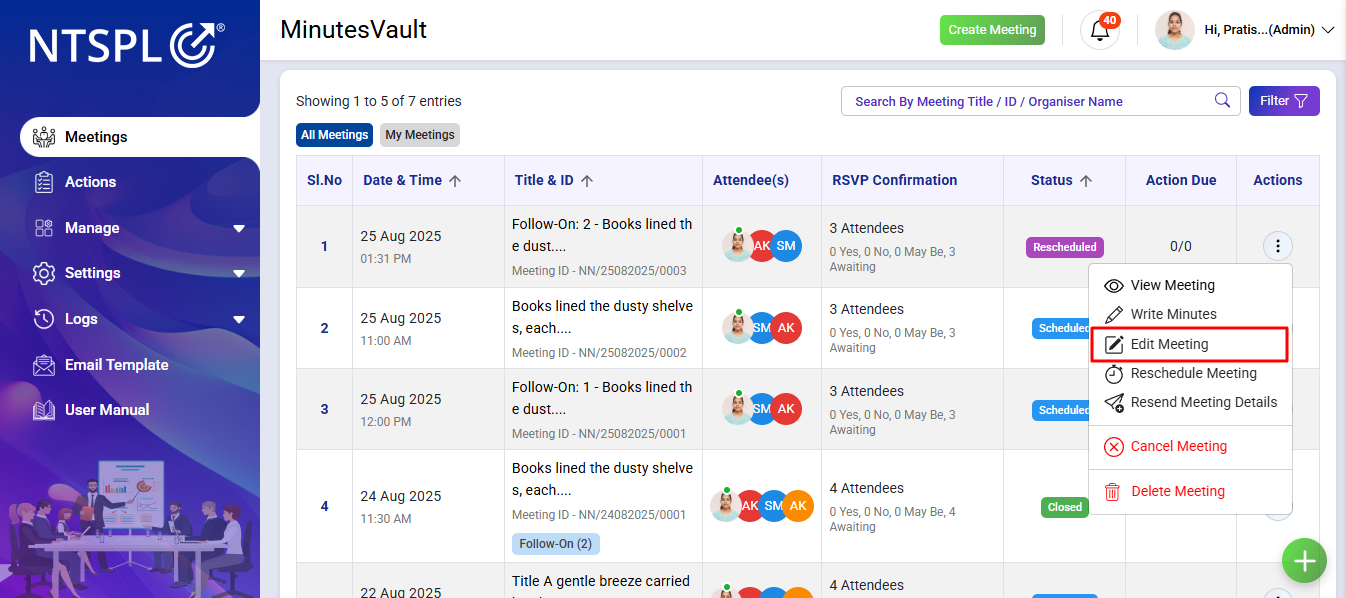
To Edit a Meeting, click on the Meetings Button.
Open the meeting you wish to edit and click on the Edit Meeting button under the action menu.
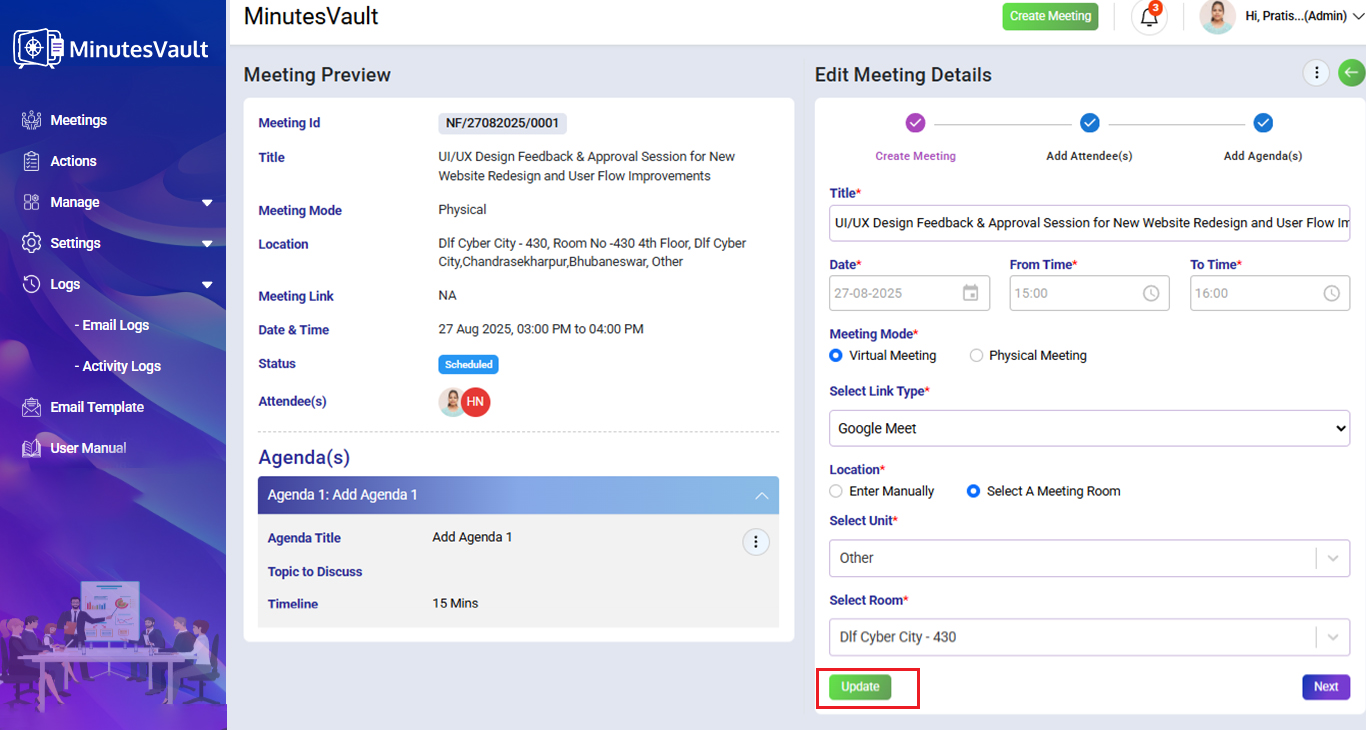
Enter the details you want to edit, such as the Meeting Title, Meeting Mode, Meeting Link and Location.
After making the necessary changes, click the Update button to apply the edits.
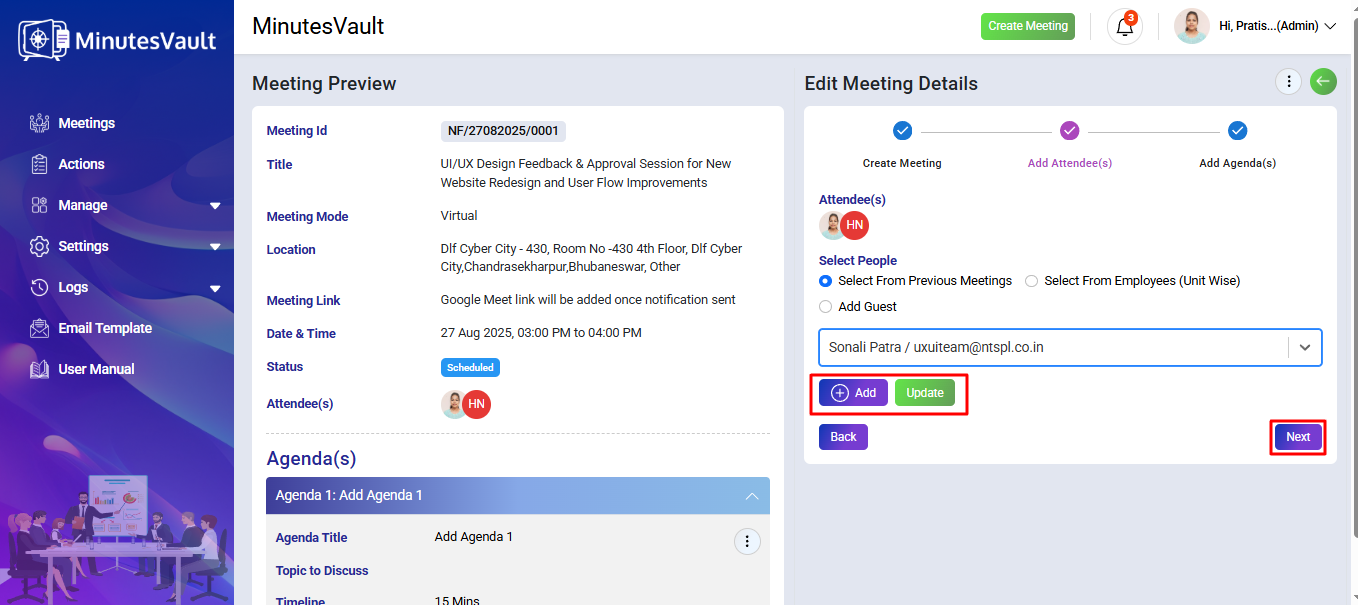
To add attendees, select the people you wish to invite, click the Add button, or update the existing attendees, then click Next to proceed.
To add an agenda, click the Add Agenda button. Afterward, click on Send Notification to save and notify participants.
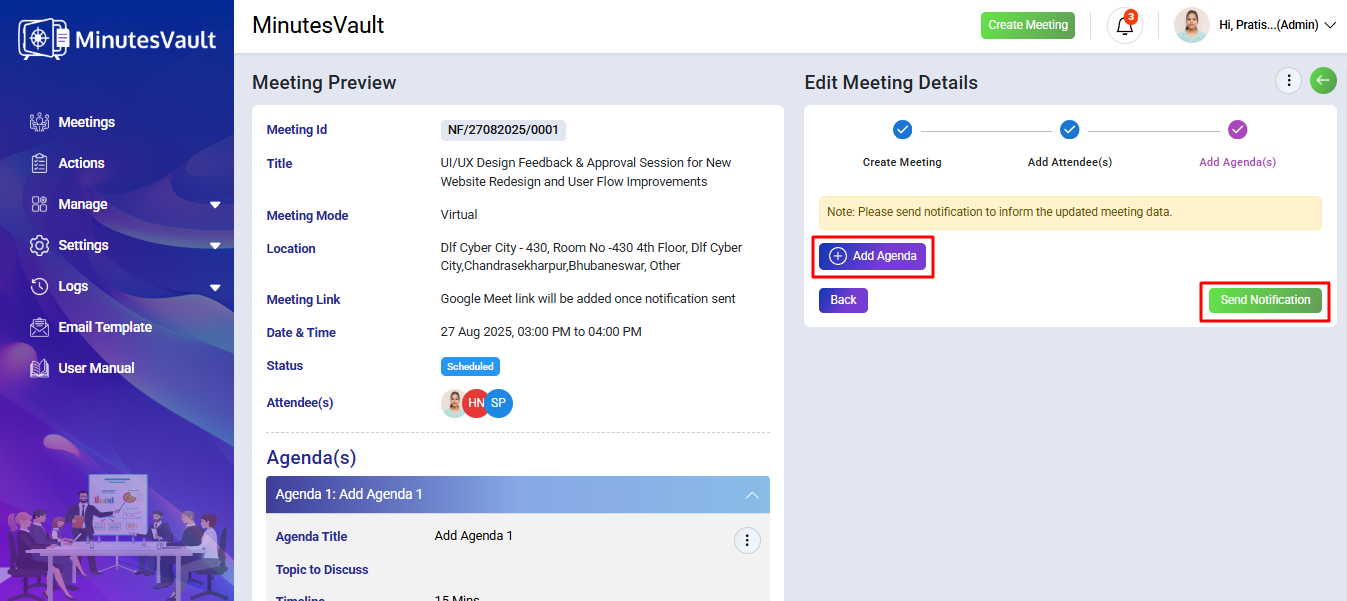
A notification email is sent to all attendees of the meeting.
To Resend Meeting Details, follow these steps:
Click on the Meetings Button.
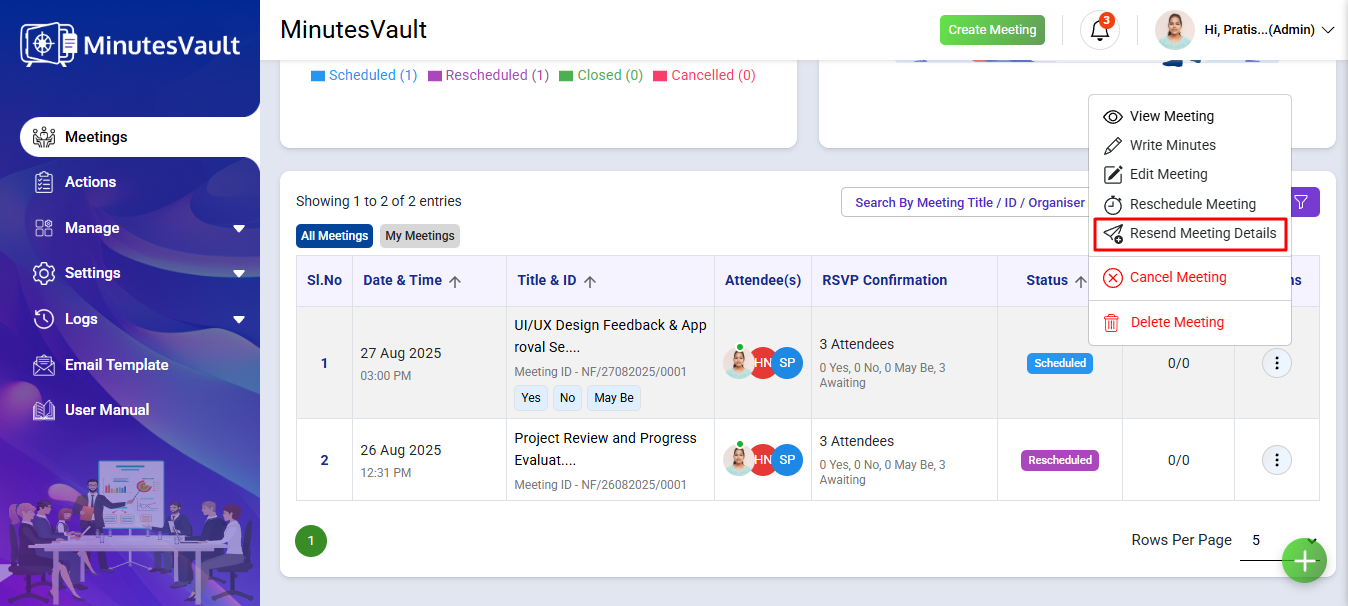
Open the meeting for which you wish to re-send the details and click on the Resend Meeting Details button under the Action Menu.
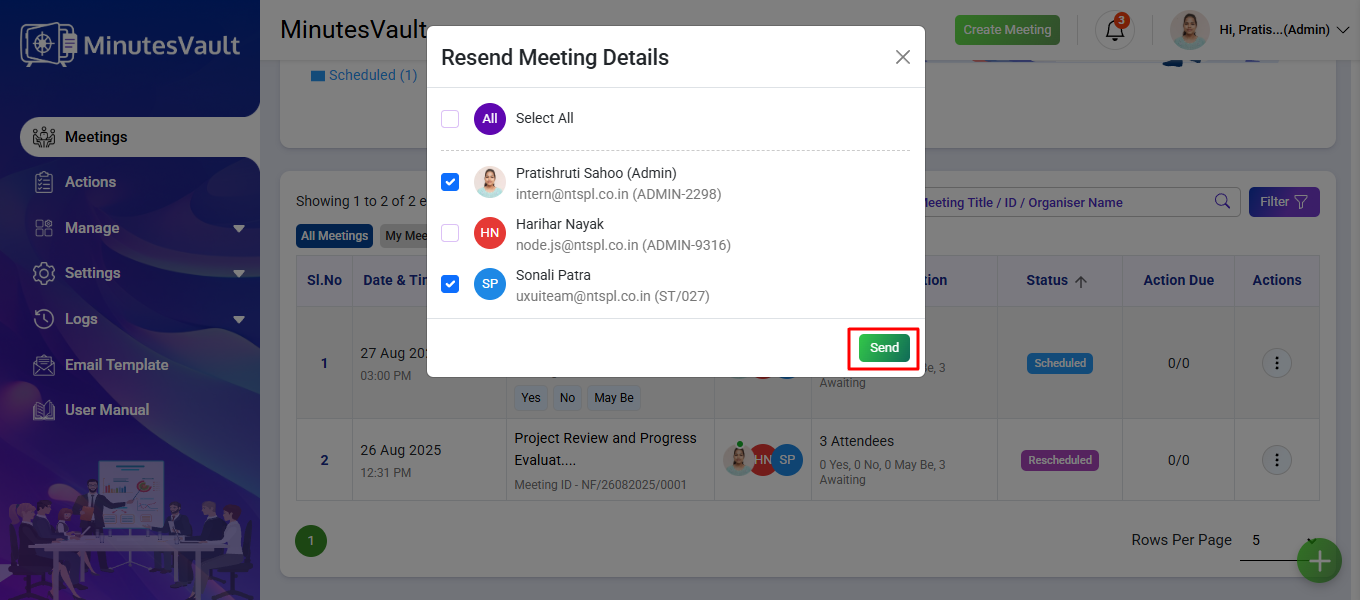
Check the names of the attendees to whom you want to send the updated meeting details, then click the Send button. This will resend the meeting invite with the updated details to all participants.
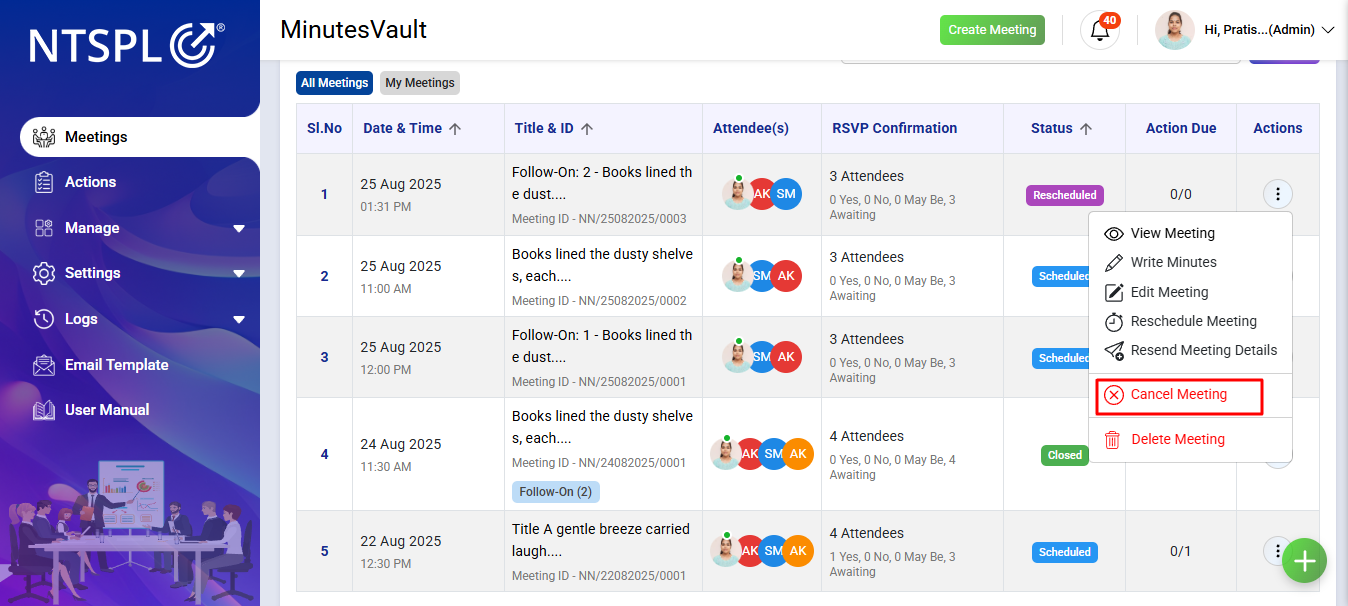
To Cancel a Meeting, click on the Meetings Button.
Open the meeting that you wish to cancel and click on the Cancel Meeting button under the Action Menu.
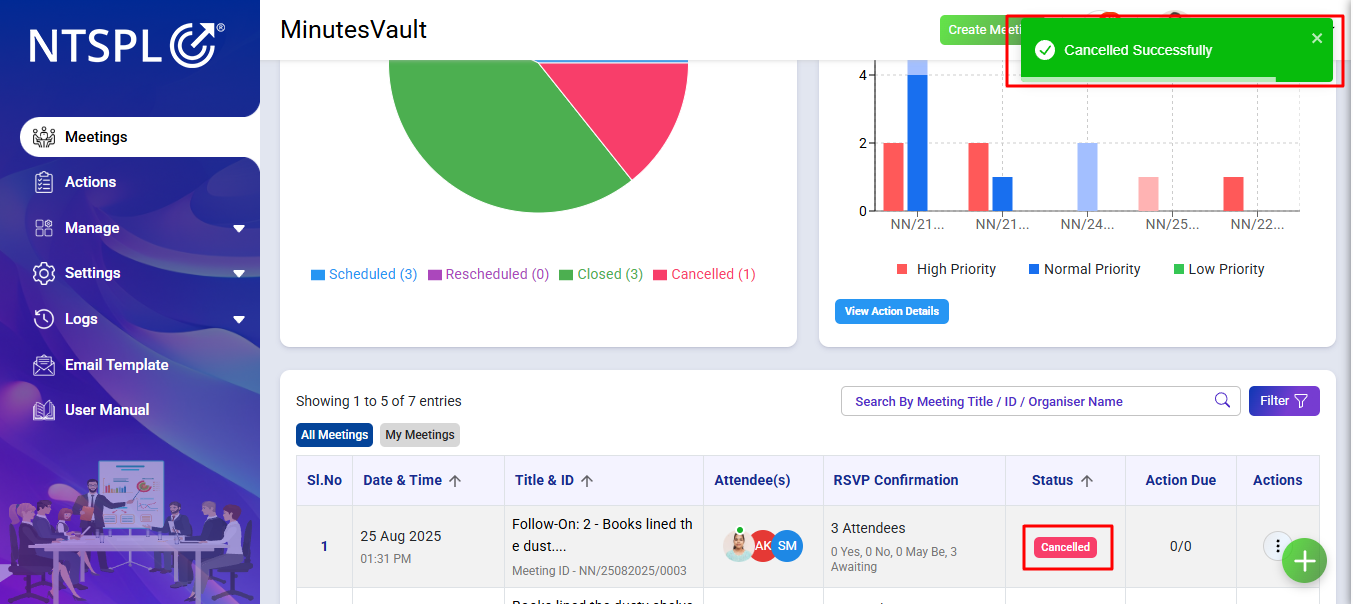
Enter the remarks regarding the cancellation and click on the Submit Remark button to finalize.
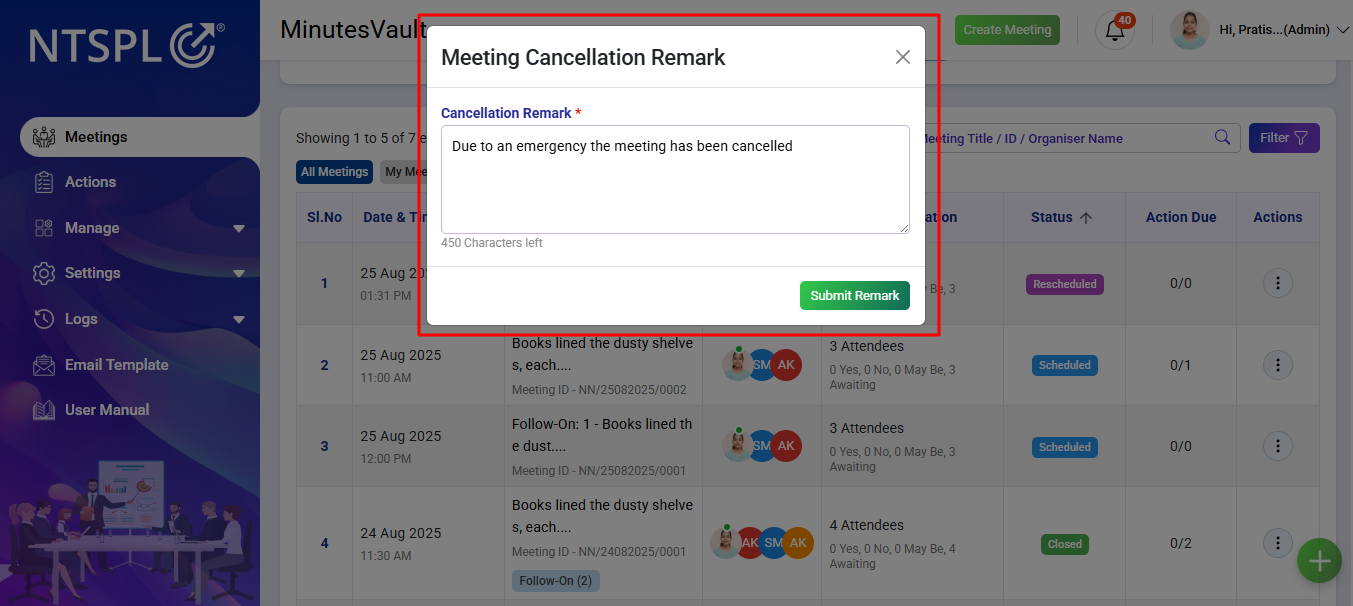
Once confirmed, the meeting will be cancelled, and participants will receive an email notification regarding the cancellation.
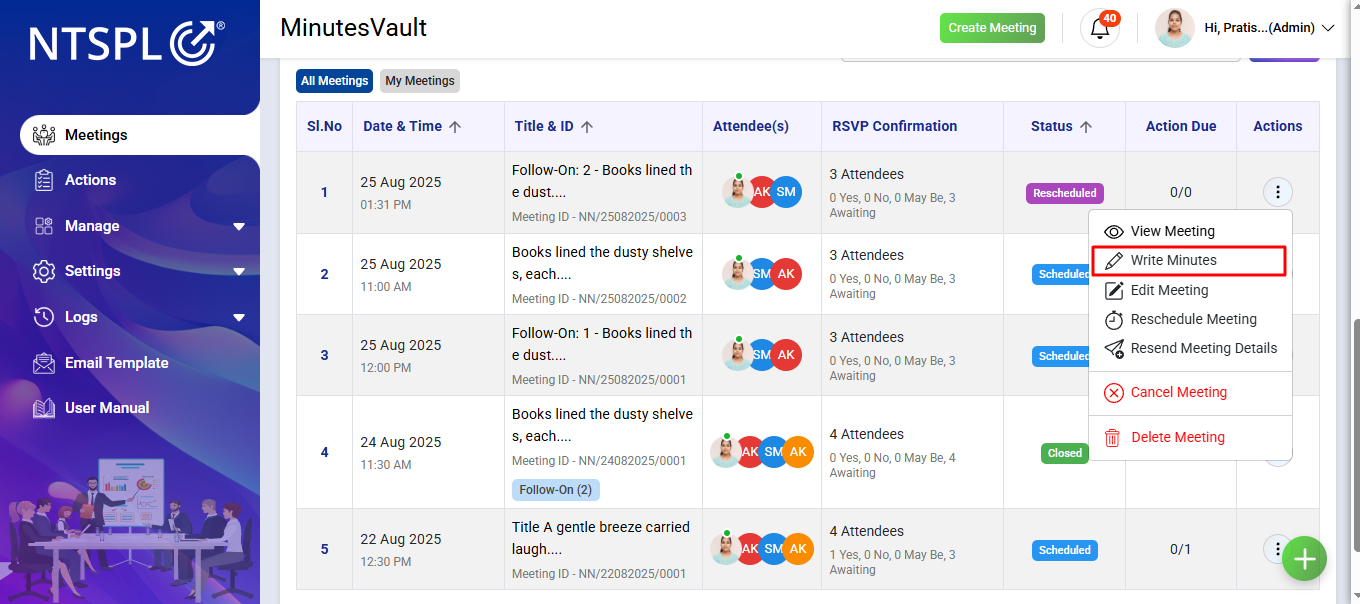
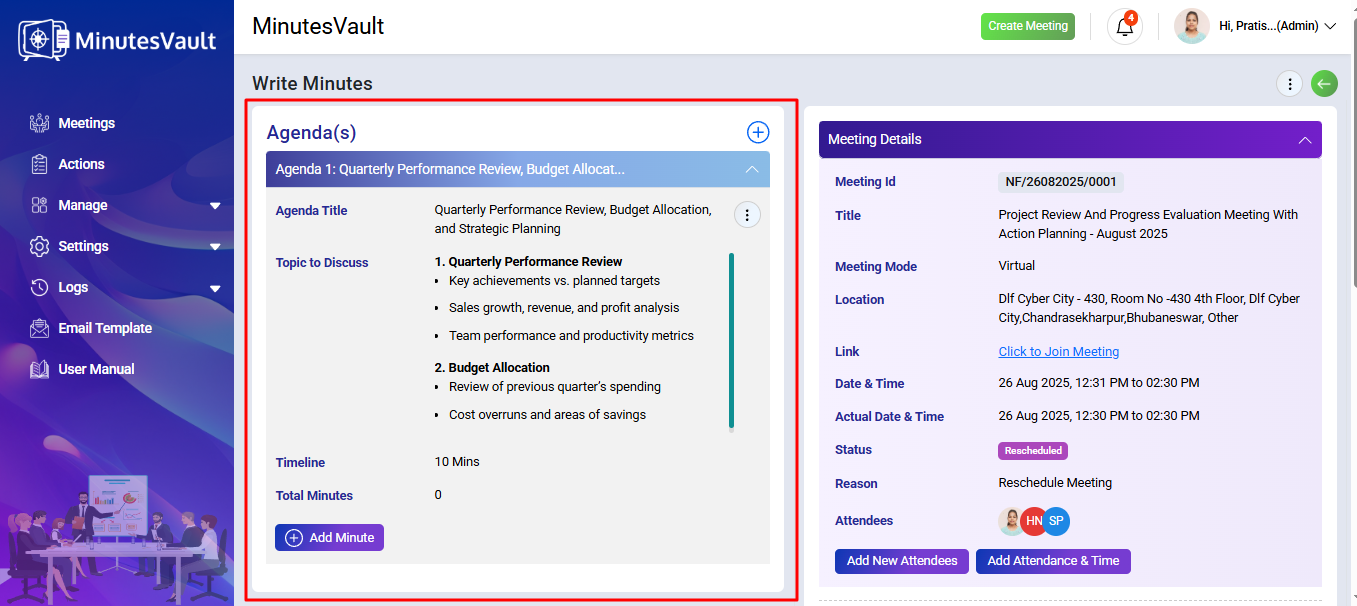
After setting MOM Write Permission Click on the Write Minutes Option under Action menu.
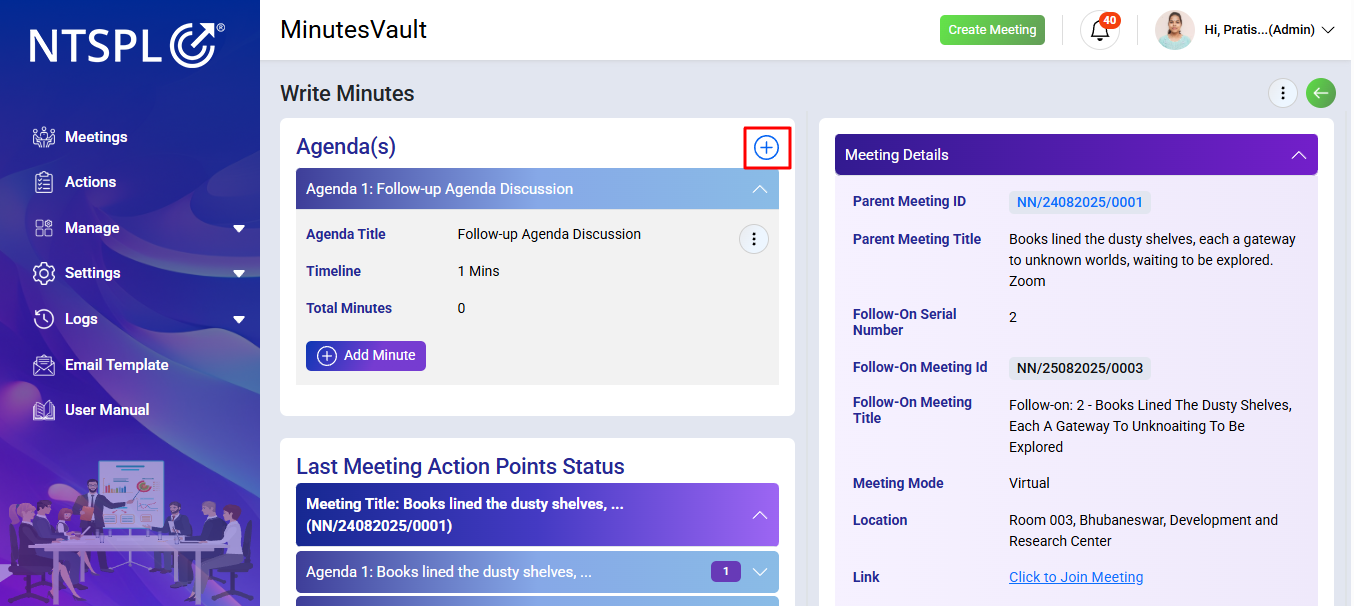
Click on + button to see the Agenda modal.
Enter Agenda details and Click on Submit button to add a new agenda for the meeting.
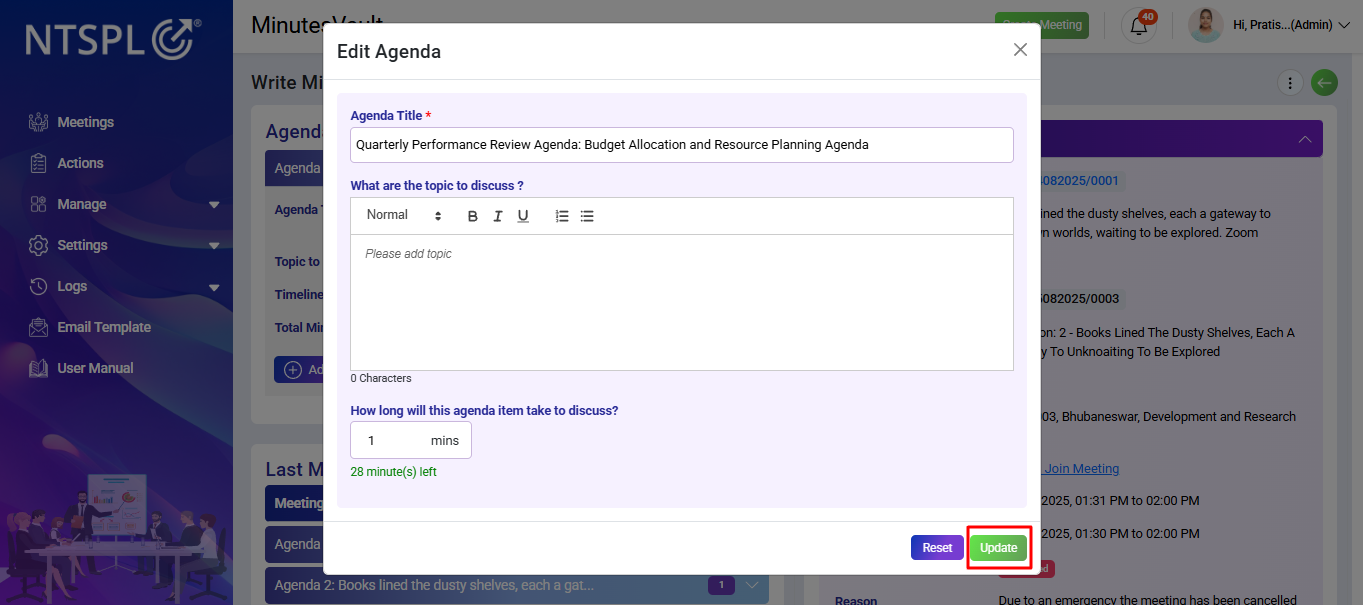
Click the button and select Edit to edit the Agenda.

Enter the new agenda and topics to be discussed to update the old agenda details, then click the Update button.
You can see the agenda here or Click on down Arrow button to see the agenda details.
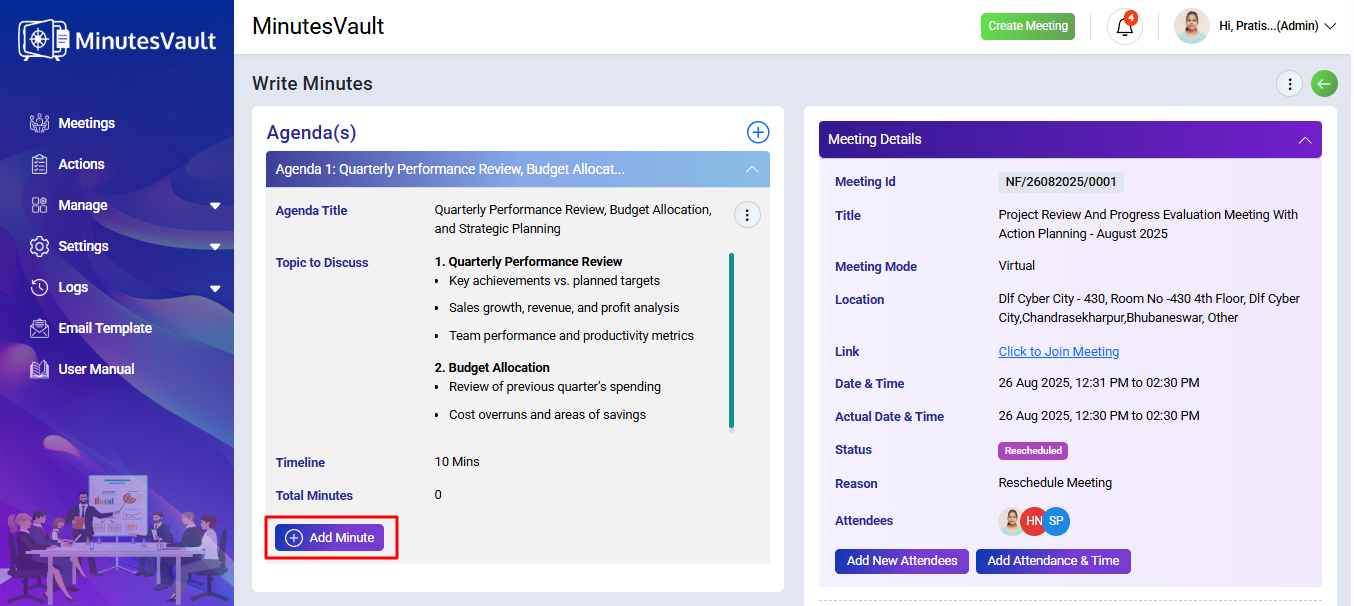
Click on the Add Minute button to add a new minute for the meeting.
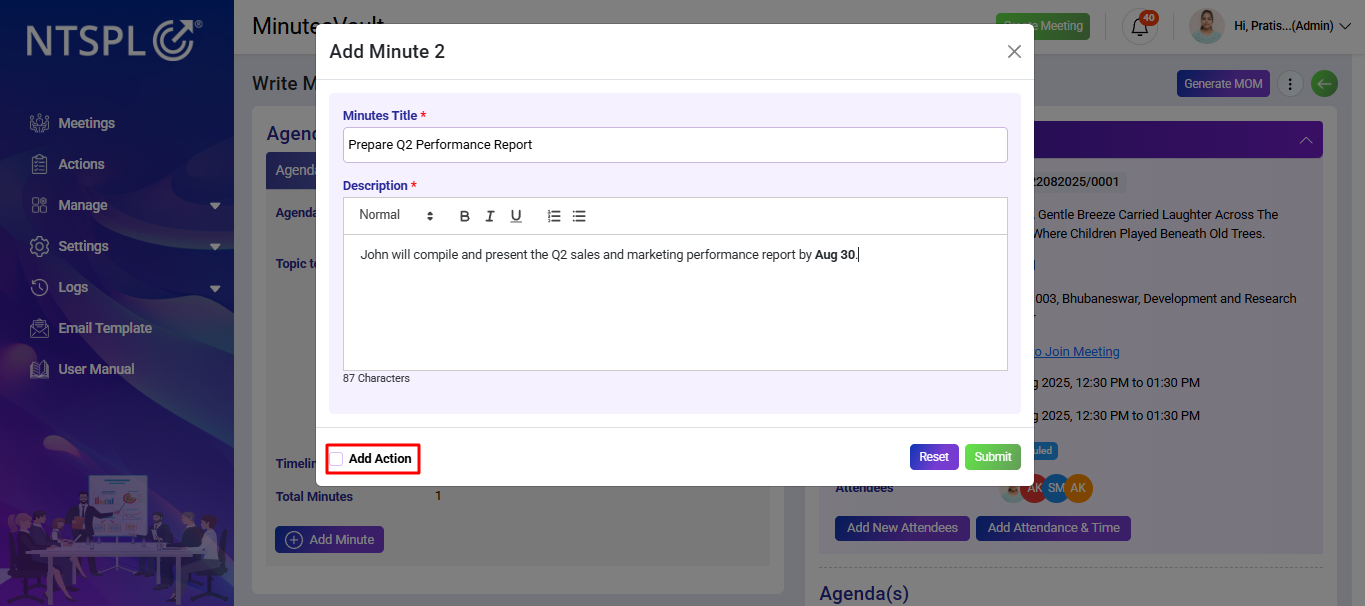
Enter the Minutes Details, then select Add Action.
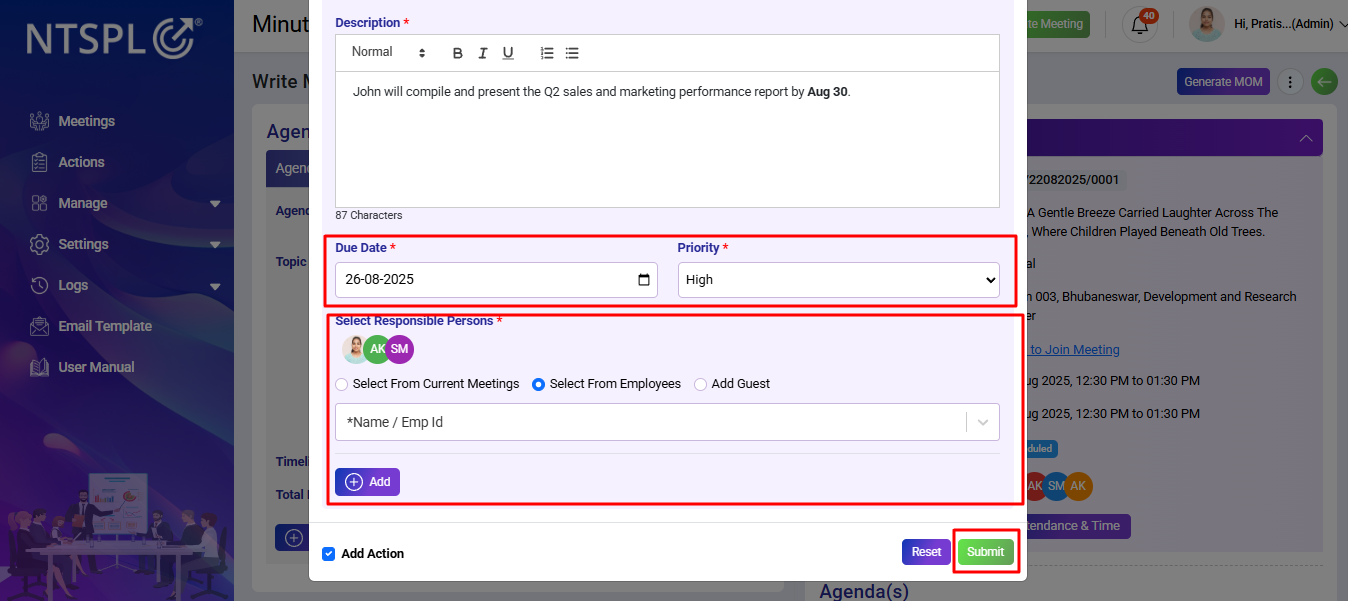
In the action modal, assign the respective Assignee User, set the Action Priority, and define the Due Date. Finally, click on Submit to save the action.
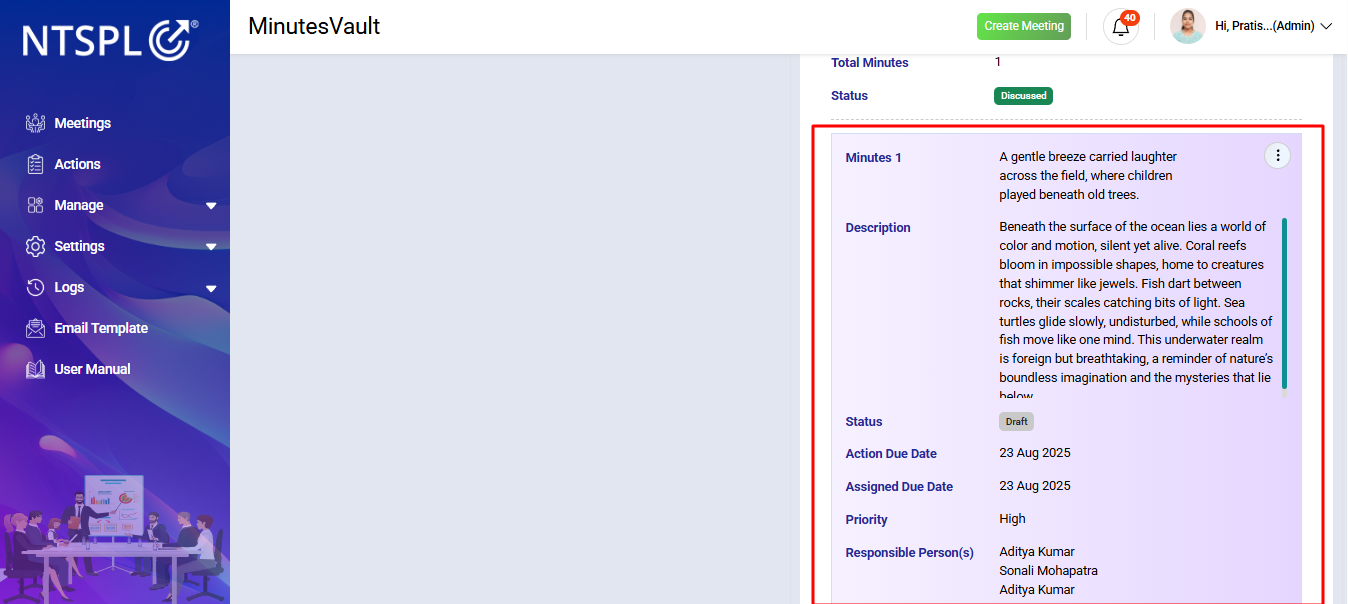
Click on Down Arrow button to view the minutes details.
You can view the minutes details here.
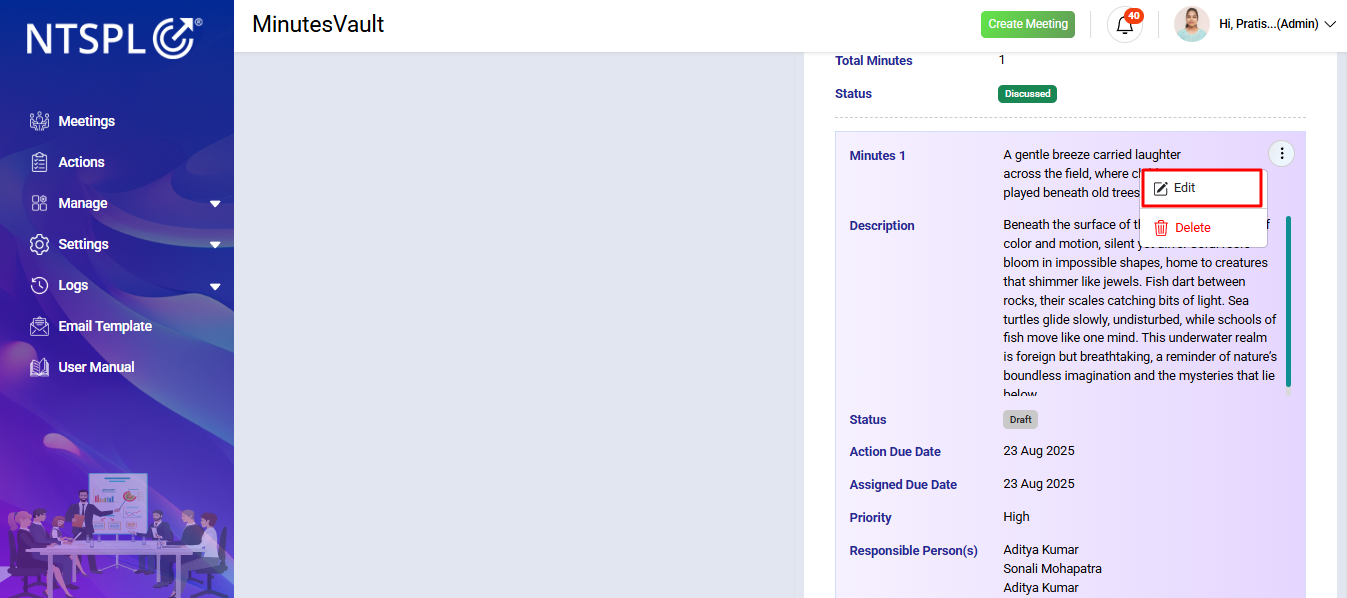
Click the button and select Edit to modify the minute.
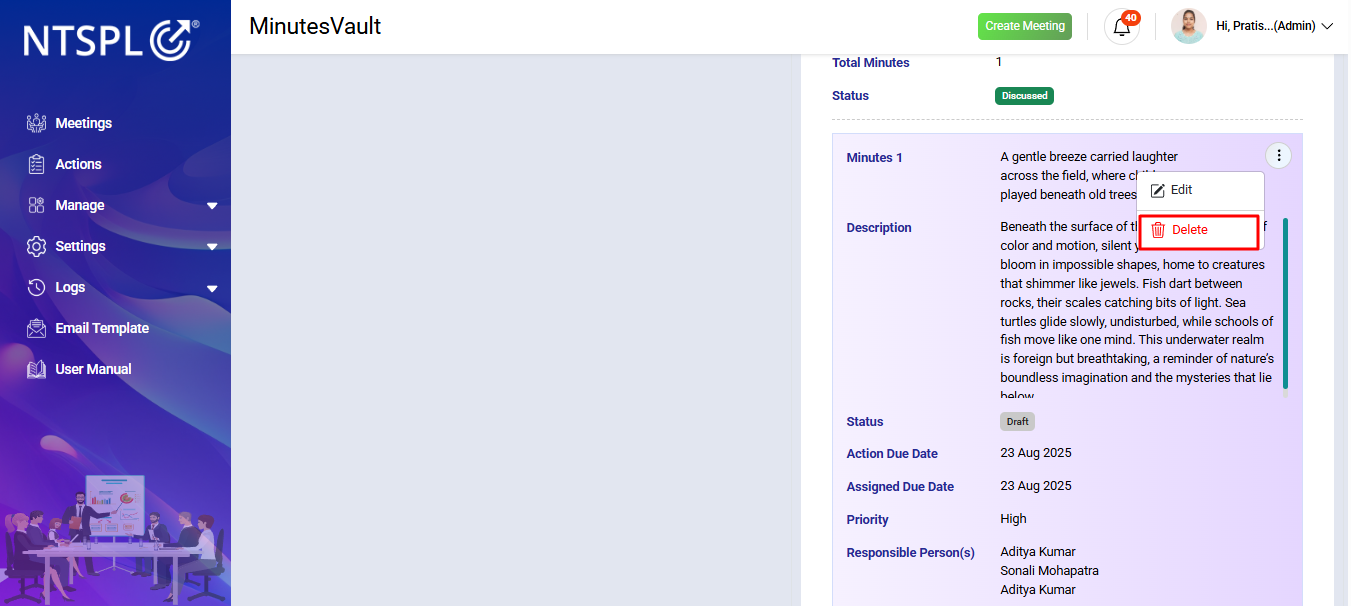
Click the button and select Delete to delete the minute.
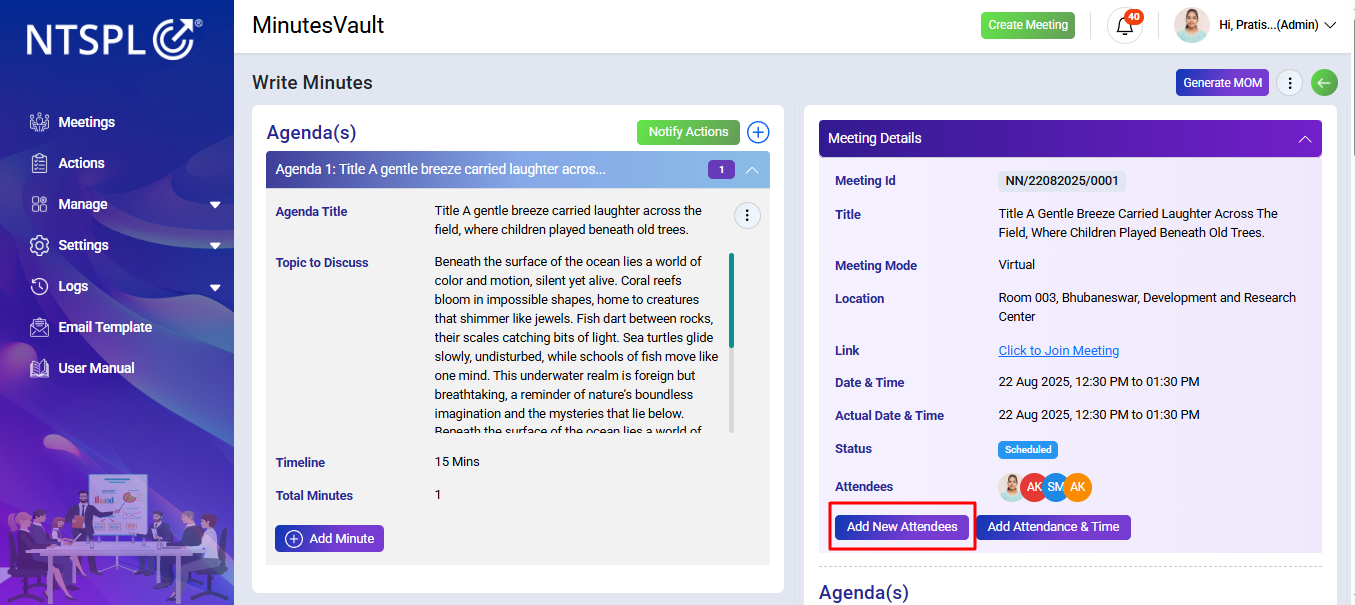
Click on the Add New Attendees button to update attendees of the meeting.
Select attendees from Select from Previous Meetings, Select from Employees, or Select from Existing Guests, then click the Add button. Afterward, click Submit to add the new attendees.
You can also update attendees by adding a new guest. Select Add New Guest, fill in the guest's name, email, designation,role, and company name, click Add, and then click Submit to finalize.
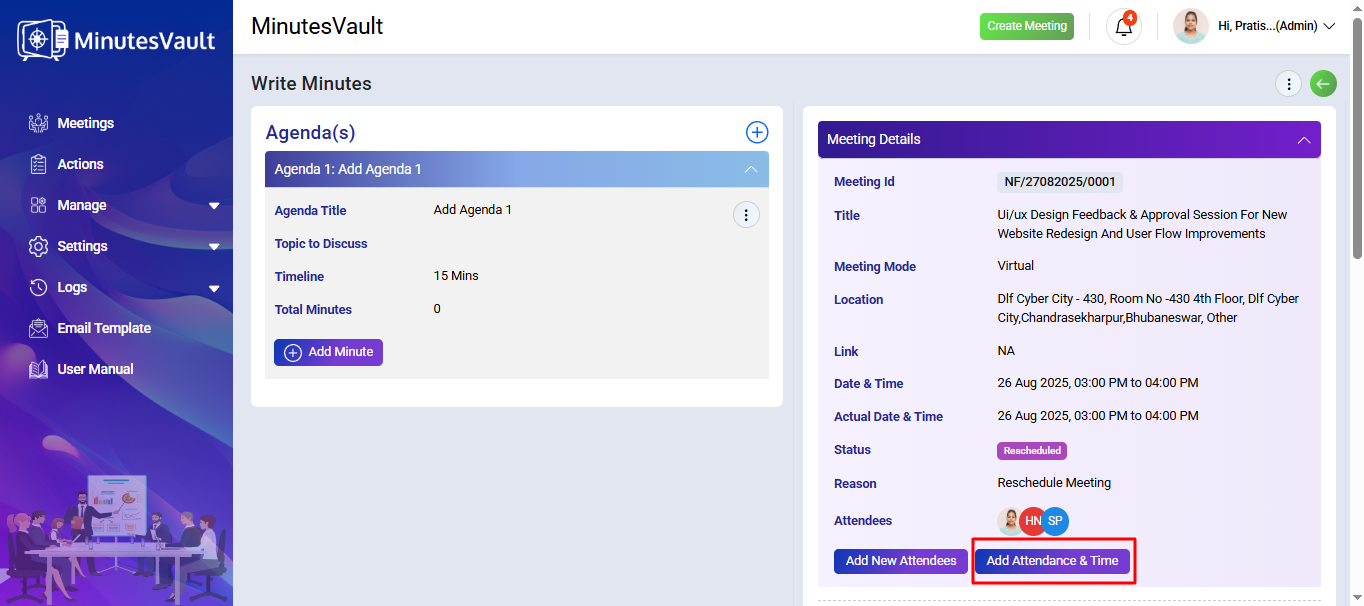
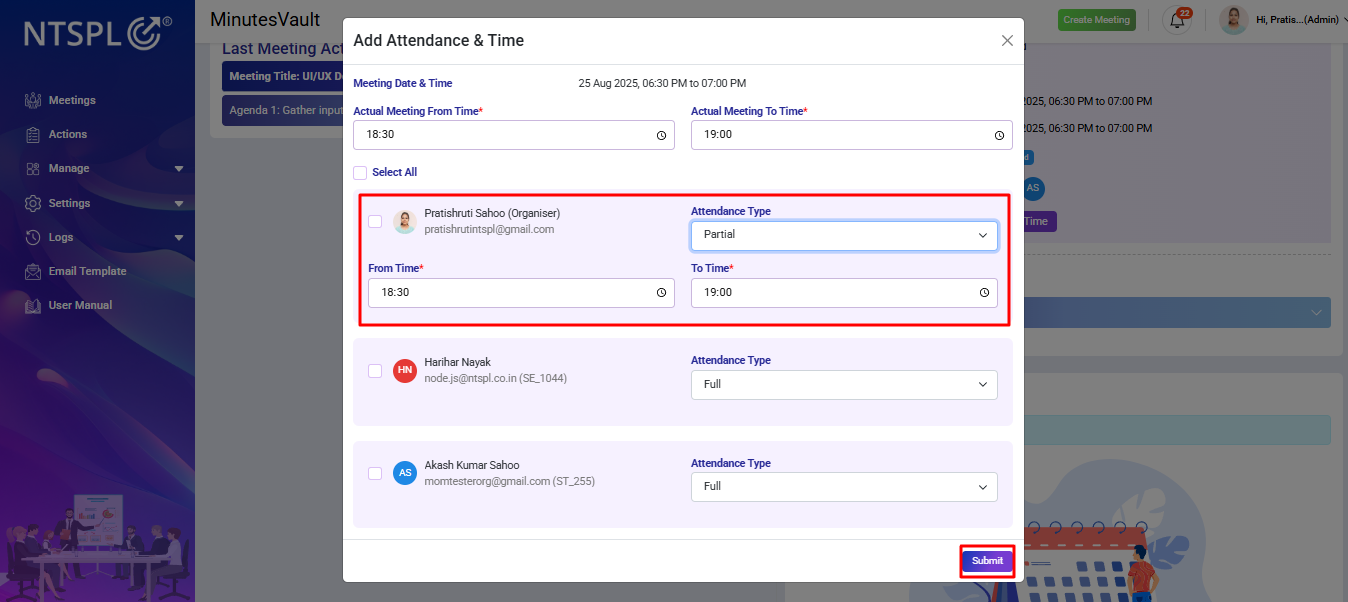
Click on Add Attendance & Time button to Update Attendance of the Attendees.
There are two types of attendance: Full and Partial. Select the checkbox and choose the Full attendance type. After that click on Submit to update the attendance.
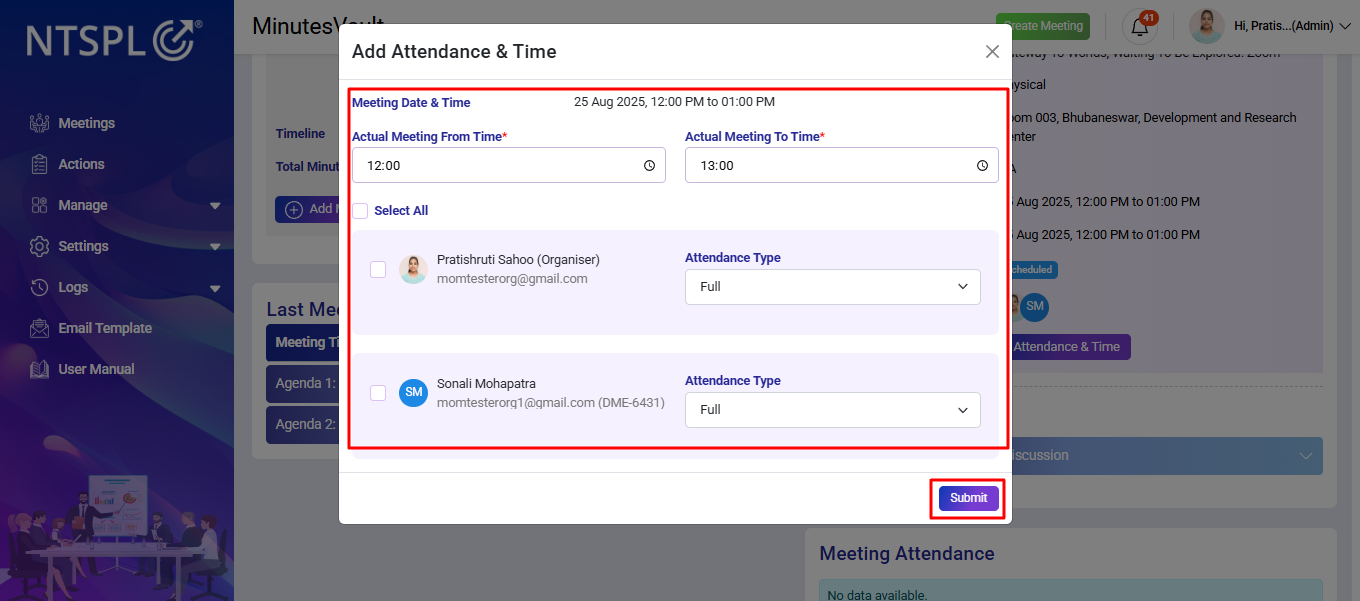
Click on Add Attendance & Time button to Update Attendance of the Attendees.
Select the checkbox and choose the Partial attendance type. Enter the 'From' and 'To' time, then click Submit to update the attendance.
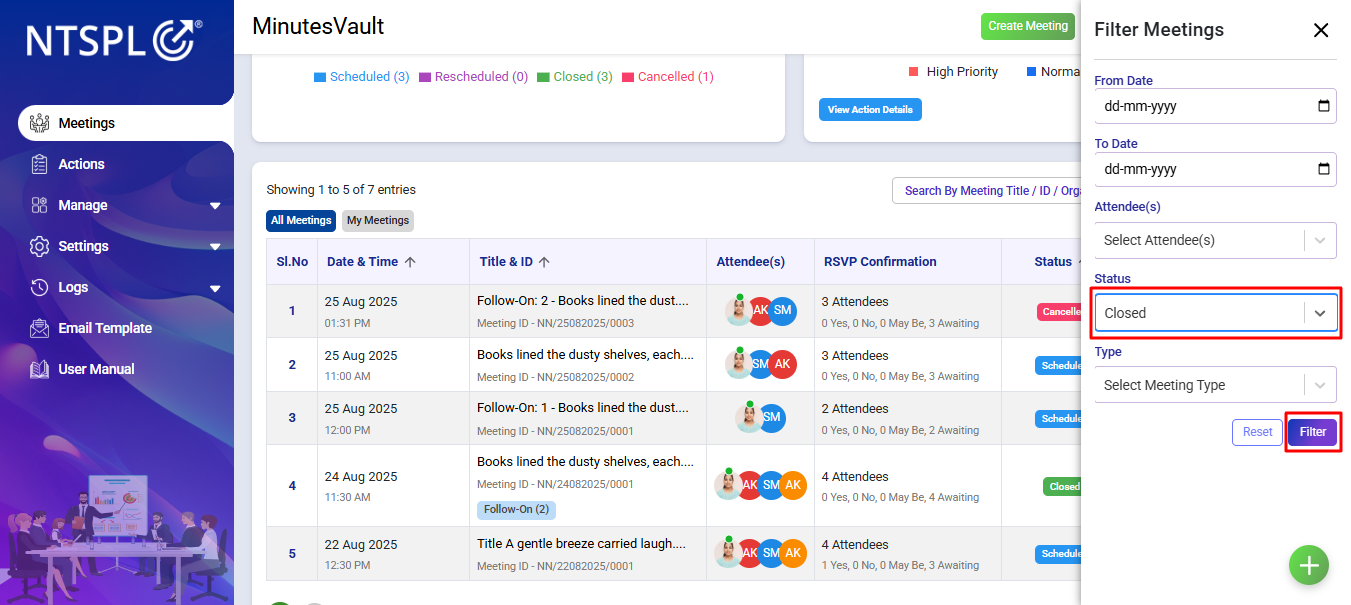
To view the minutes, click on the Meetings button on the dashboard.
Click on the Filter button.
Filter the Closed Meetings.
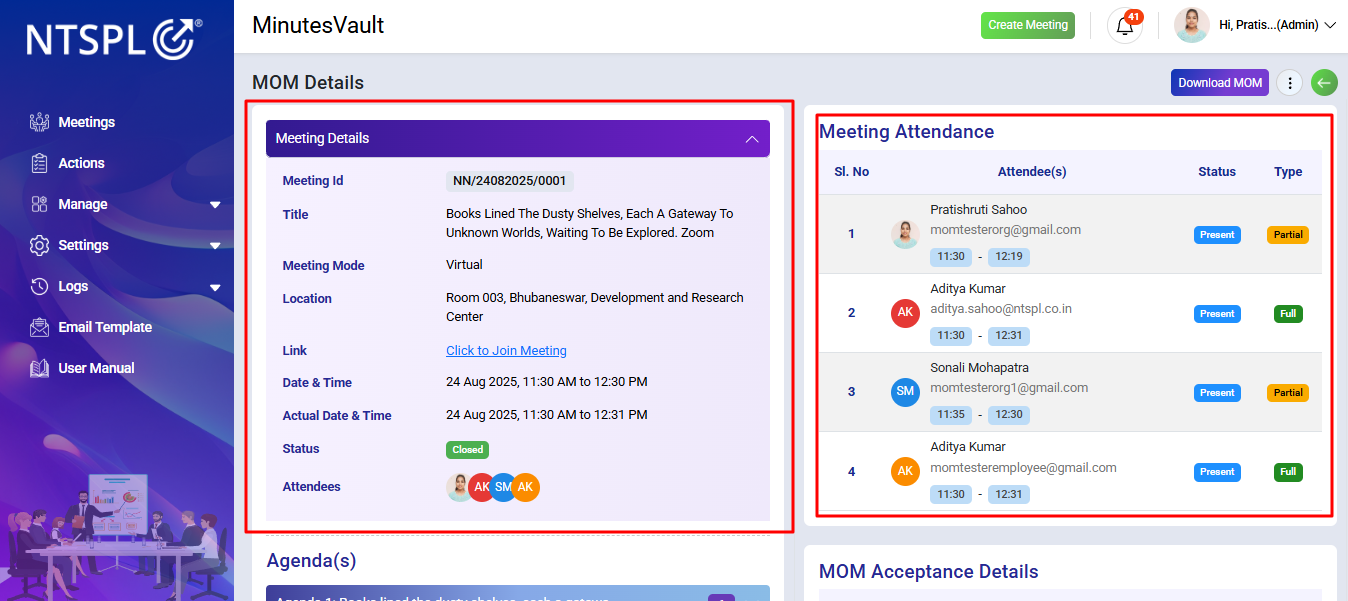
If you are the meeting organizer, the following options will appear under the action menu. Select the View Minute option.

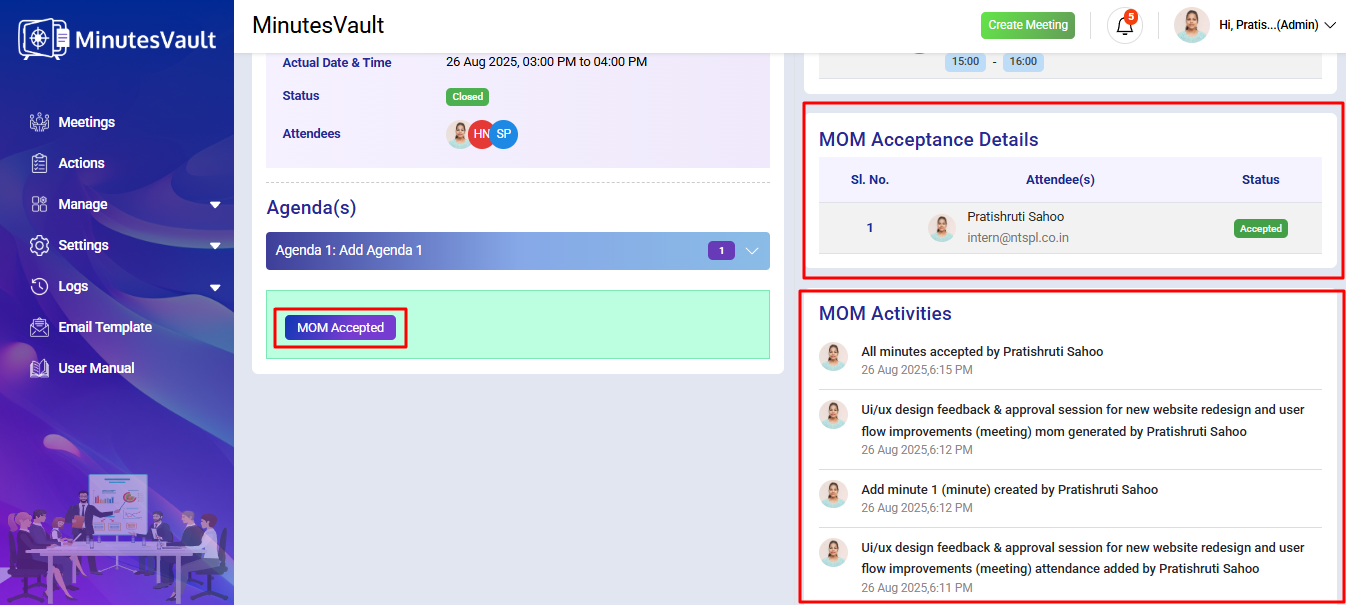
It will redirect you to the View Minute Detail page, displaying the meeting details, meeting attendance, agenda(s), MOM acceptance details, and MOM activities.
To accept the MOM, by acknowledging the Minutes of Meeting (MOM), you confirm the accuracy and completeness of the discussions and agreements recorded herein. Check the checkbox and then click on I Accept the MOM to confirm.
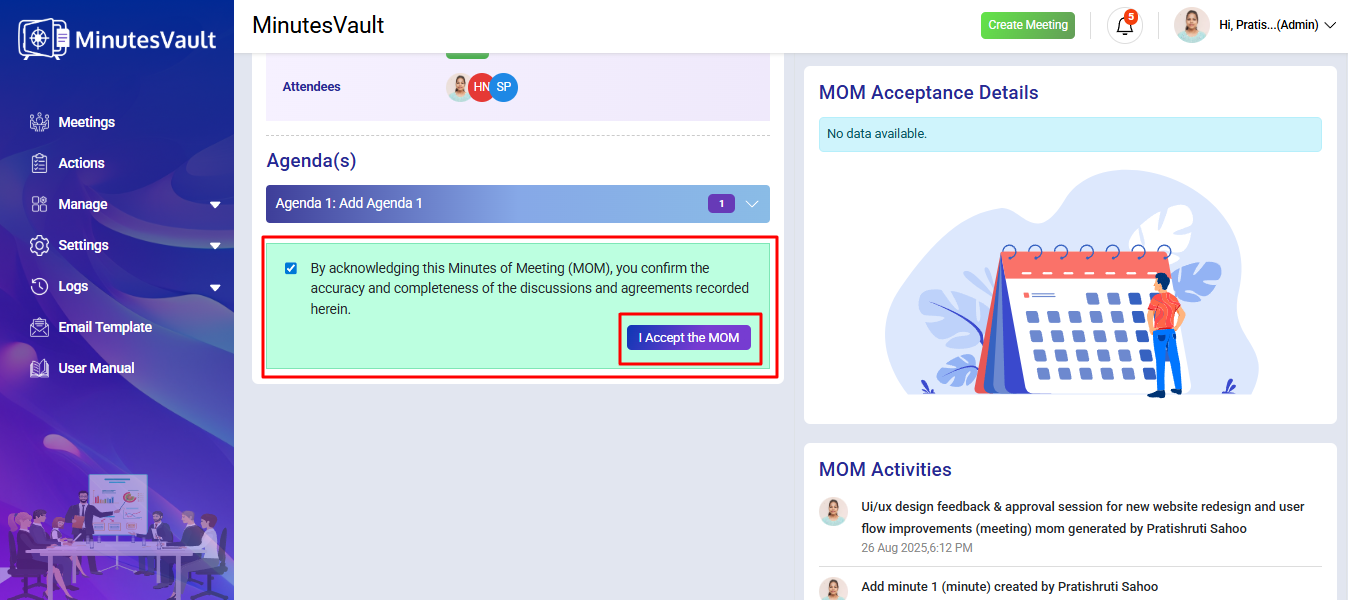
The MOM is now accepted. The MOM Acceptance details and MOM activities will be displayed.
To close a meeting, generate the MOM. Click on Meetings menu in dashboard.
Click on Write Minutes option to go MOM preview page.

Before clicking the Generate MOM button, first update the attendance, then click on Submit.
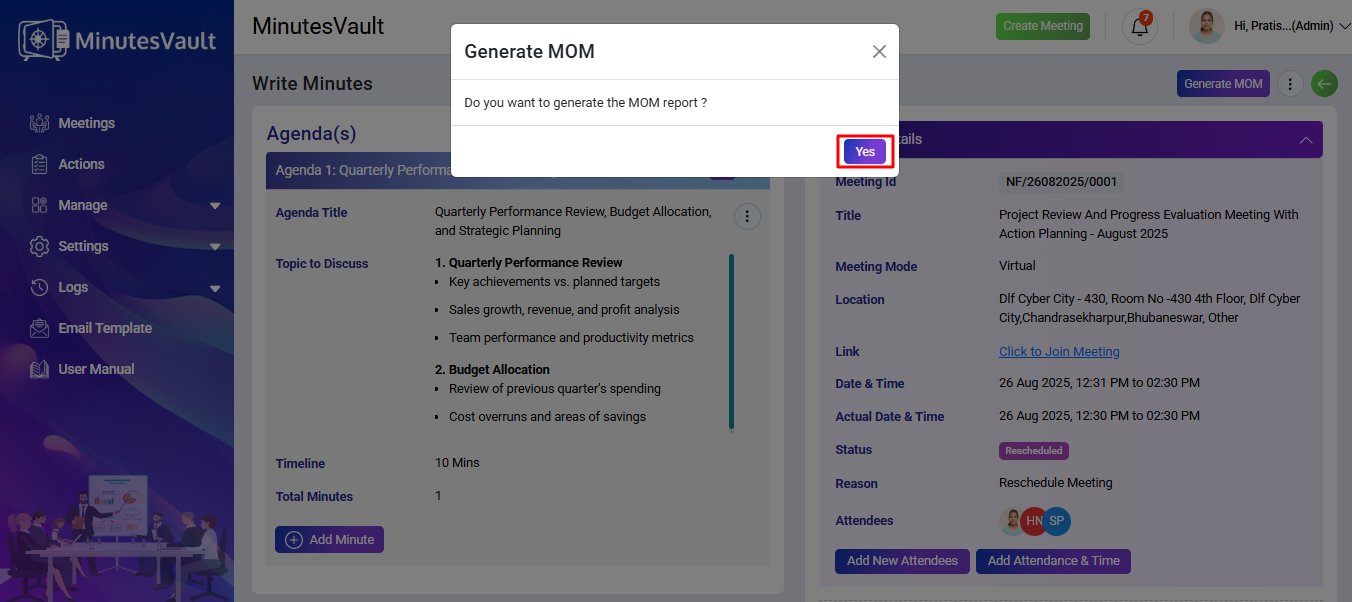
Click the Generate MOM button.

It will display a confirmation to generate the MOM report. Click Yes if you wish to generate the MOM report.
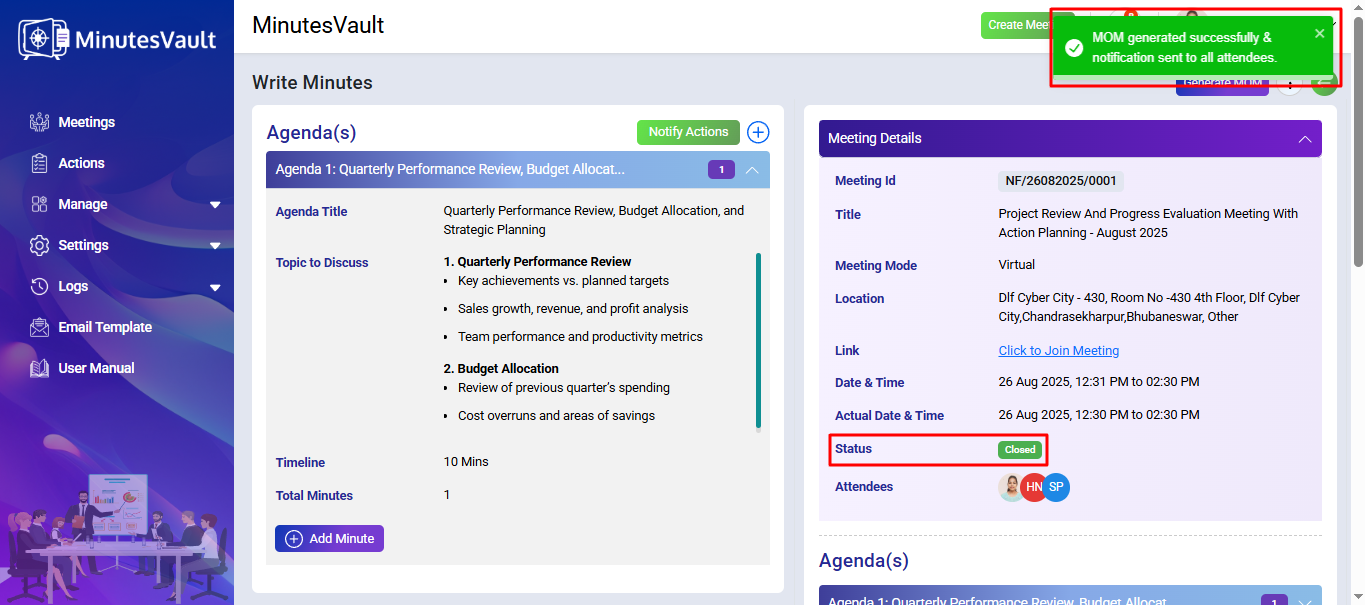
The MOM has been generated, and an email notification has been sent to all attendees.
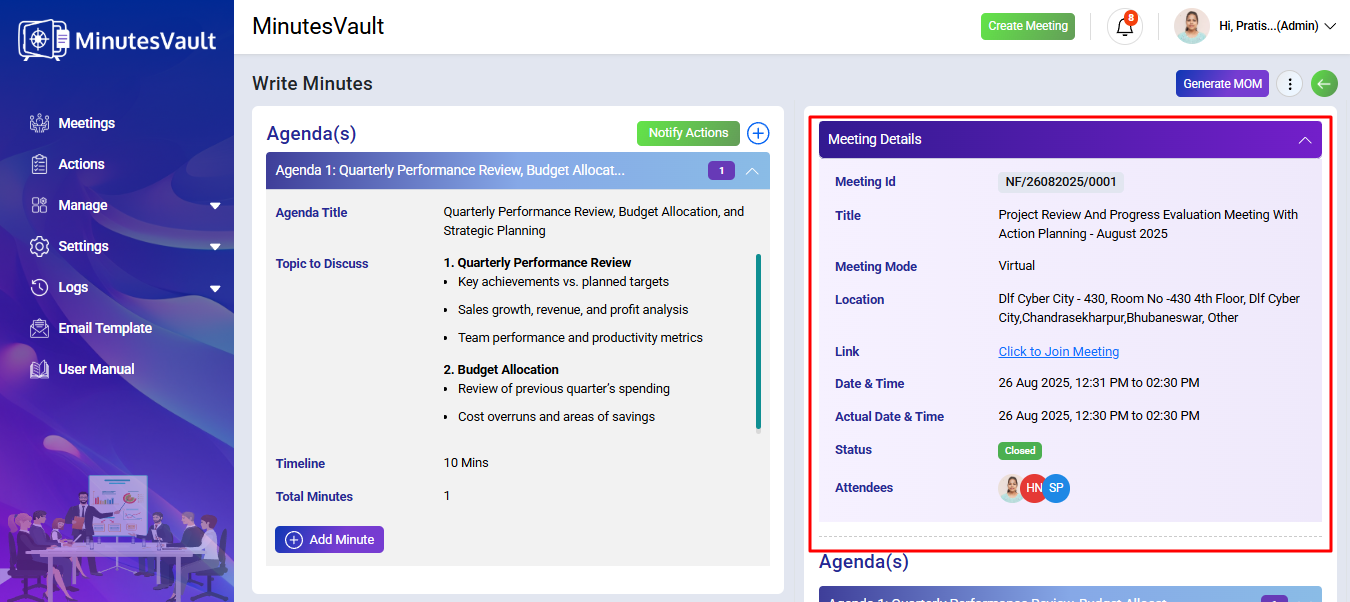
Here you can see MOM preview.
The MOM has been generated, and the meeting is now closed.
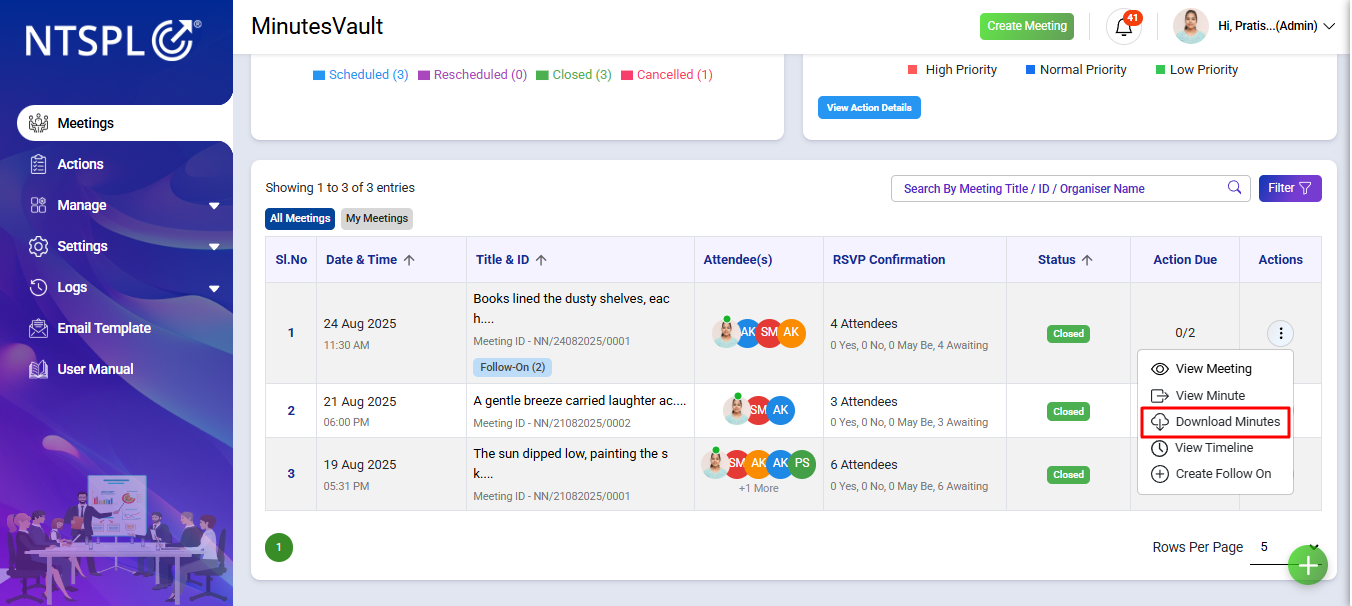
From the Dashboard Click on filter button.
Filter the status as closed for the meetings.
Click on the Download Minutes Option under Action menu.
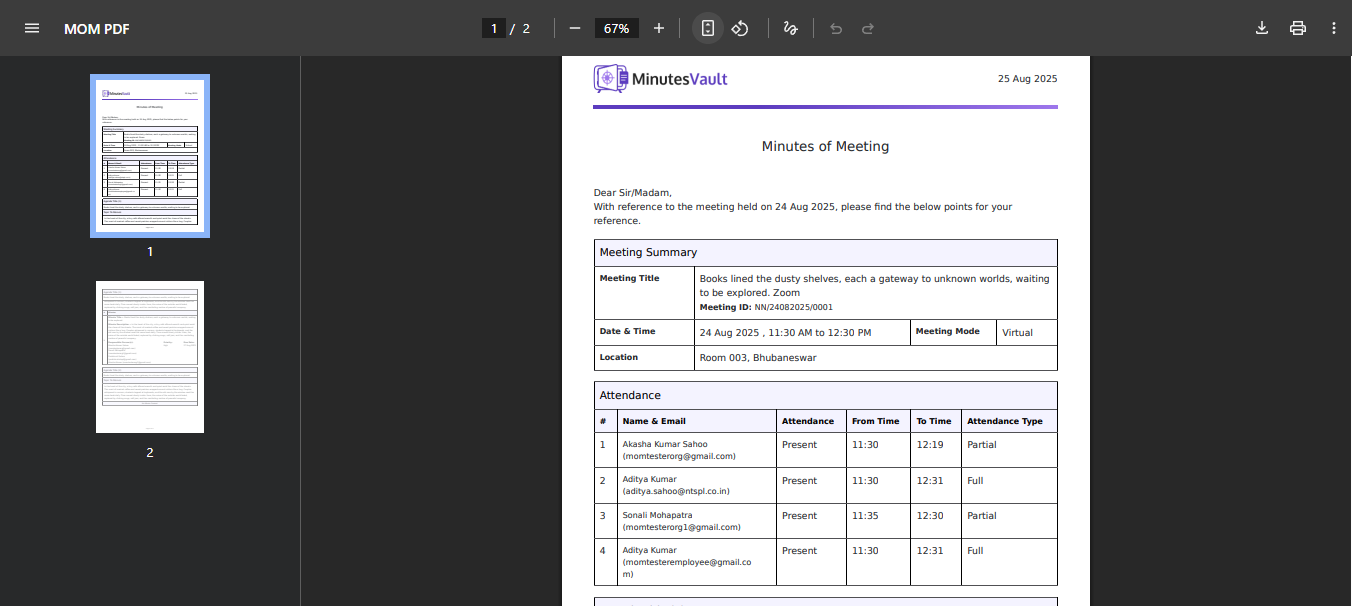
The Minutes is Downloaded in another tab.
You can access the Timeline Page after a meeting is closed. You can also go to the Timeline Page directly using the Action Button of that meeting.

Here you can view all meetings displayed in a timeline format.
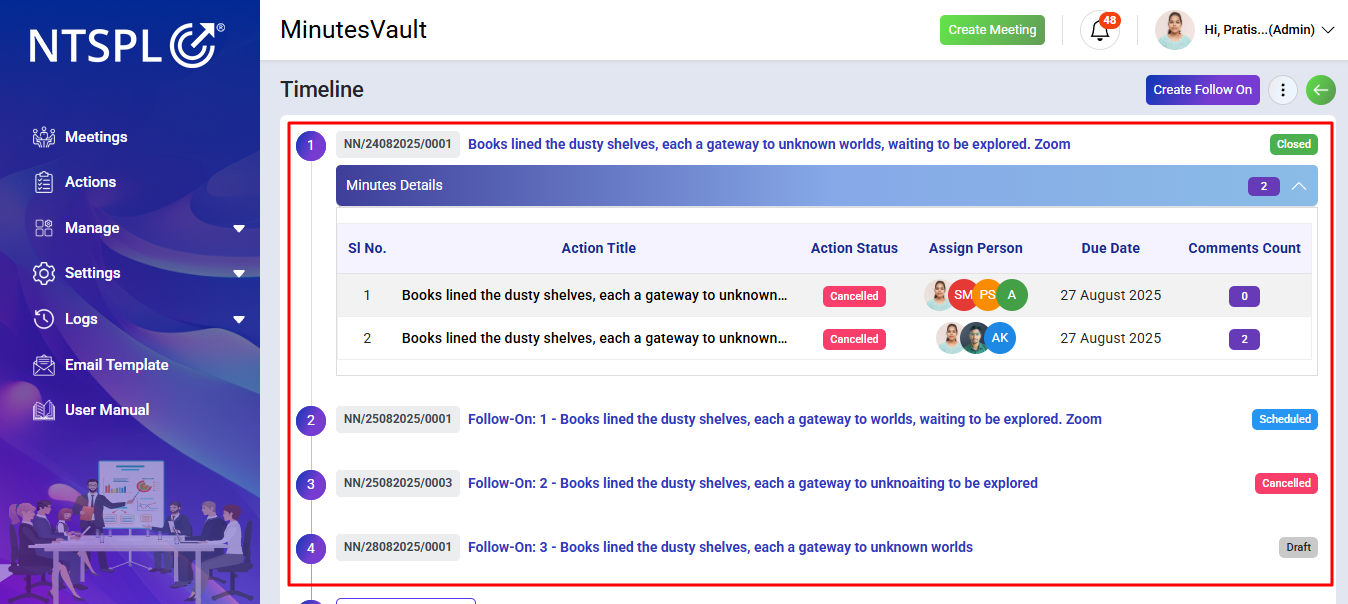
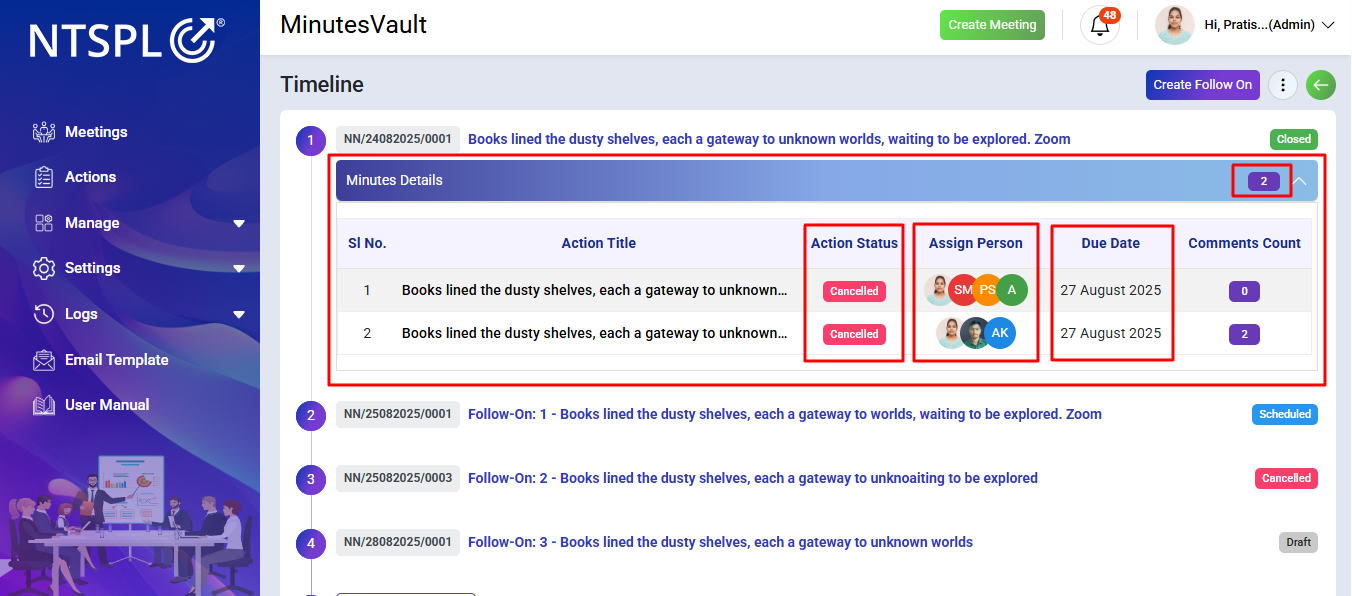
For each meeting, you can see the Minute Title, Due Date, Assigned Person, the Action Status, and also how many Actions are there for that meeting.
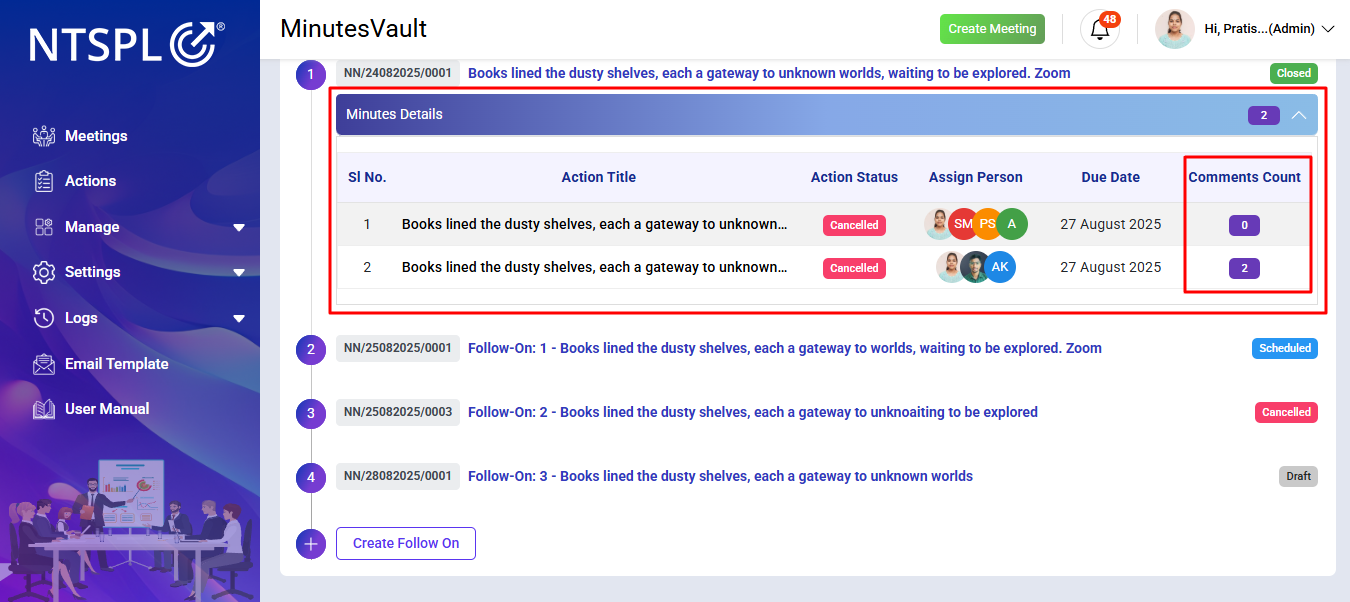
You can also check how many Comments are added to each Action.
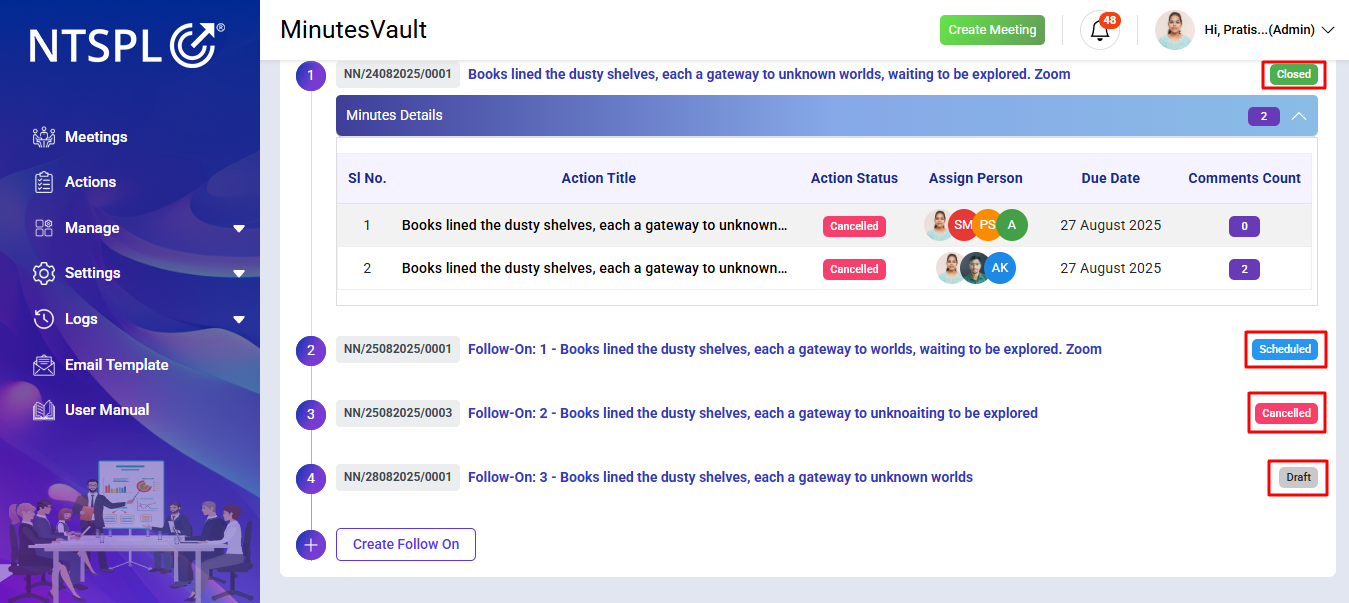
The Meeting Statusis also shown.
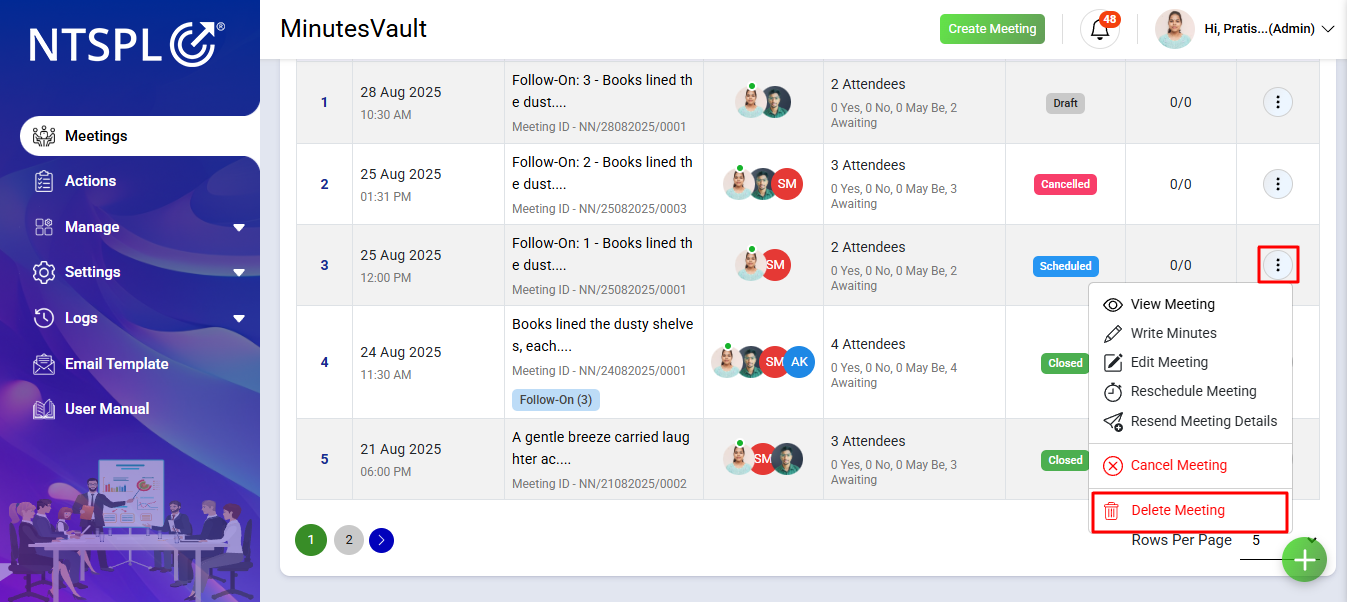
From the Meeting List, open the Action Menu of the meeting that you want to delete.
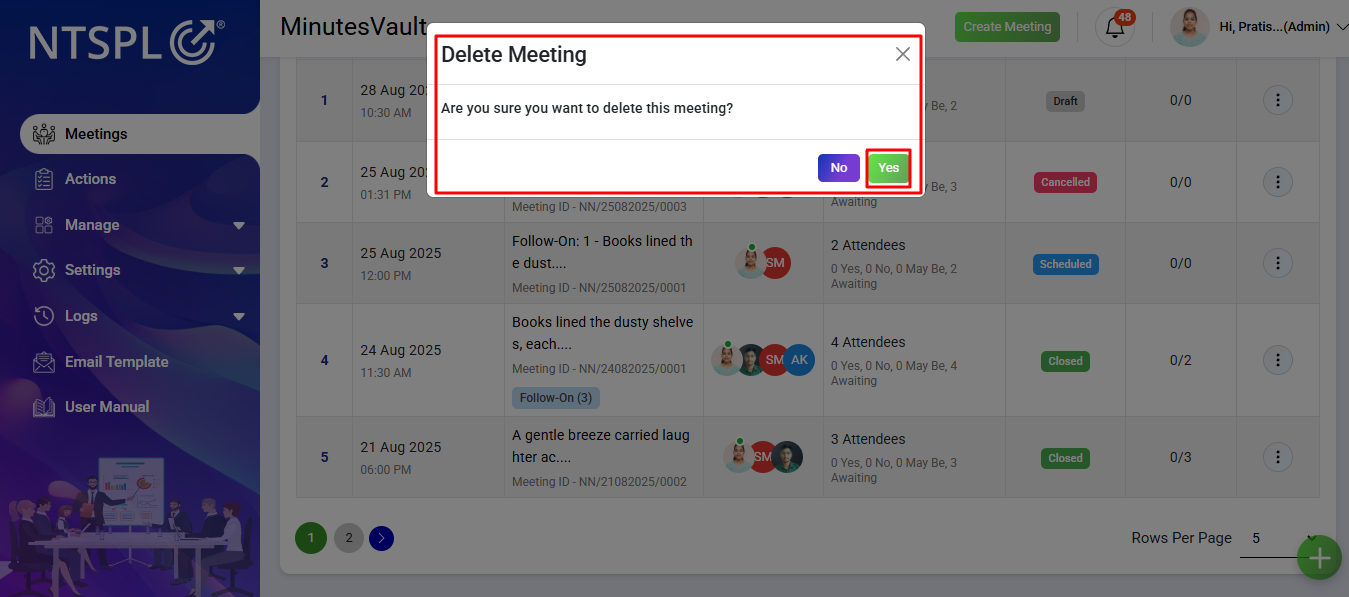
A confirmation modal will appear. Click on the Yes button to confirm and delete the meeting.
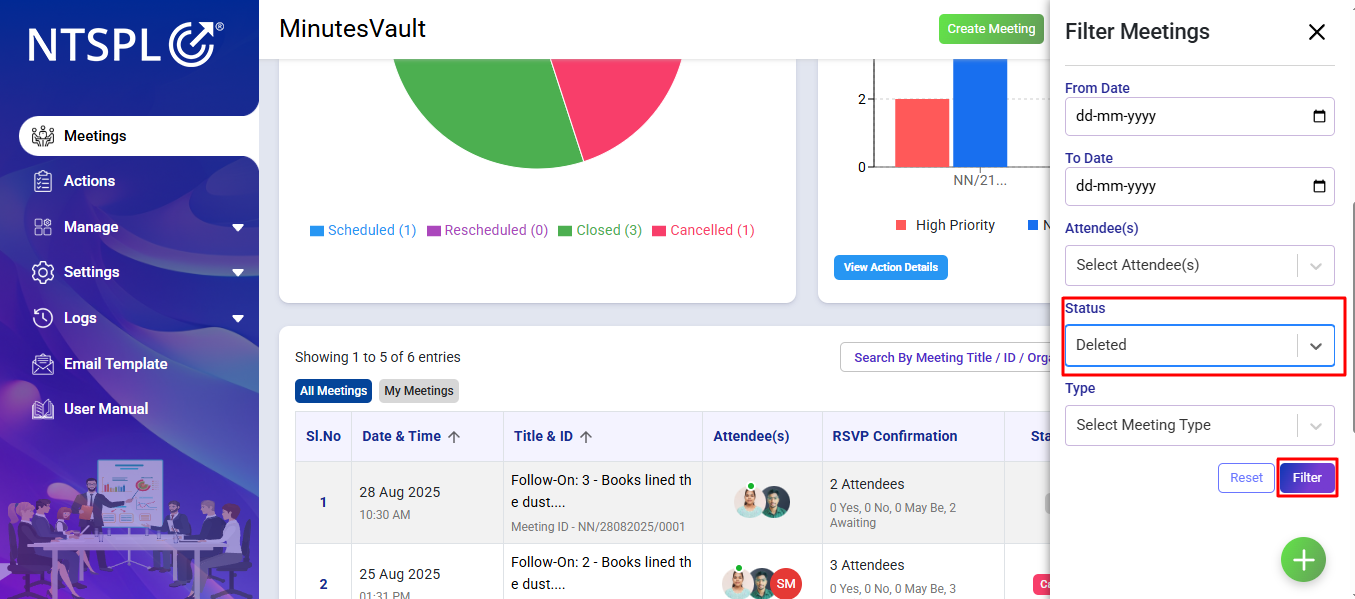
Deleted meetings are not permanently removed. You can find them in the Meeting List by applying the Status Filter as Deleted.
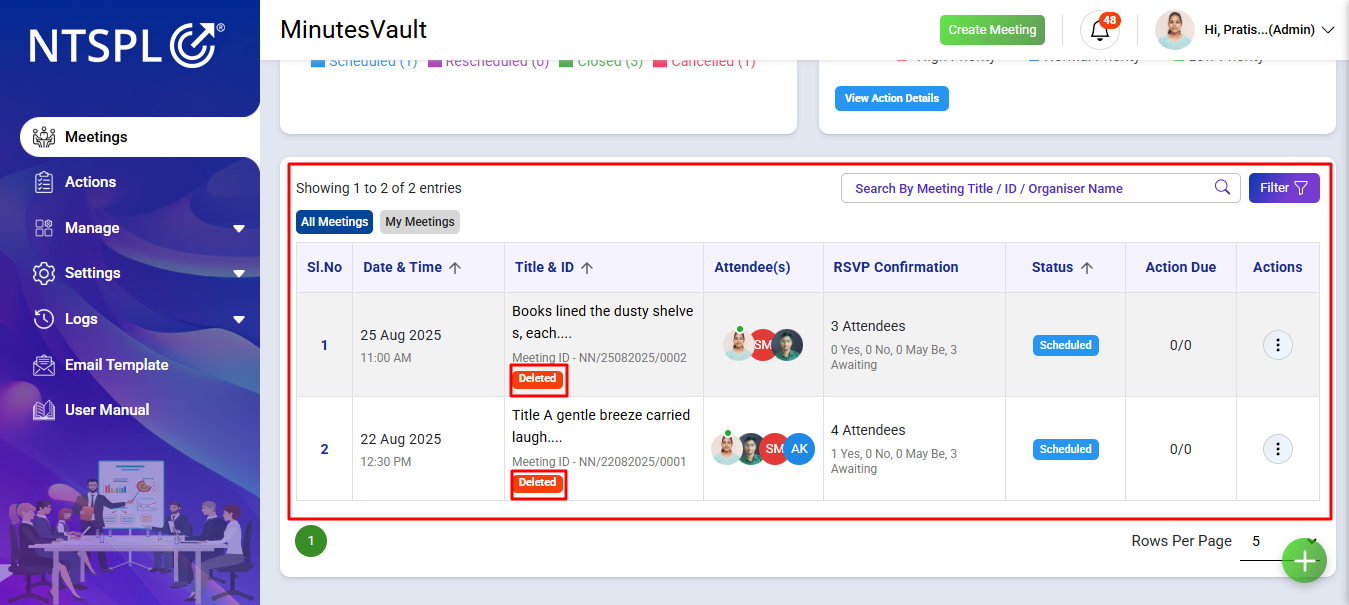
You can view the list of all Deleted Meetings in one place.
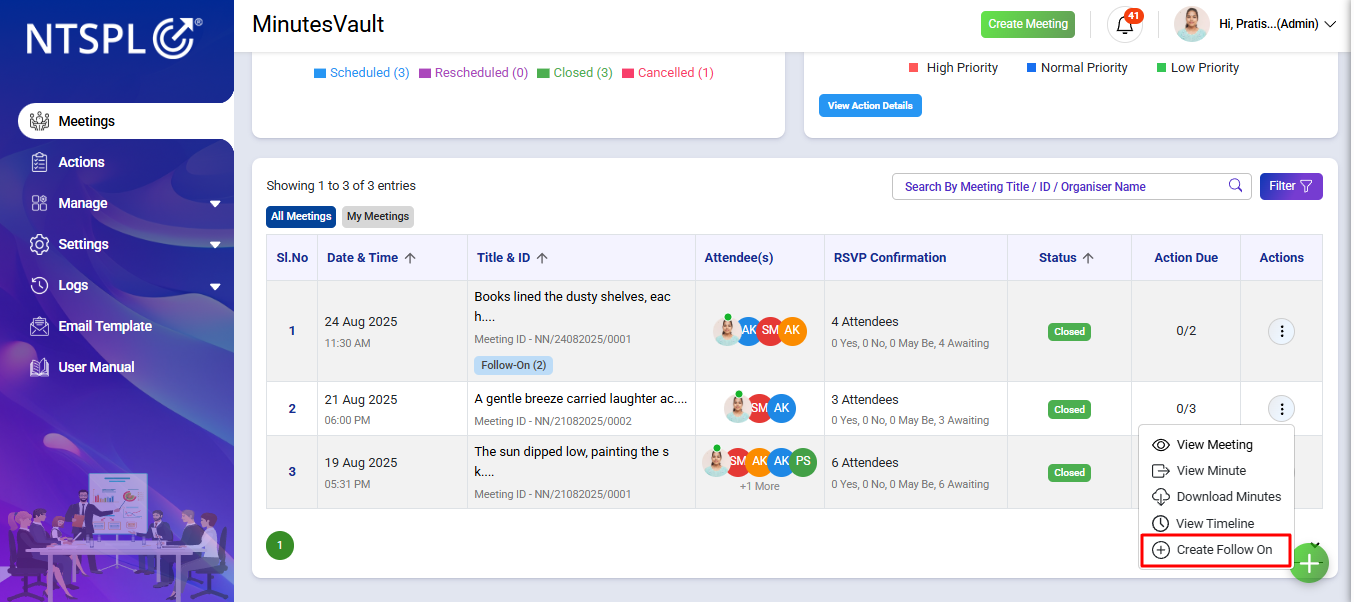
From the Dashboard Click on filter button.
Filter the status as closed for the meetings.
Click on the Create Follow On Option under Action menu.
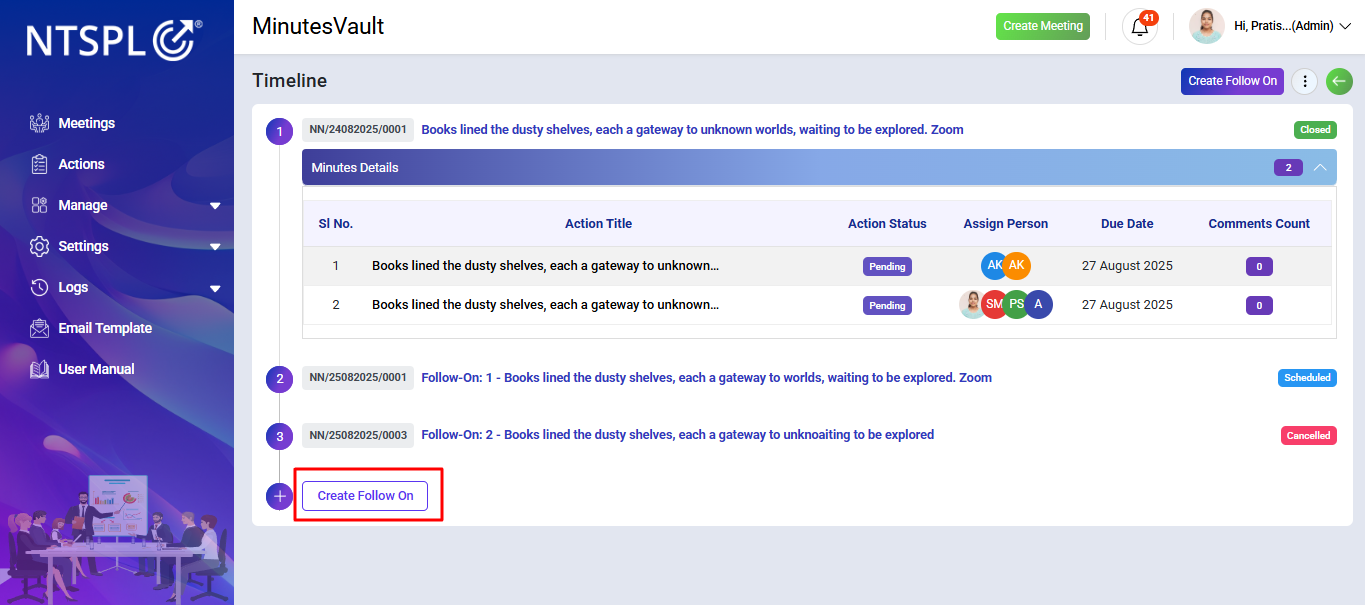
Click on the Create Follow On.
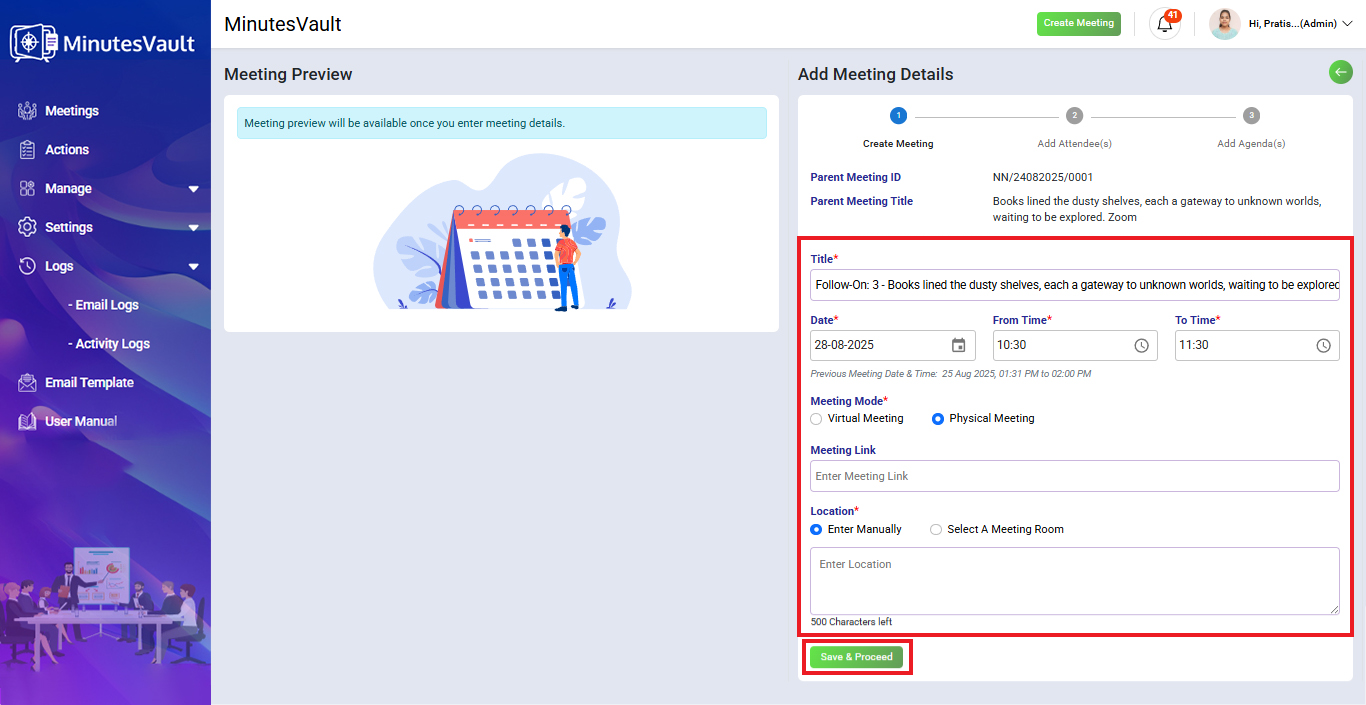
Enter Follow on meeting Title and other details and Click on the Save & Proceed.
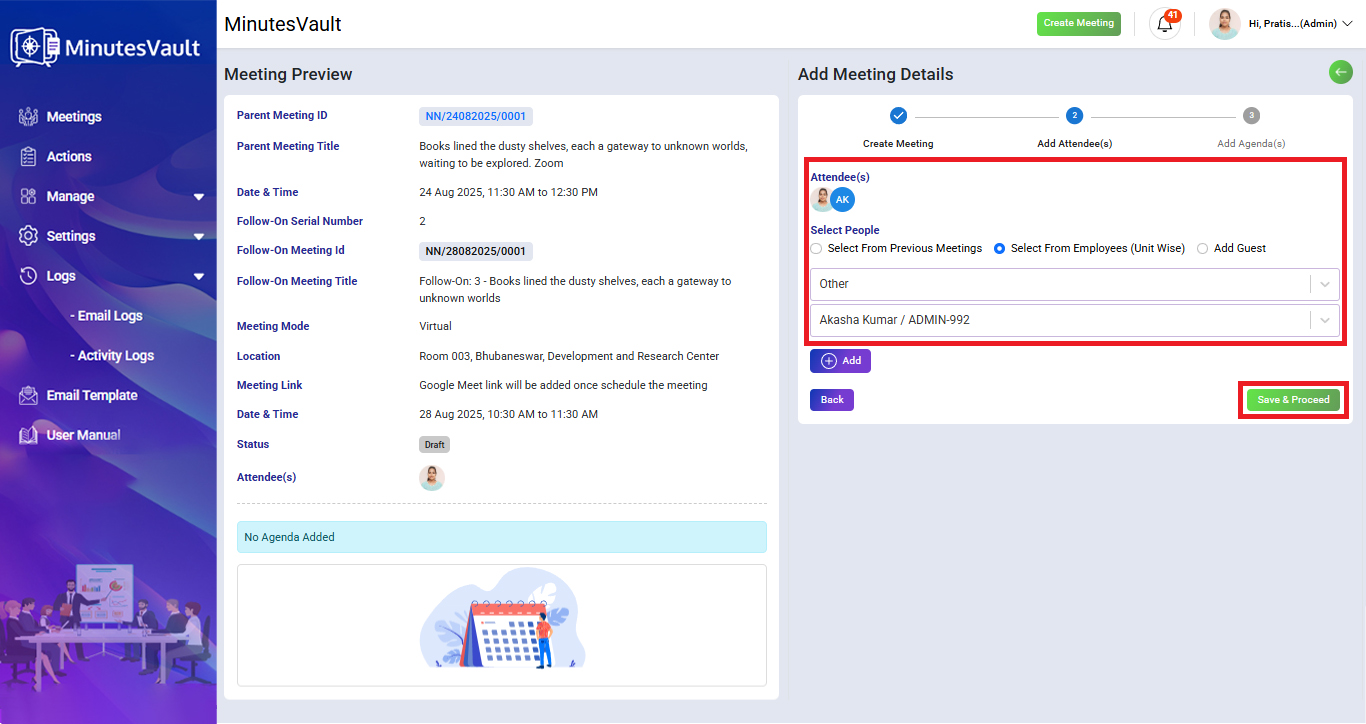
Select and Add Attendees for the meeting. Then Click on Save & Proceed.
Click on the Add Agenda button to open the agenda modal. By default, a follow-on agenda discussion is created with the title Follow-up Agenda Discussion.
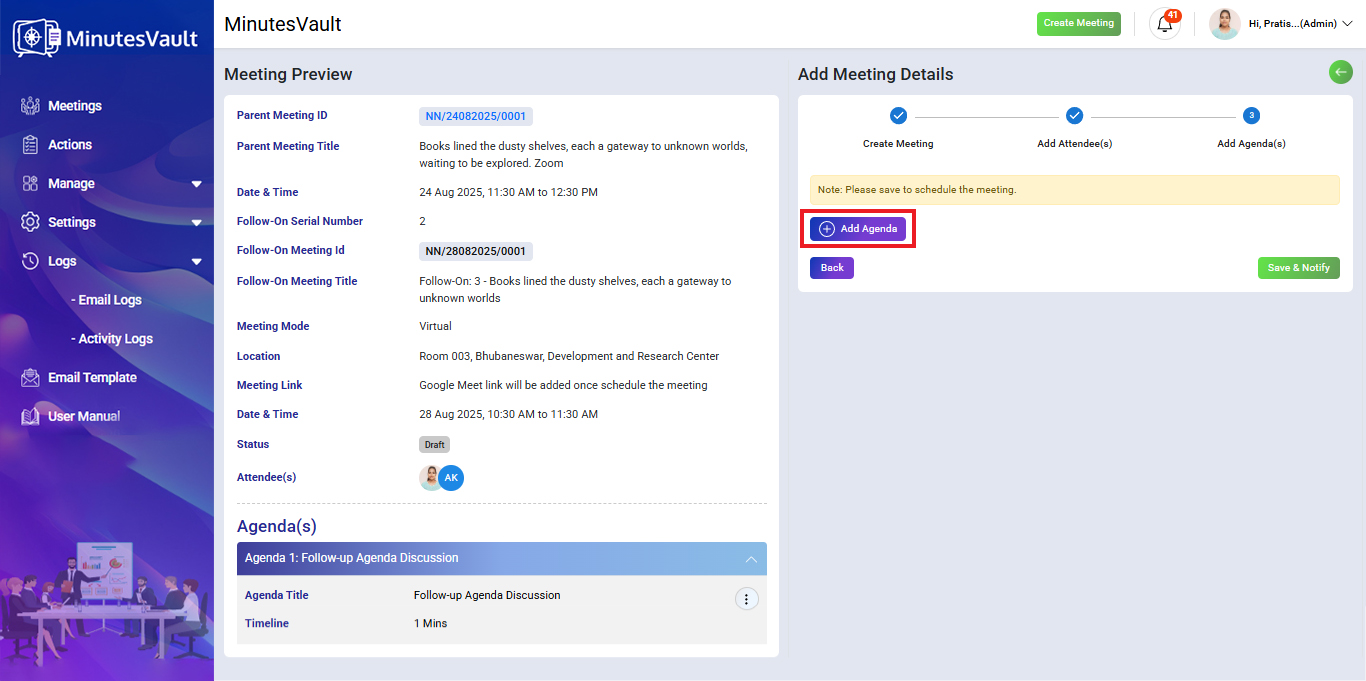
In the agenda modal, you can enter the Agenda Title, Description, and optionally set an Agenda Time.
Enter Agenda title and other details. Then Click on Submit to add agenda for follow on meeting.
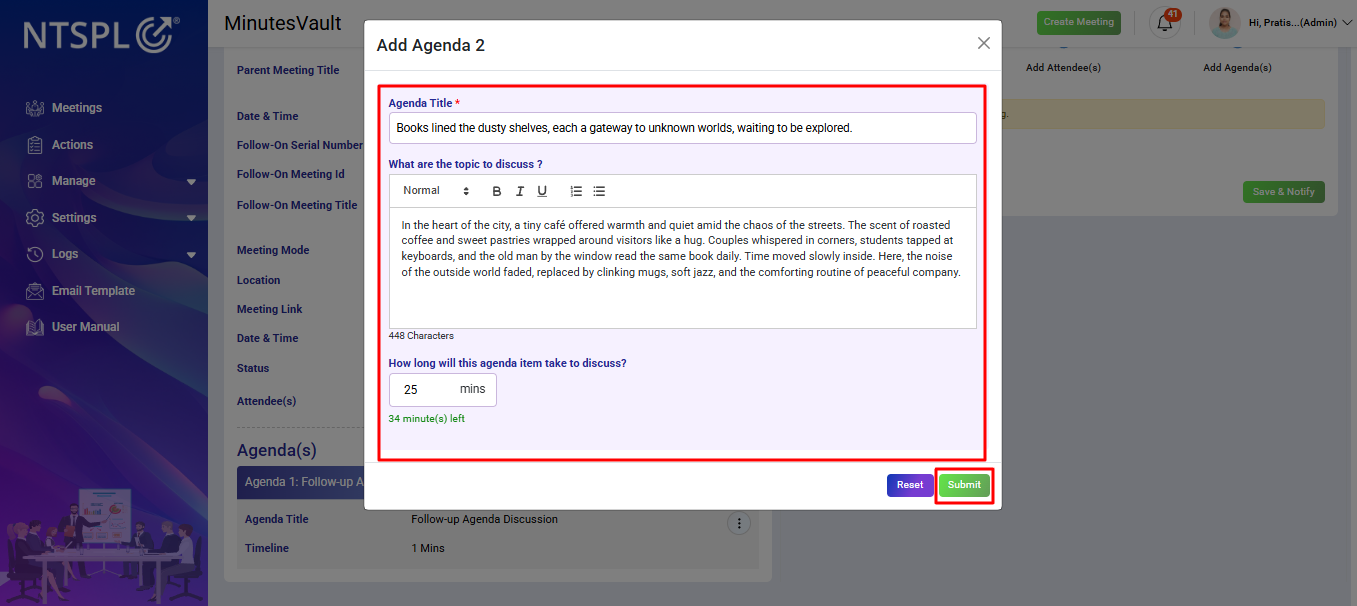
Click on Save & Notify to complete the creation process of follow on meeting.

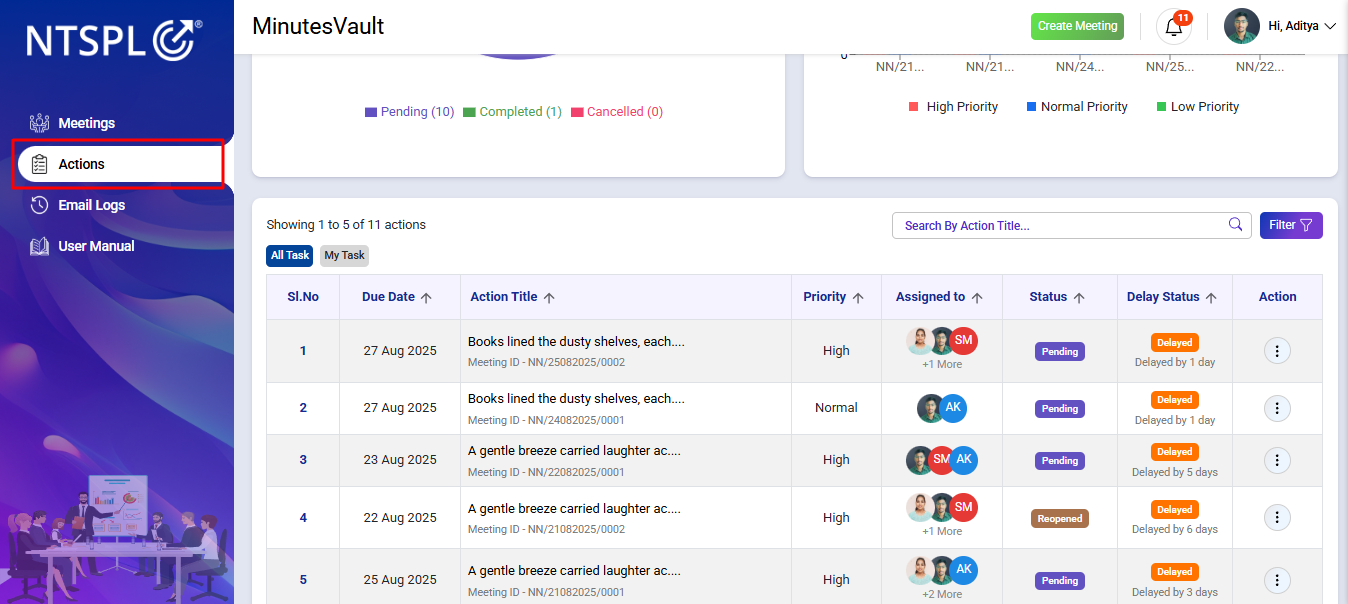
Click on the Action Button.
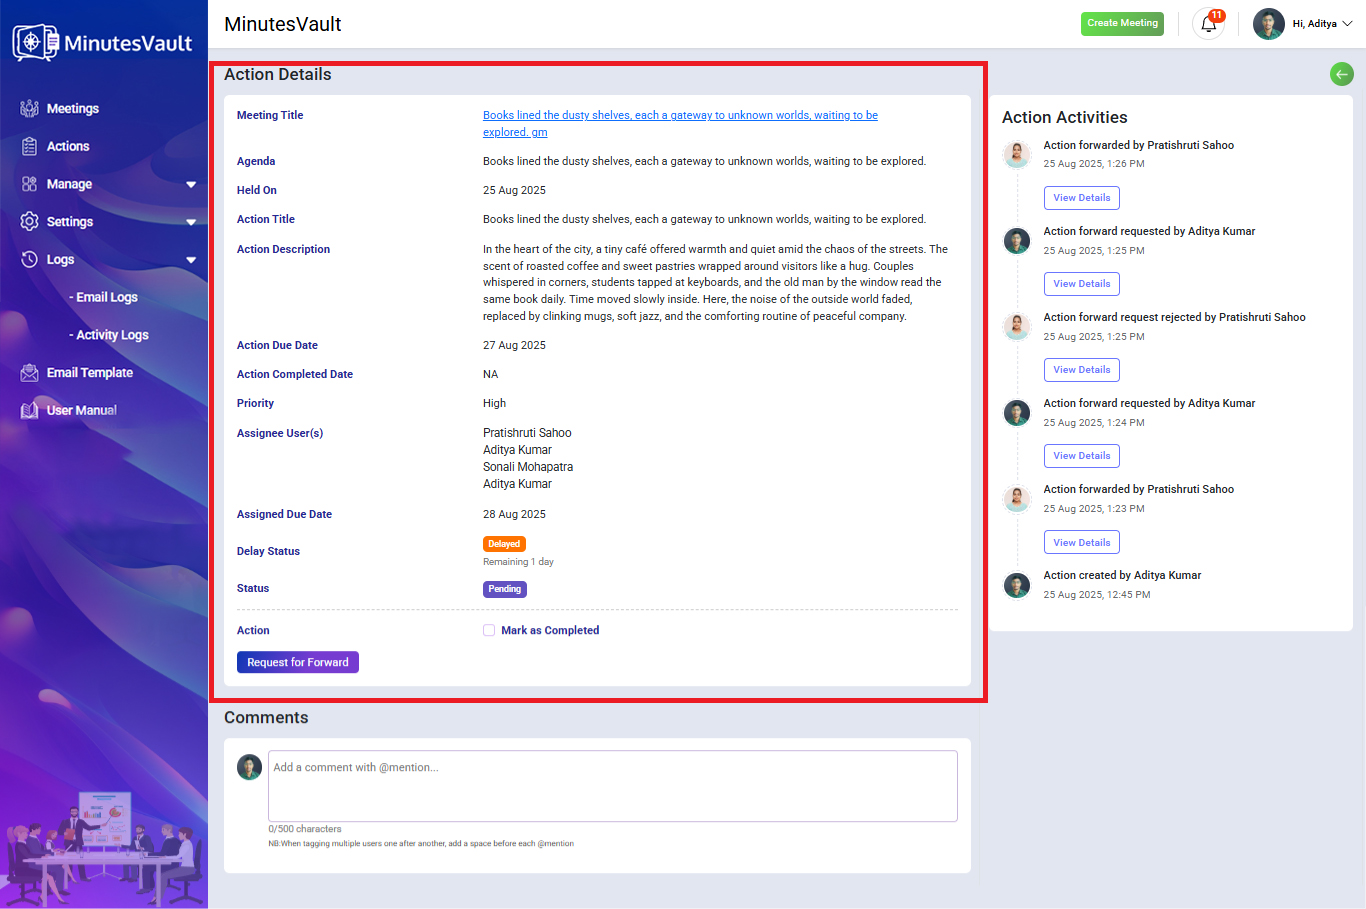
Click on the View Action Details under the action menu.
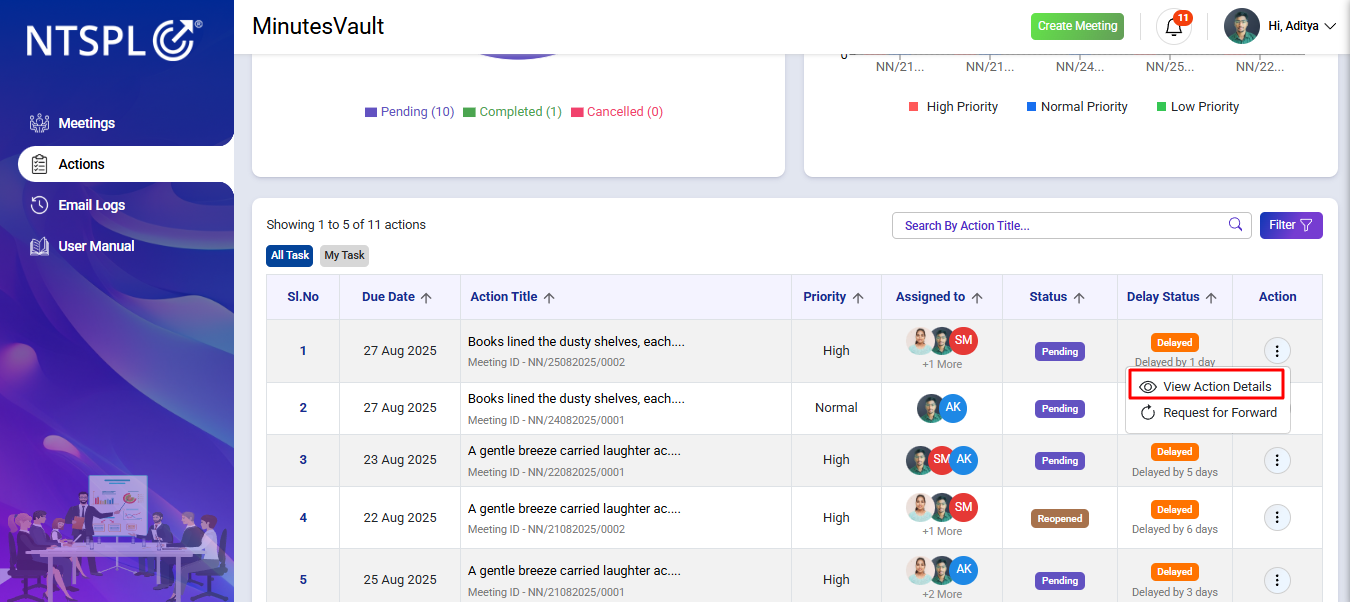
It will redirected to View Action details page.
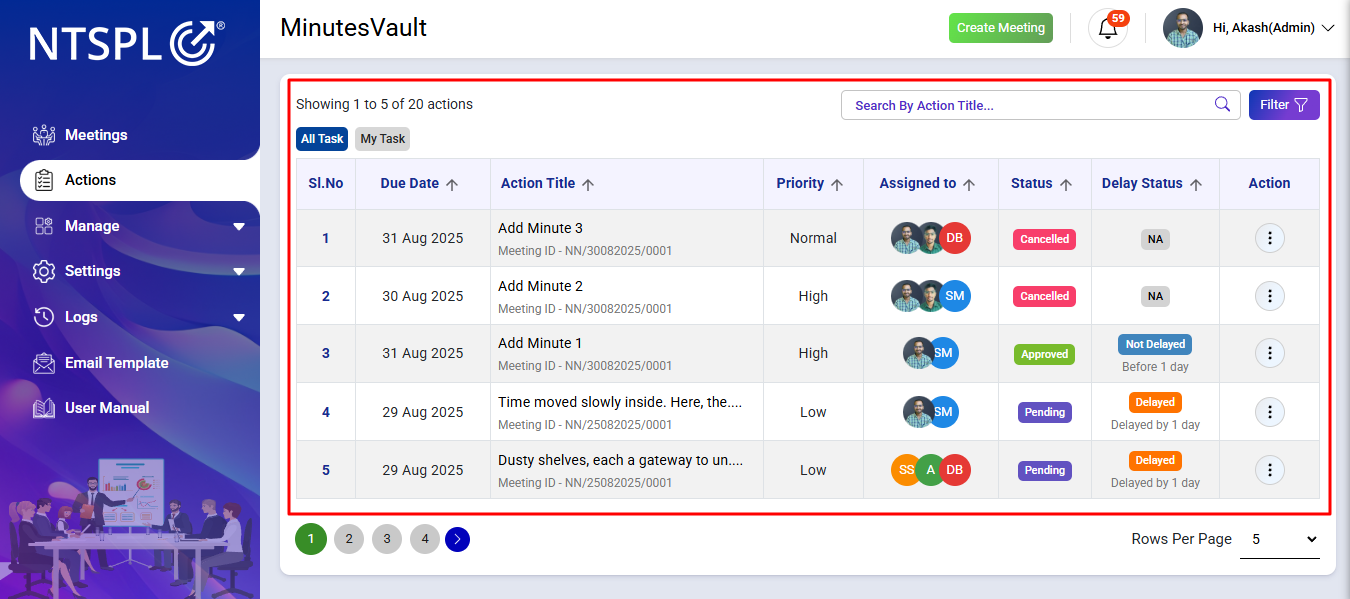
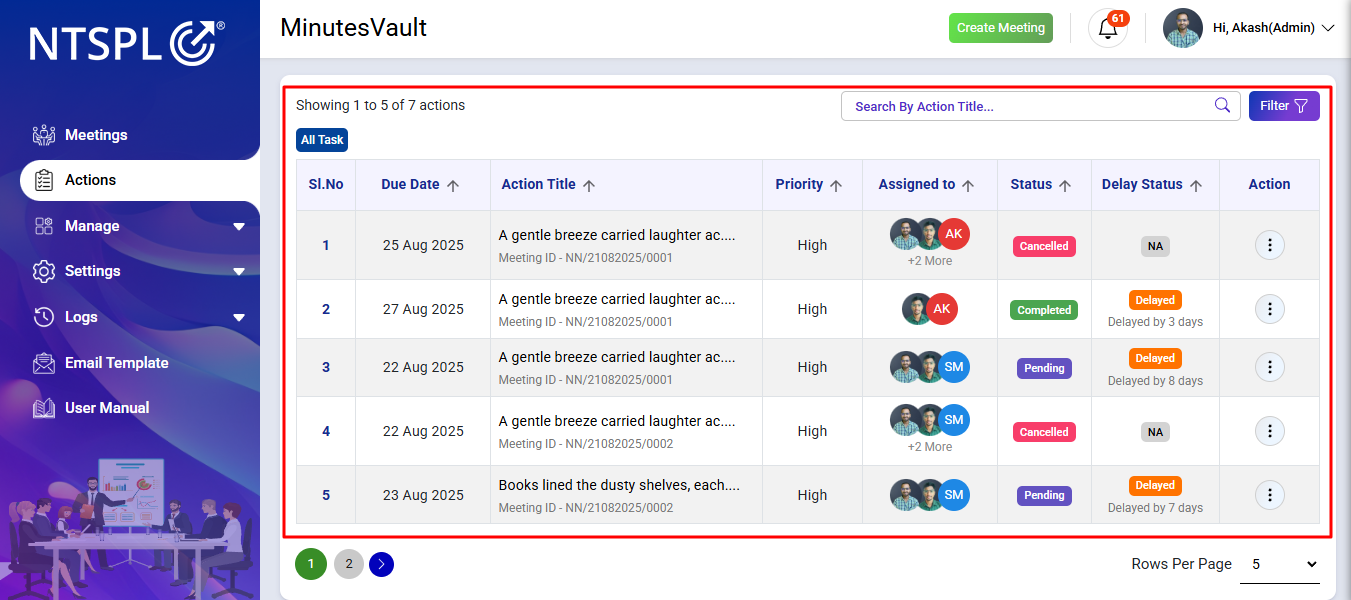
In the Action section, you can switch between two views:

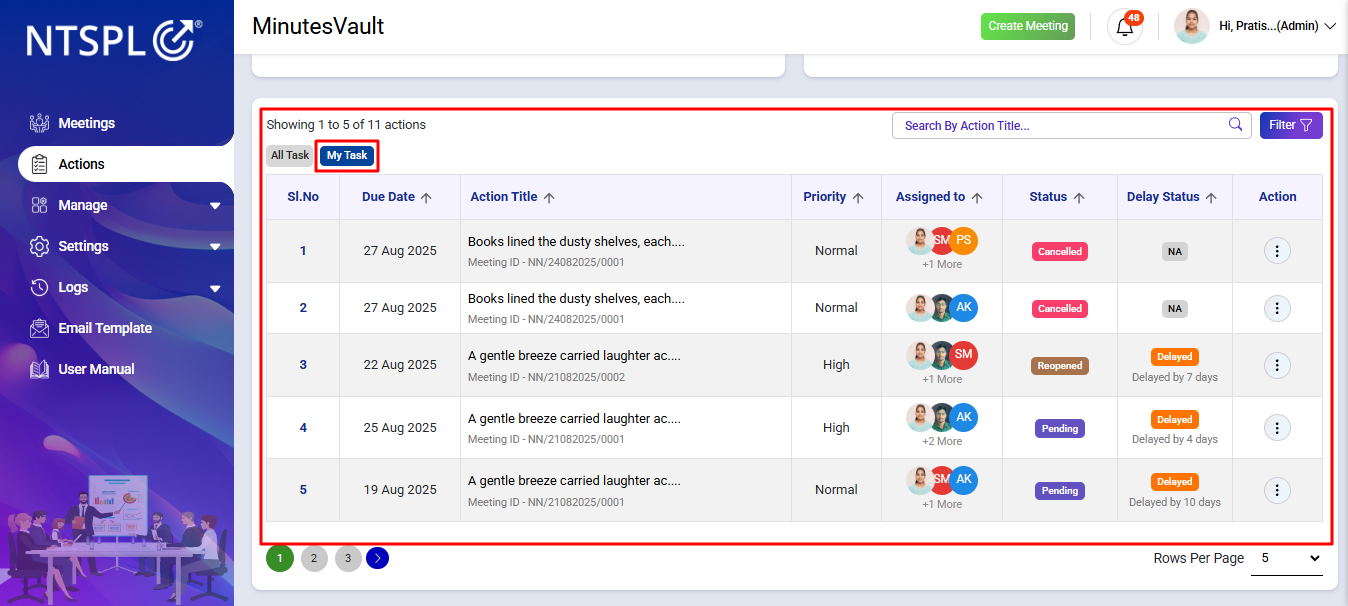
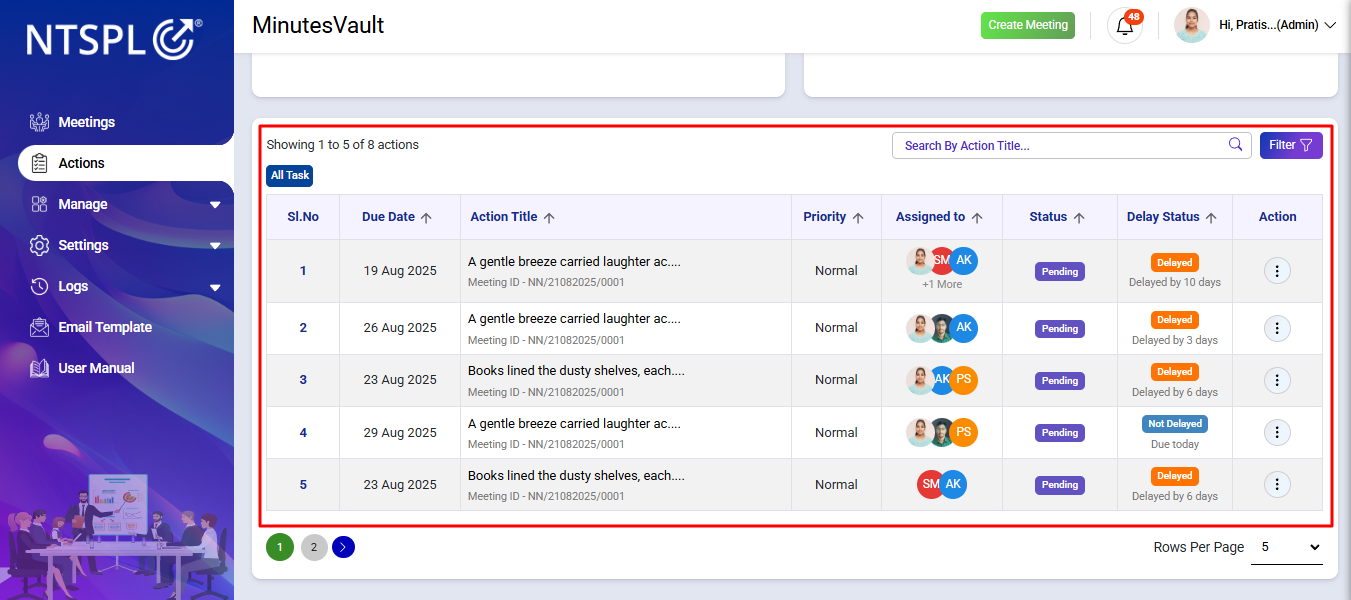
Click on Total Due to view all pending due actions.

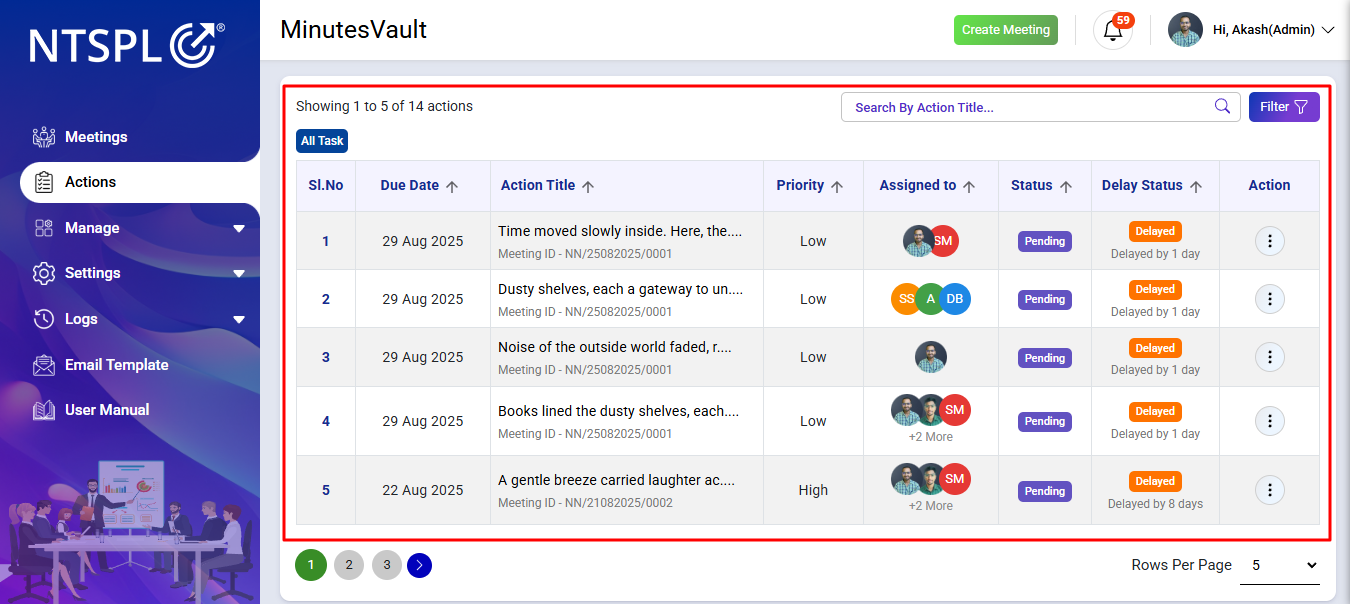
Click on All to view all actions regardless of status.
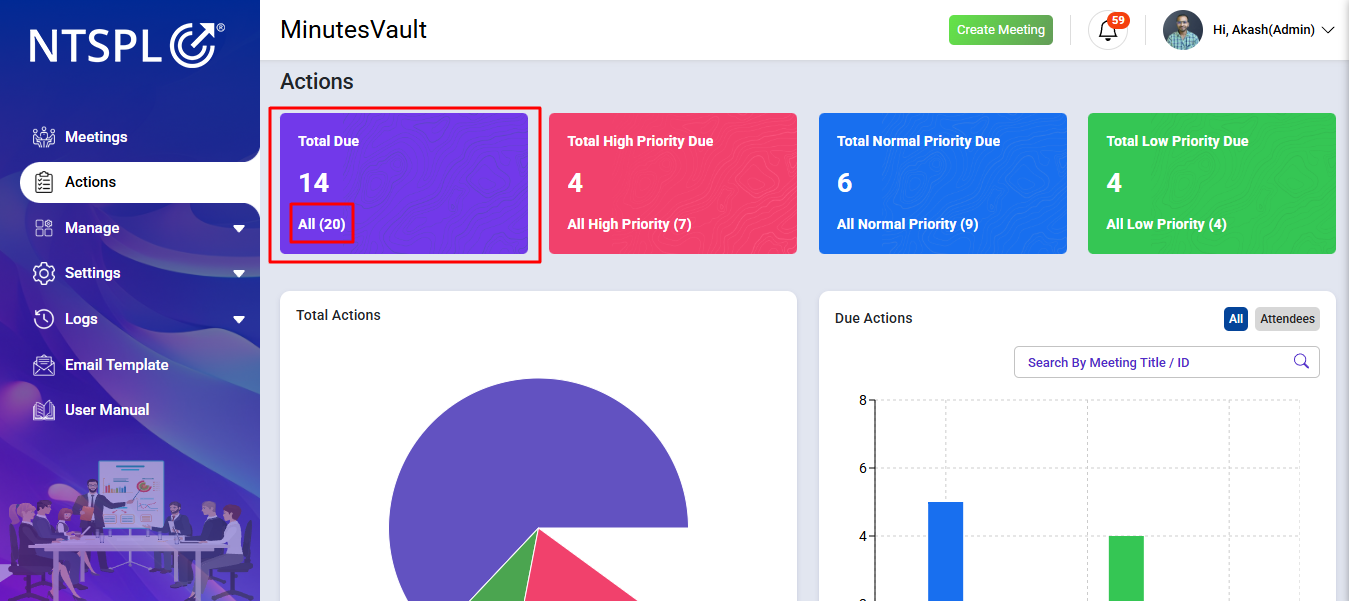
Click here to see all pending high priority actions.


Click here to see all actions marked as high priority.

Click here to see all pending normal priority actions.
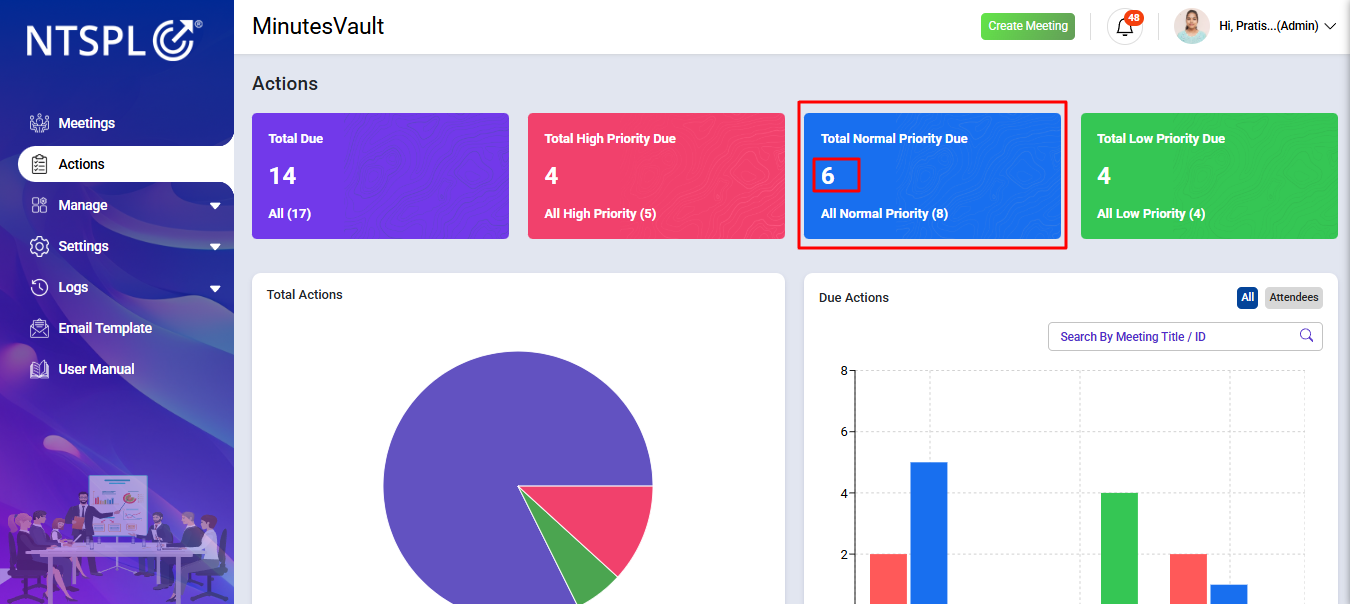
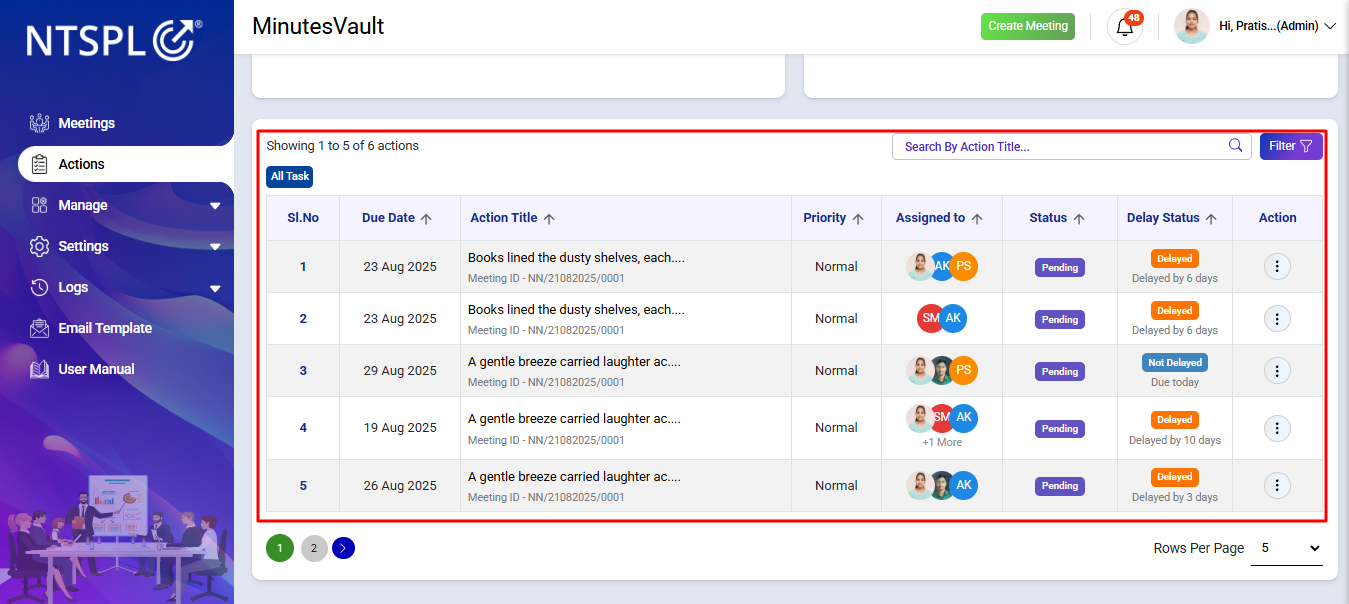
Click here to see all actions with normal priority.

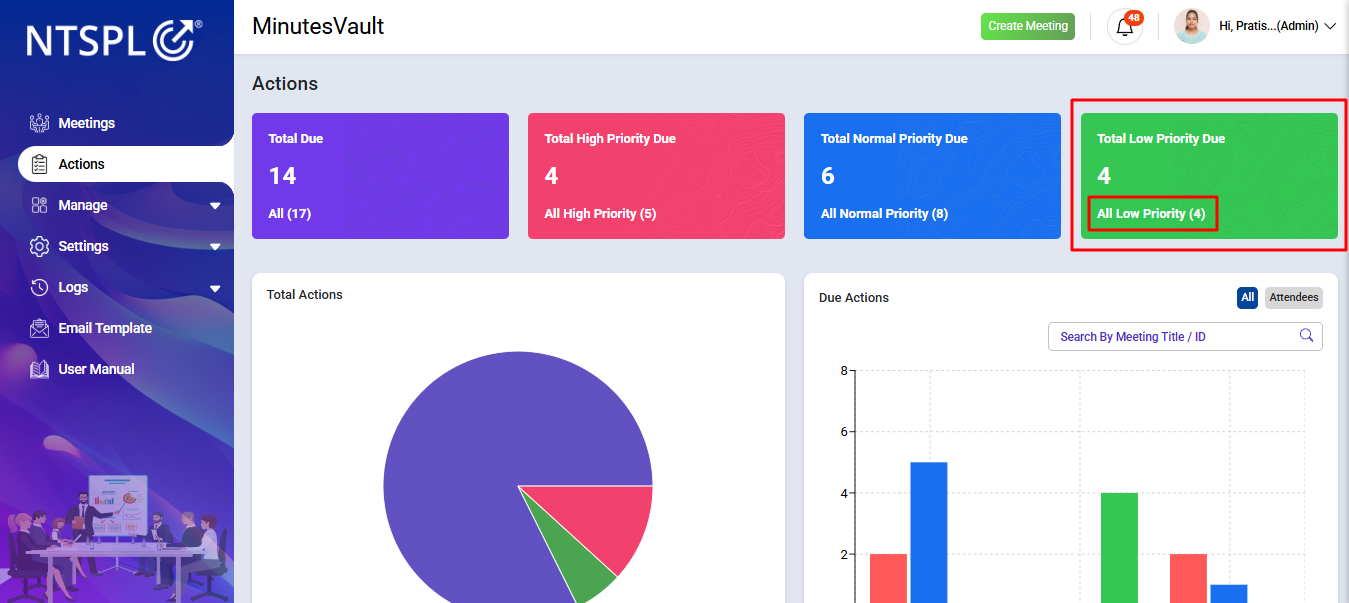
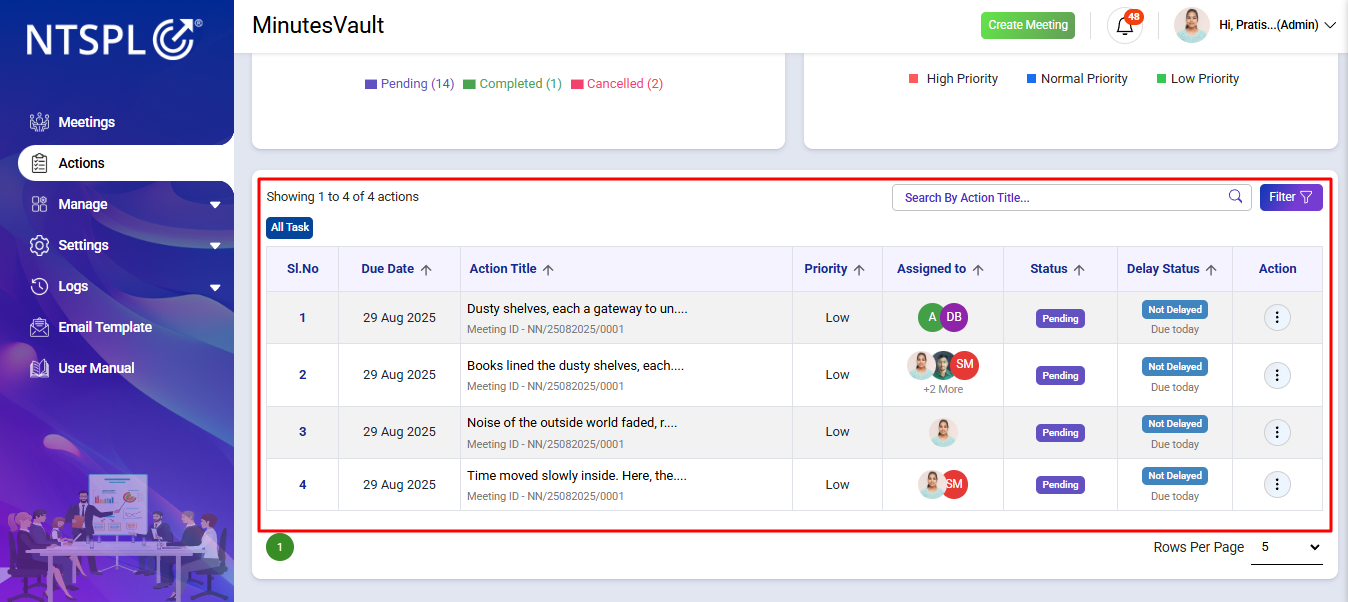
If available, click here to see pending low priority actions.

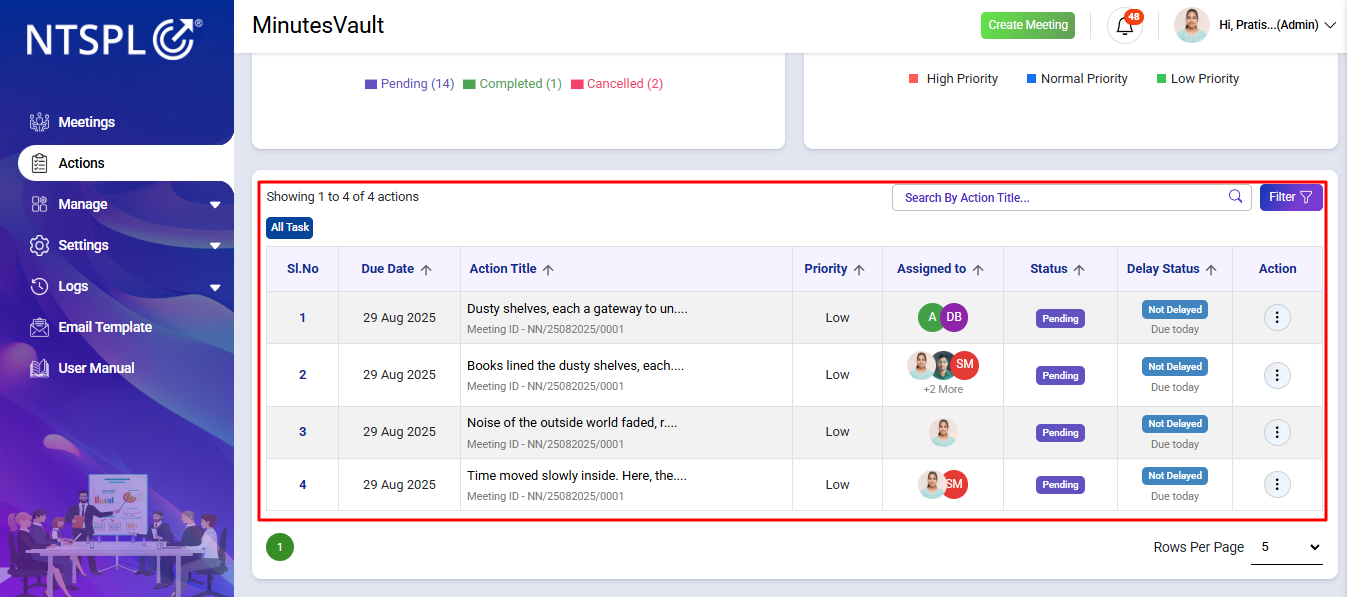
Click here to see all low priority actions.
The Meeting-wise Action Chart Bar shows how many actions are due in each meeting. This helps identify which meetings have the highest number of pending actions.
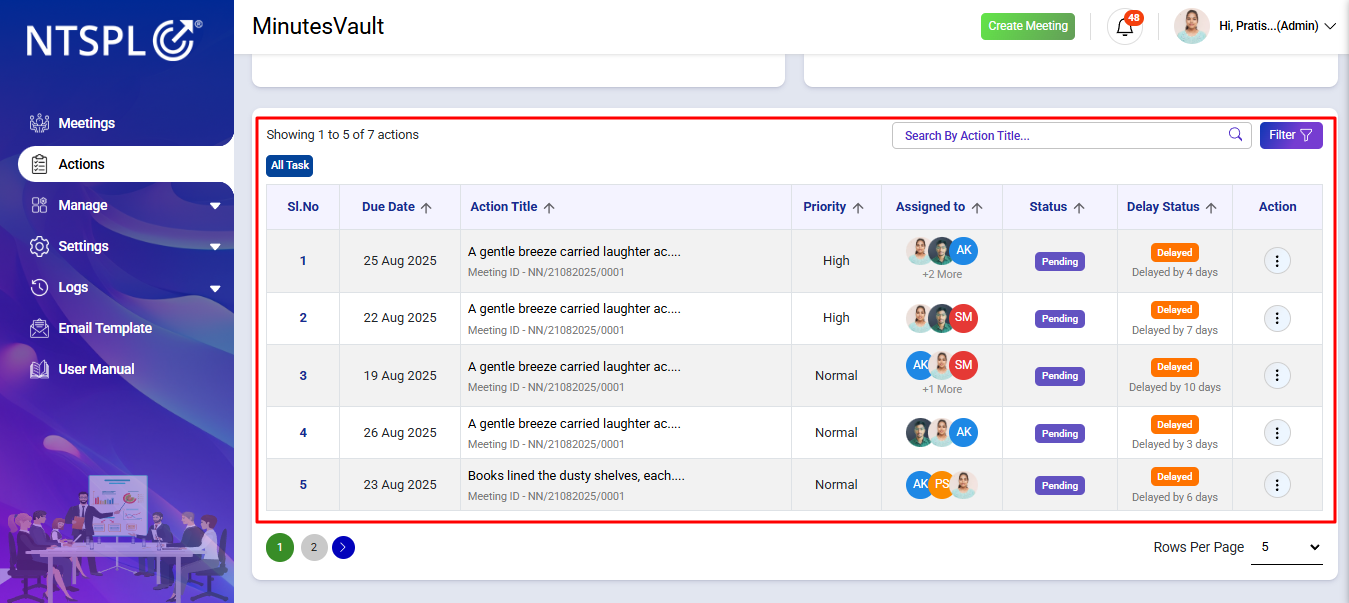
Tip: You can click on any bar to view the detailed list of due actions for that meeting.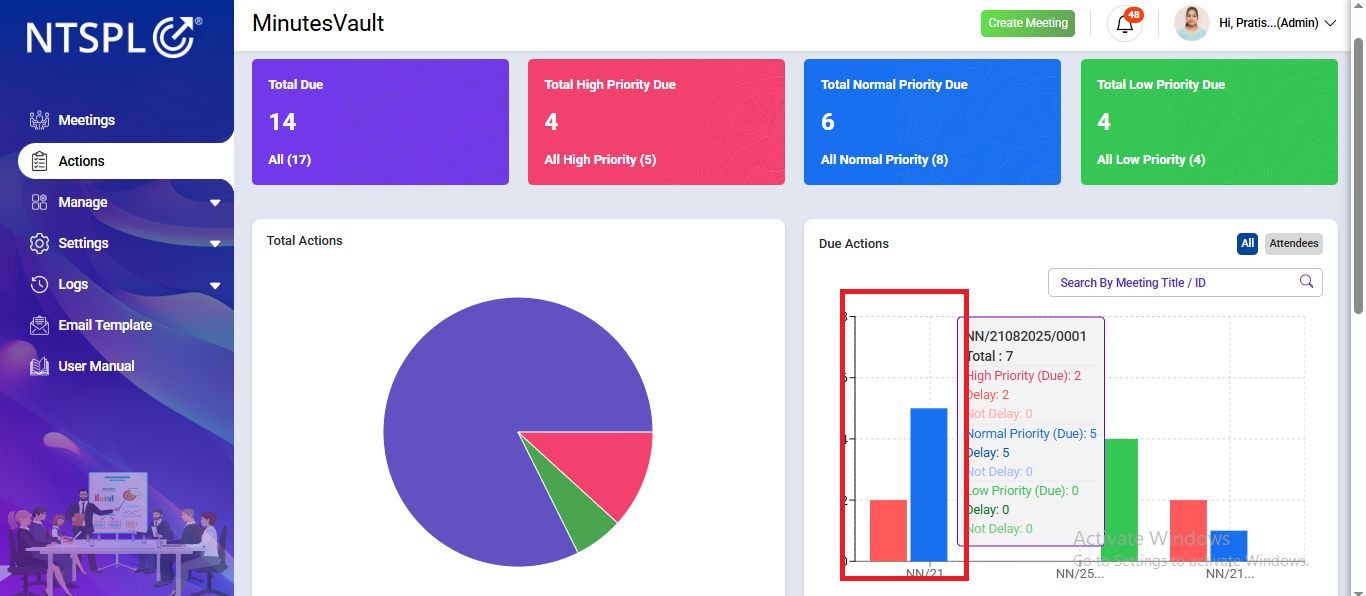
The Attendee-wise Action Chart Bar shows how many actions are due for each responsible attendee. This helps track individual workloads and identify which attendees have more pending actions.
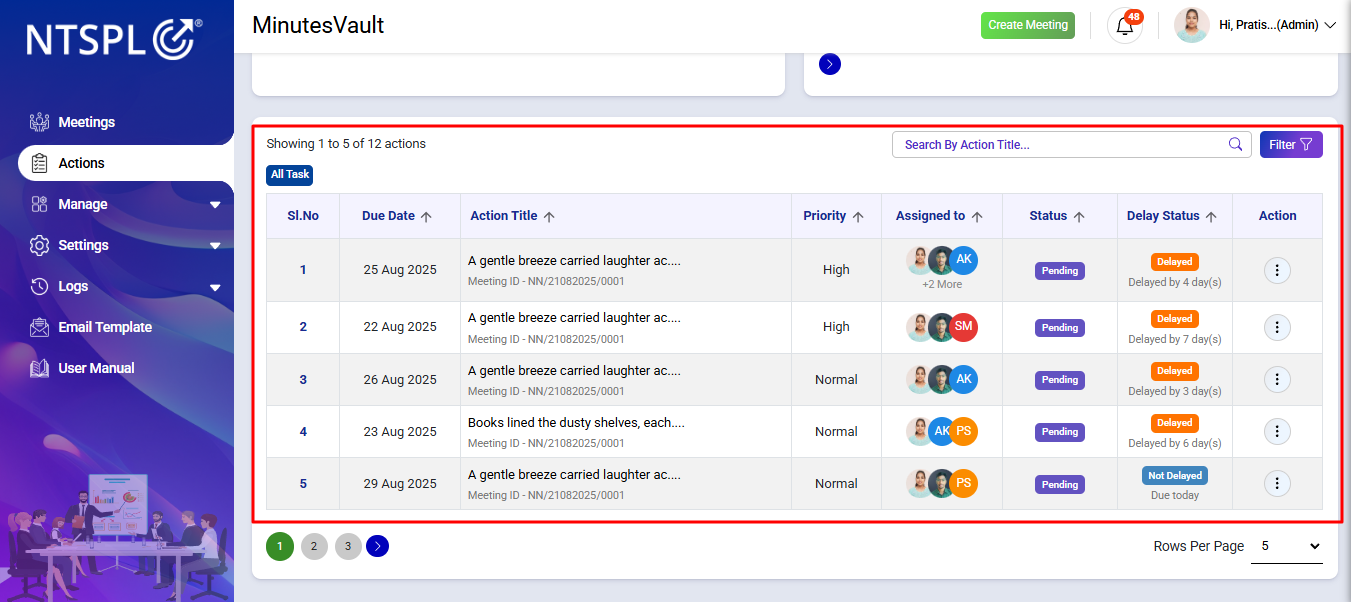
Tip: You can click on any bar to view the detailed list of due actions assigned to that attendee.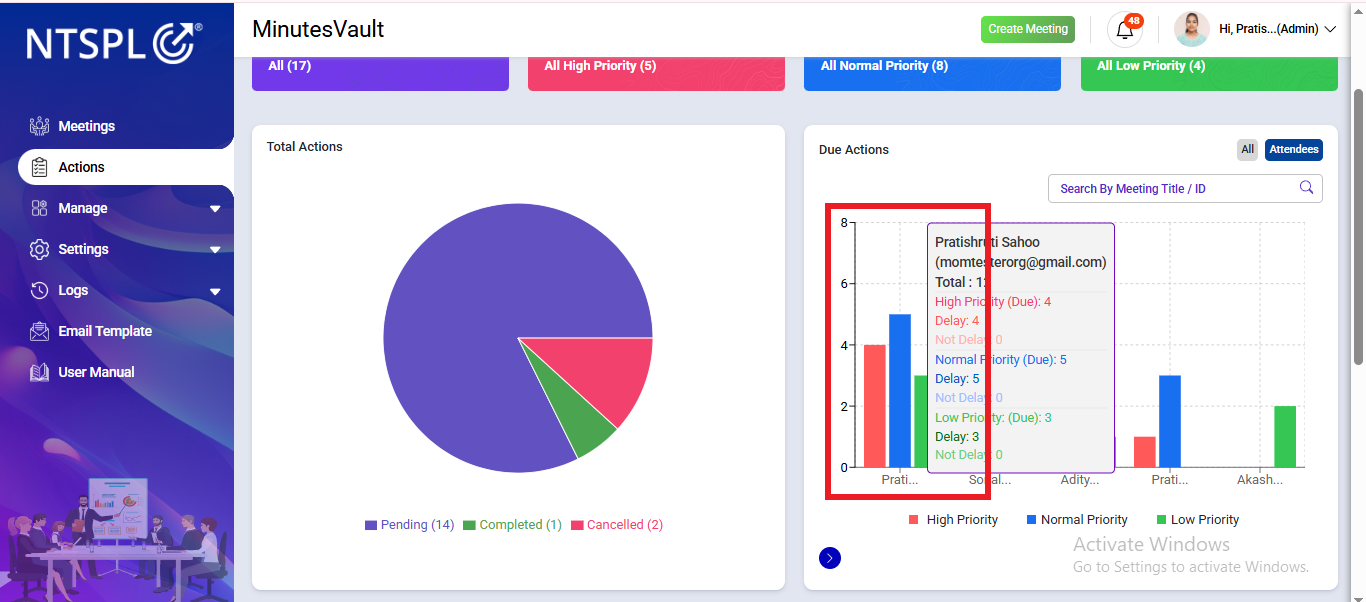
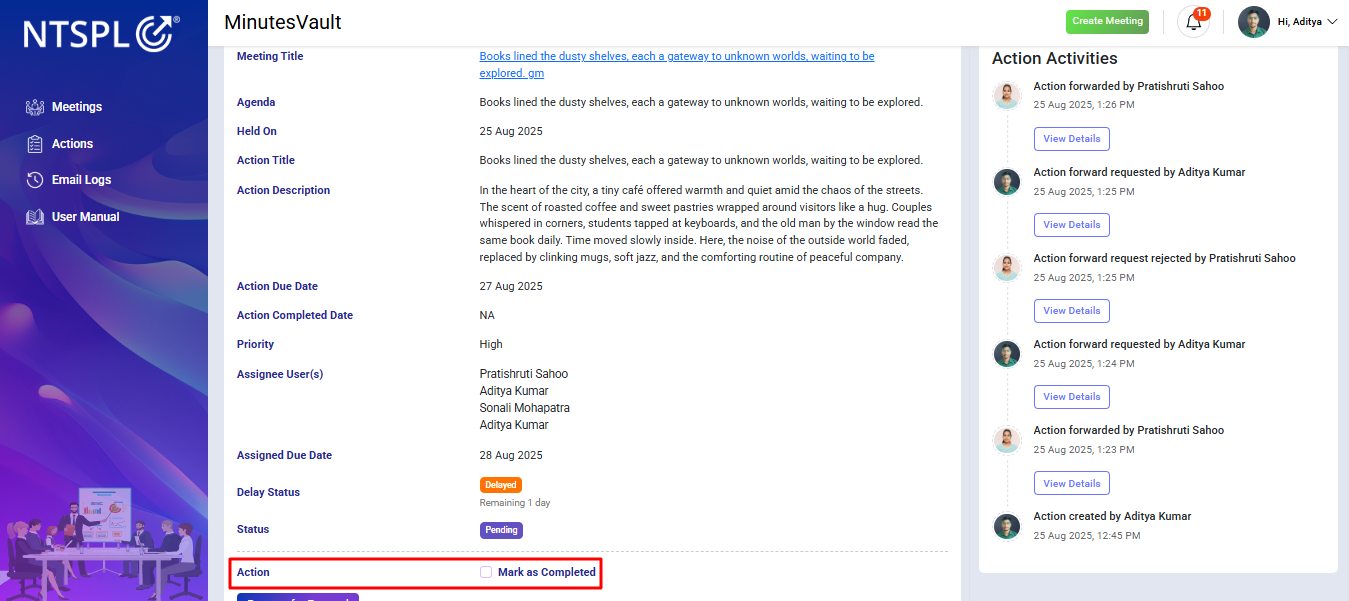
Click on the Action Button.
Click on the View Action button under the action menu.
Check the Mark as completed check box.
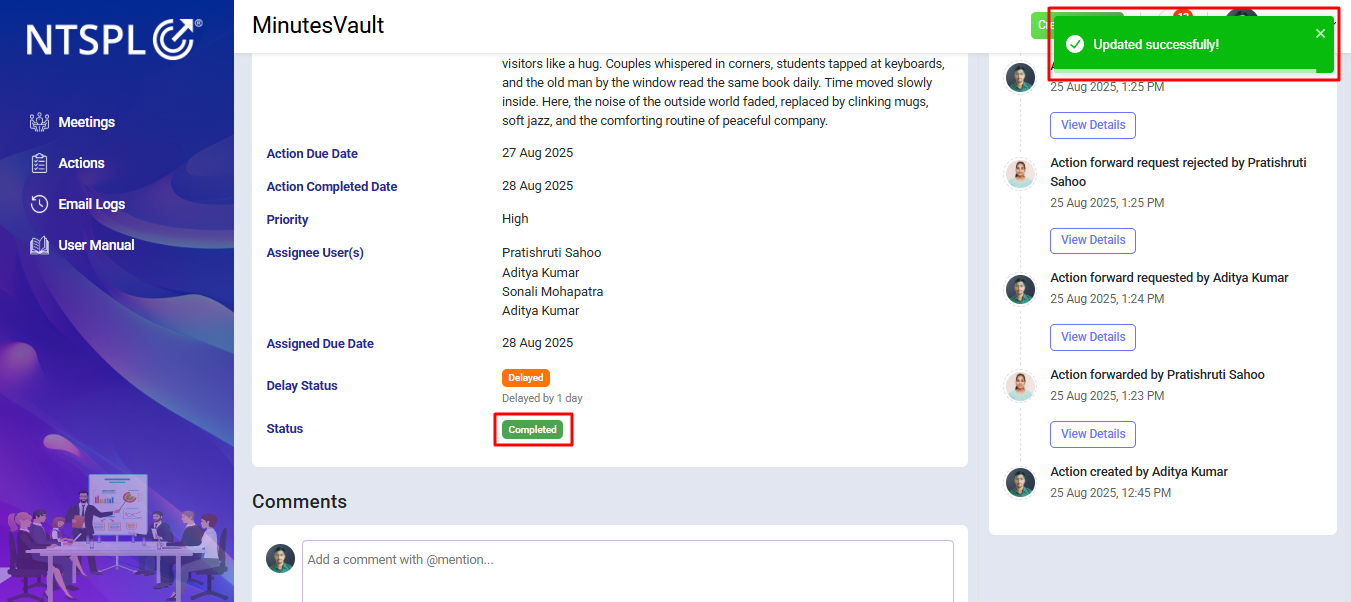
Enter the Remark & update.

Action is completed.
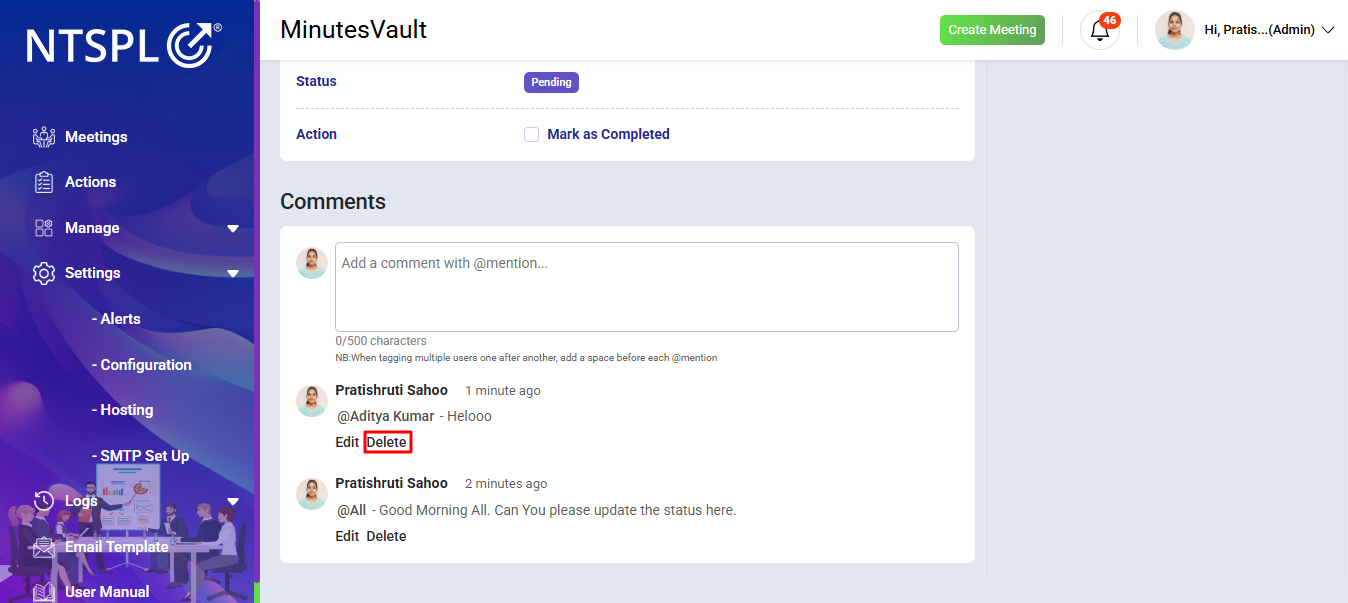
In the Comment Section, you can add notes or messages regarding the action.
@UserName), the comment will be sent only to
that specific person.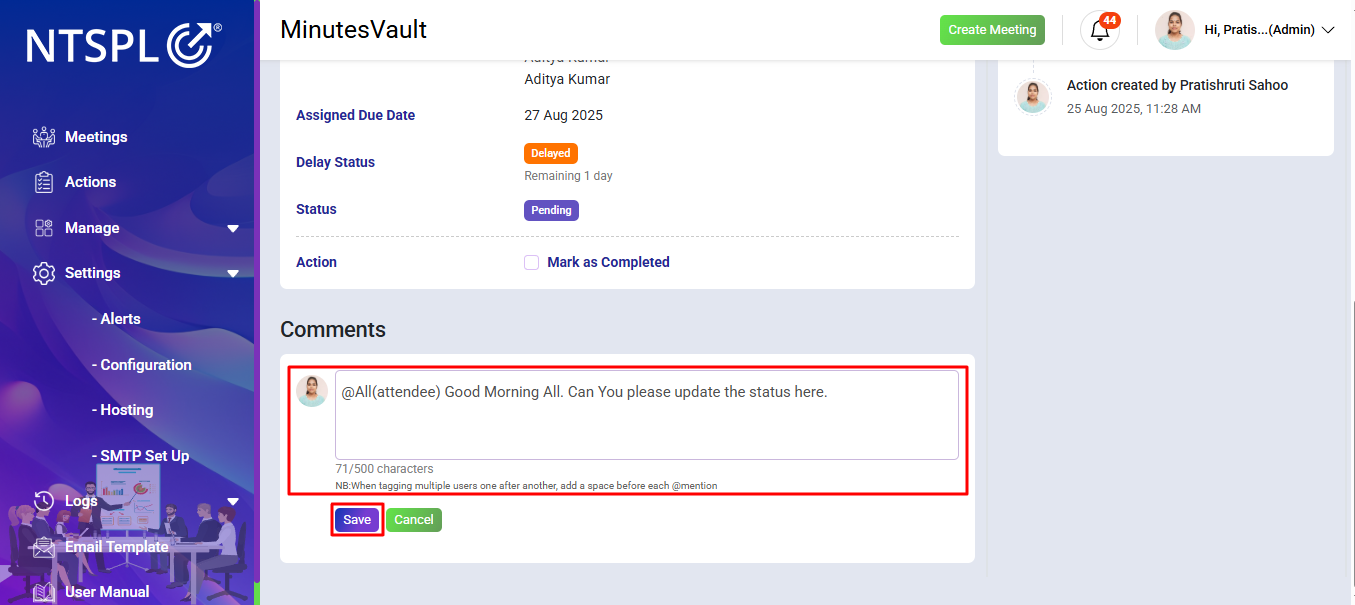
You can edit your previously added comments if any update or correction is required.
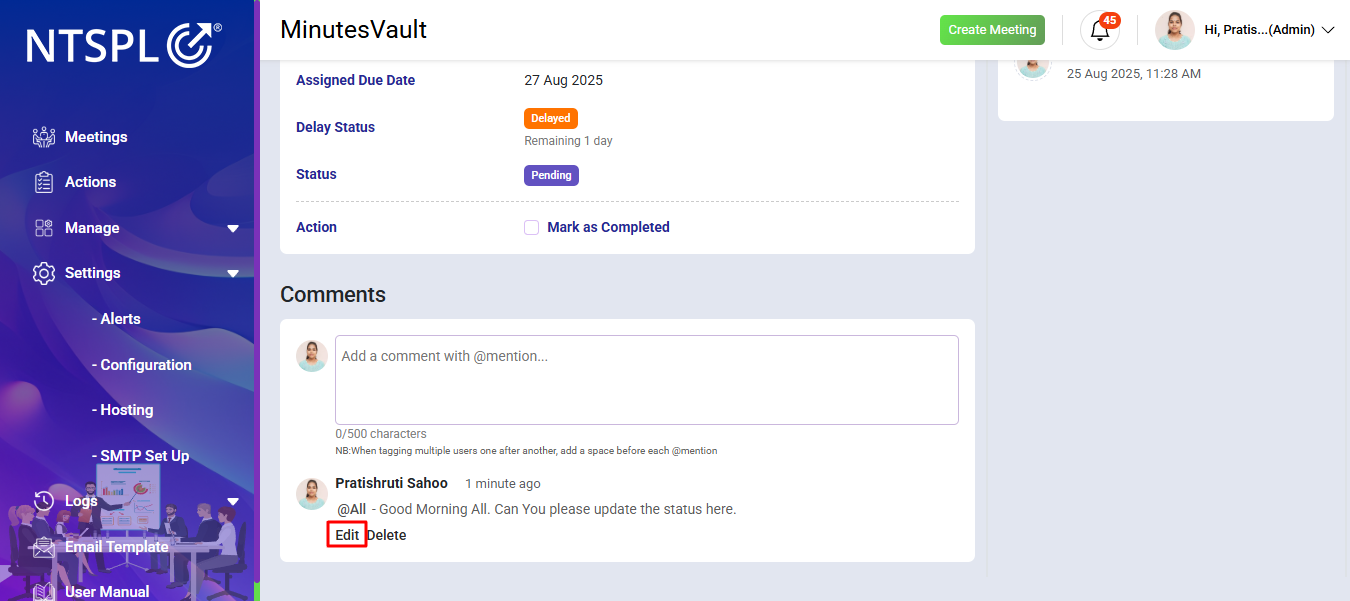
You can also delete comments that are no longer needed.
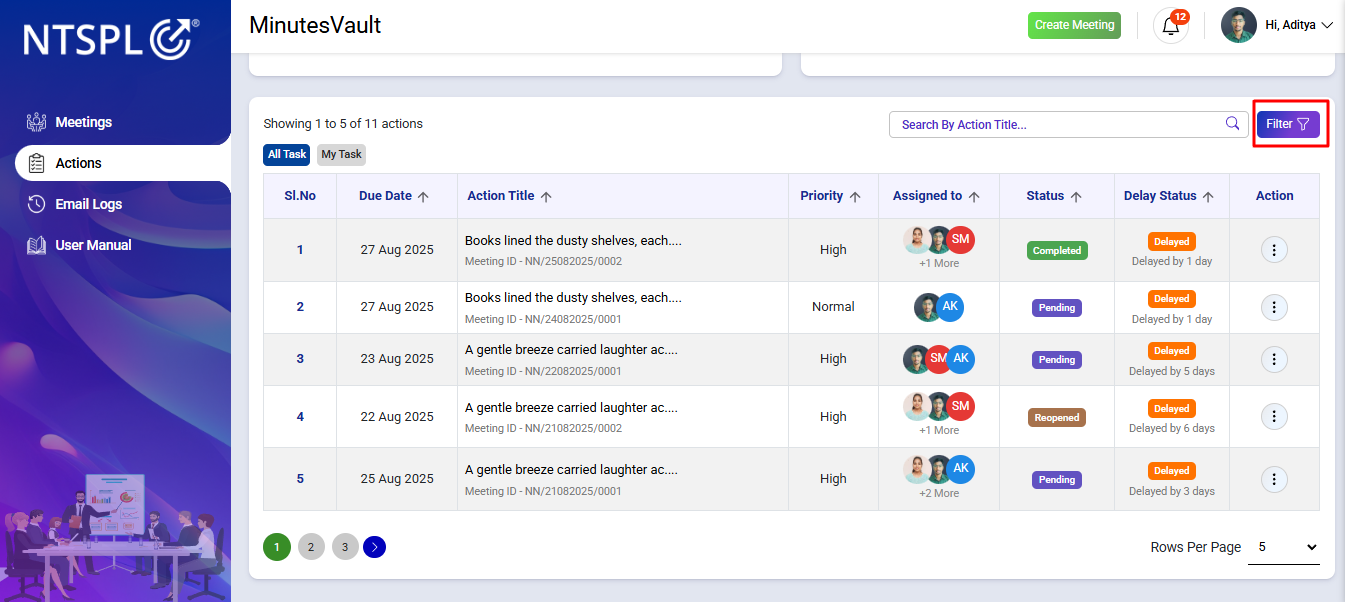
Click on the Action Button.
Click on Filter button to filter only pending action.
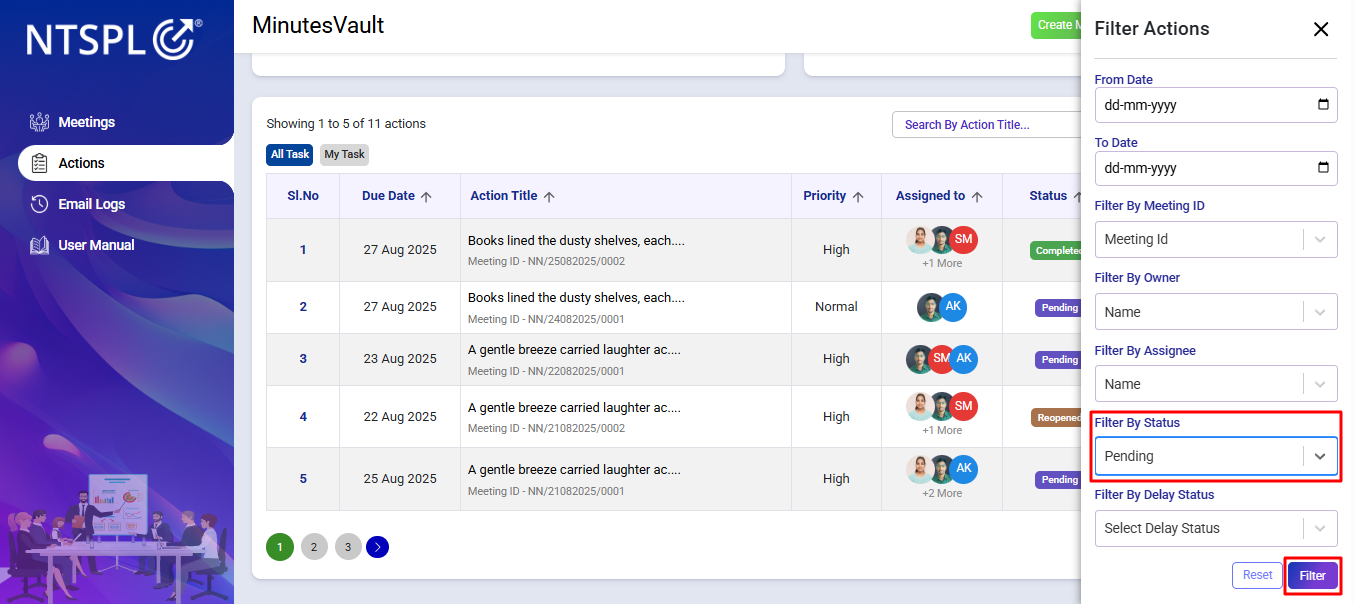
Select Pending as filter by status and click on Filter.
Select Request for Forward option under the Action menu.

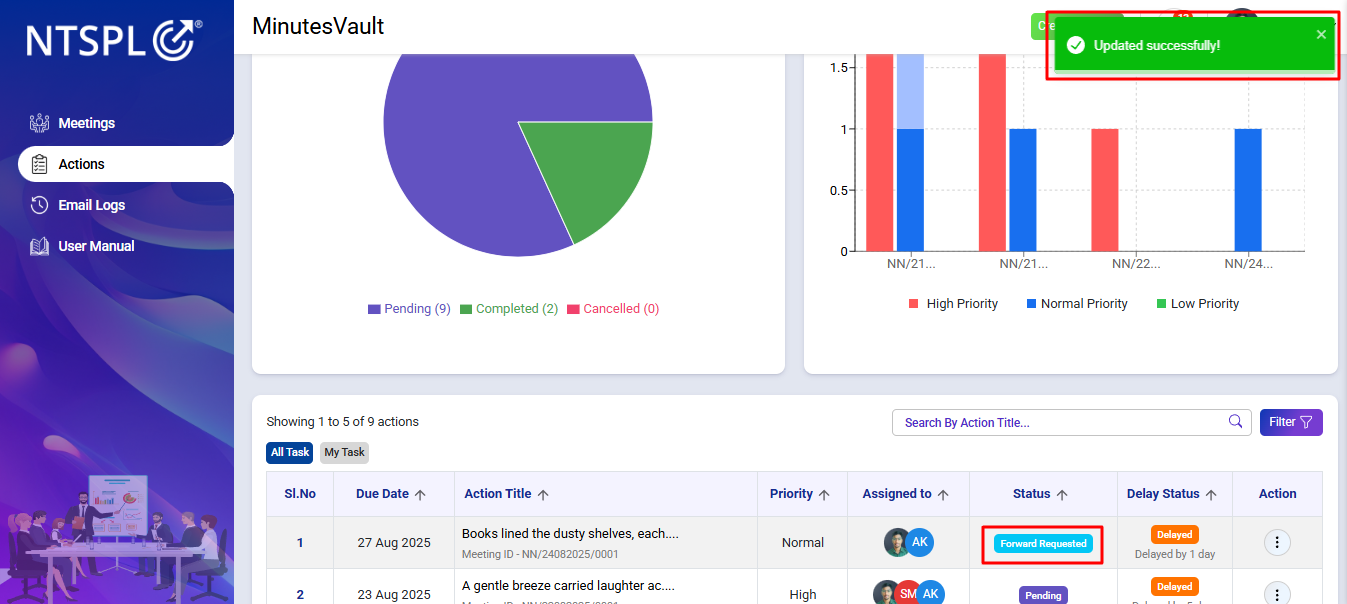
Enter forward reason and click on Submit Request button to request for forwarding an action to someone else.
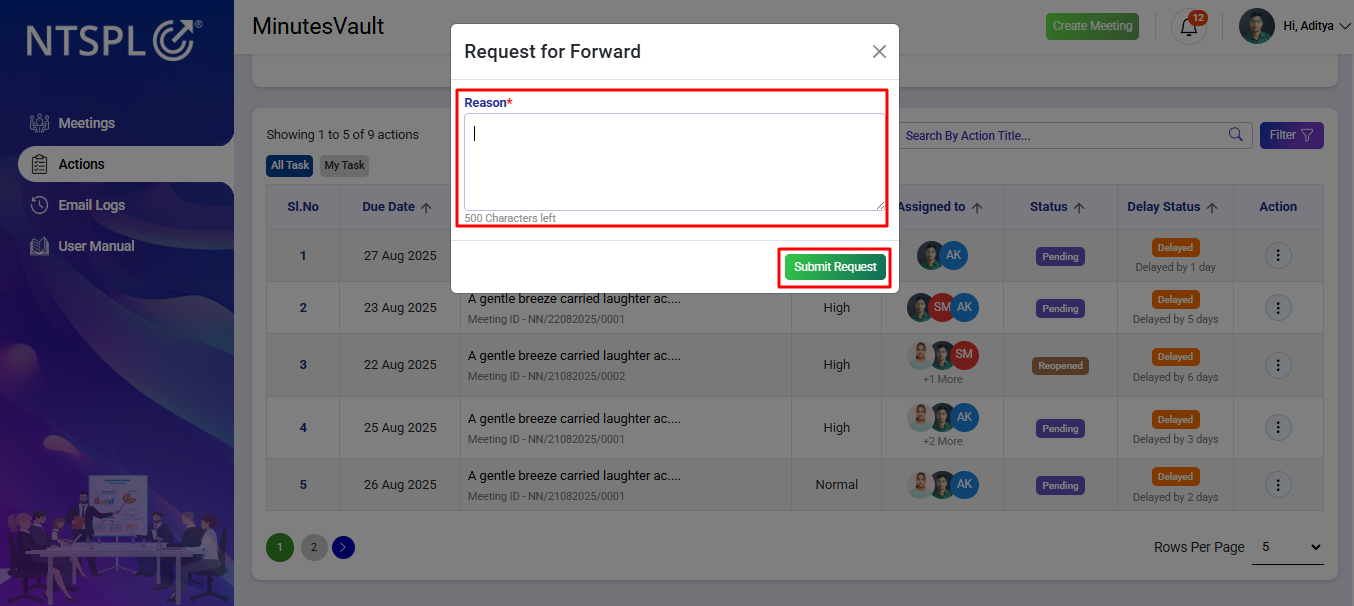
You can see a success message and the staus is Forward Requested.
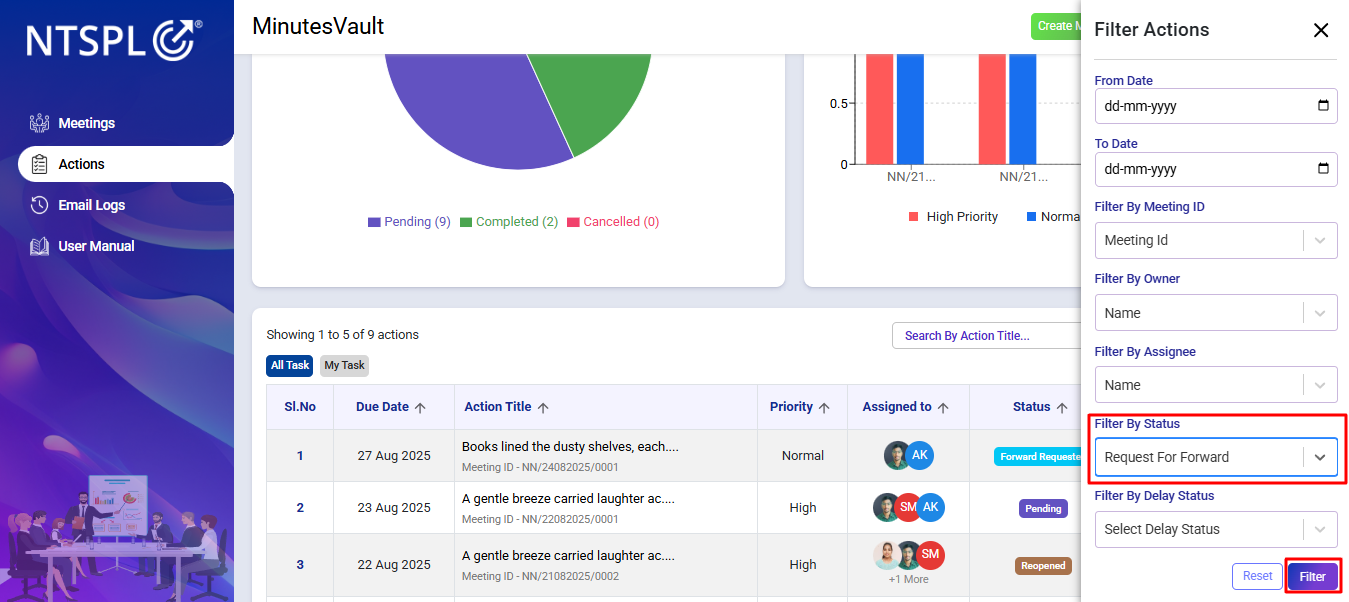
To view the action, navigate to the Actions section.
Click on the Filter button.

Filter the Request For Forward actions.
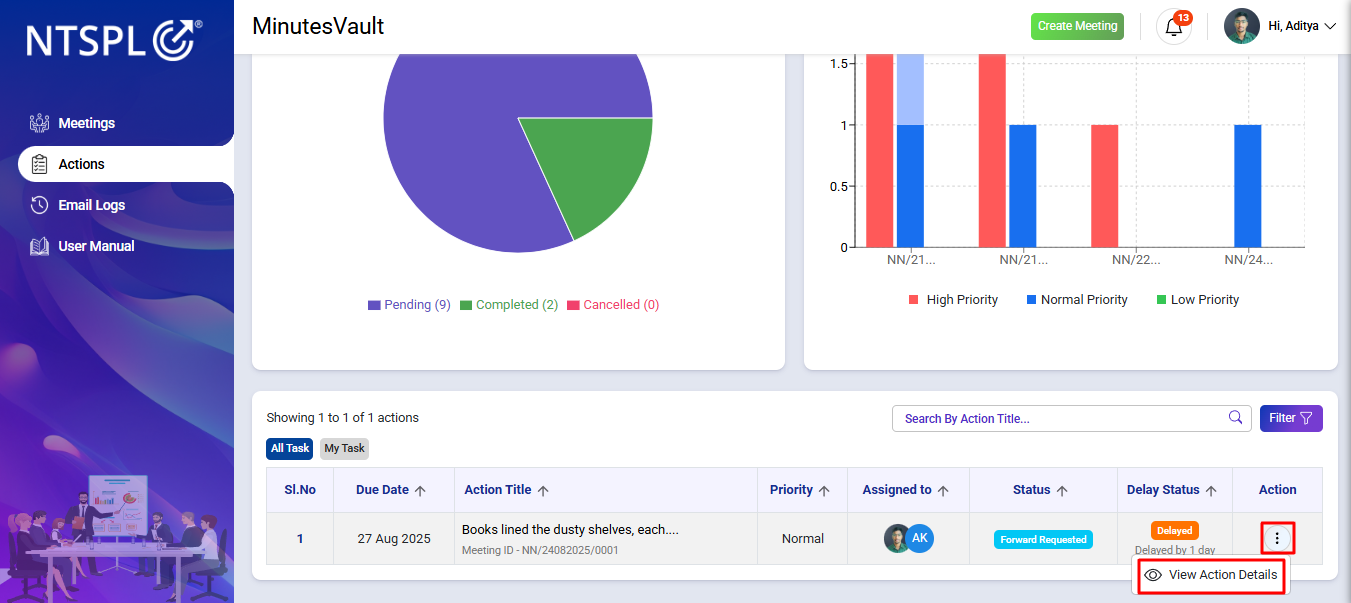
Open the action that you wish to take an action and click on View Action under the Action Menu.
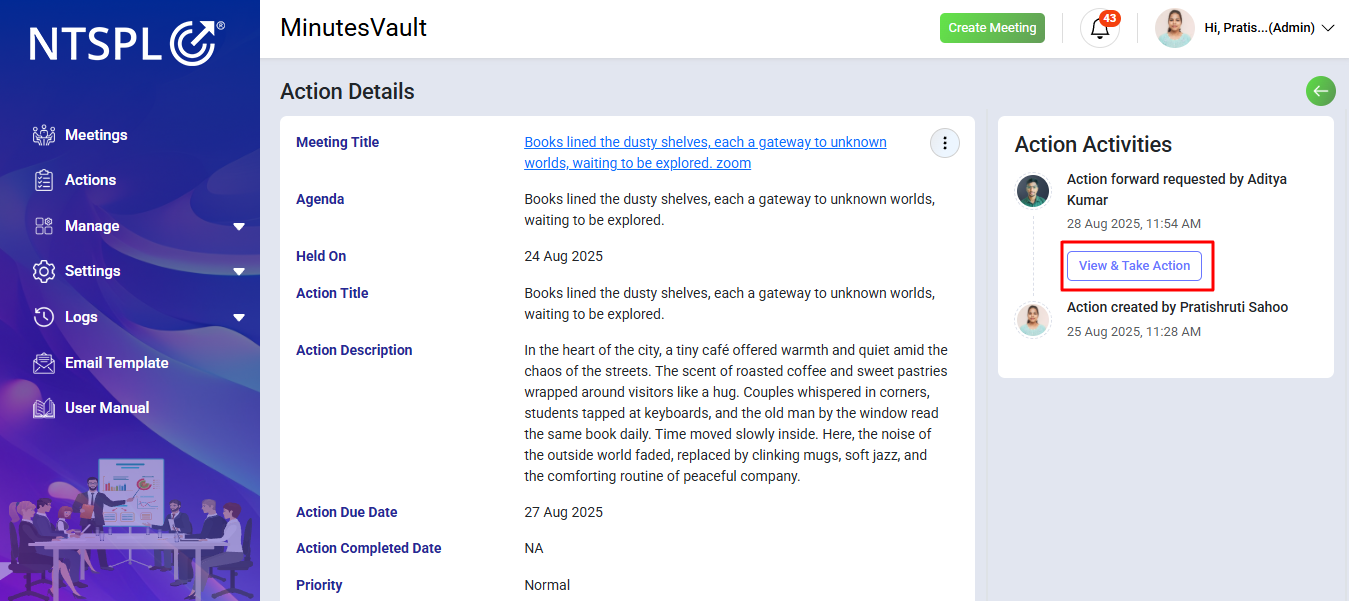
It will redirect to the View Action Details page, displaying the action details and activities. Click on View & Take Action.
To approve a forwarded request, click on Accept, provide the reasons, fill in all the required details, and then click the Forward button.
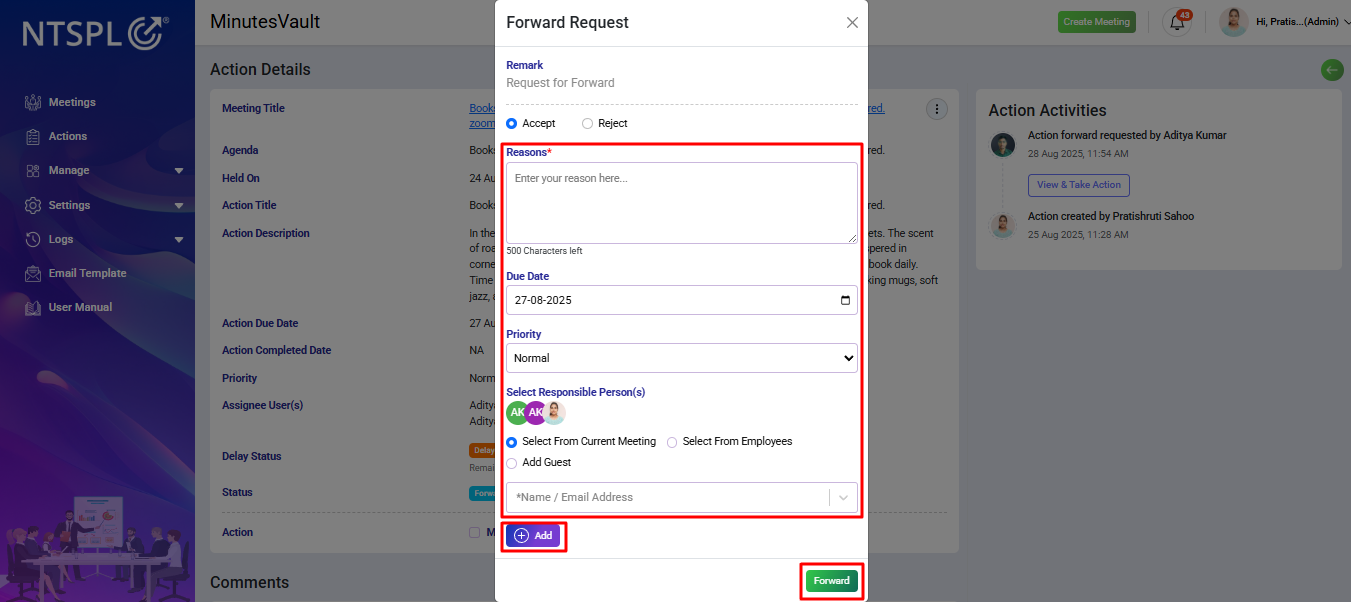
The forwarded request has now been approved, and the action has been forwarded.
To reject a forwarded request, click on Reject, provide the reason for rejection, and then click the Reject button.
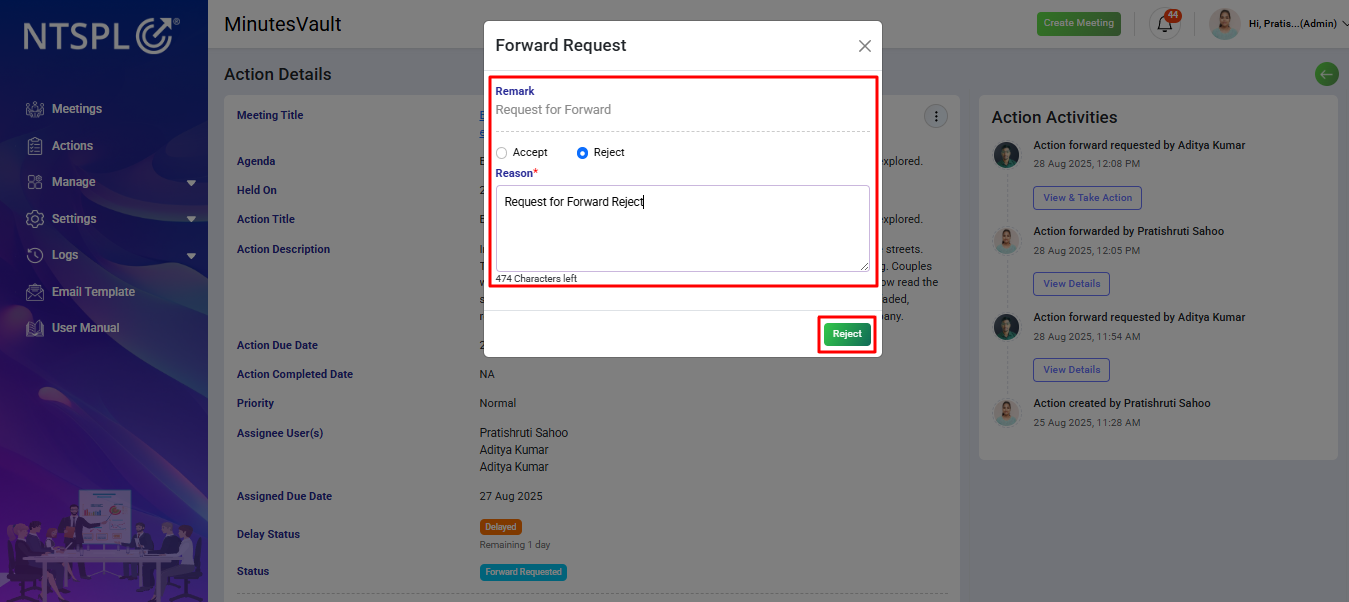
The forwarded request has now been rejected.

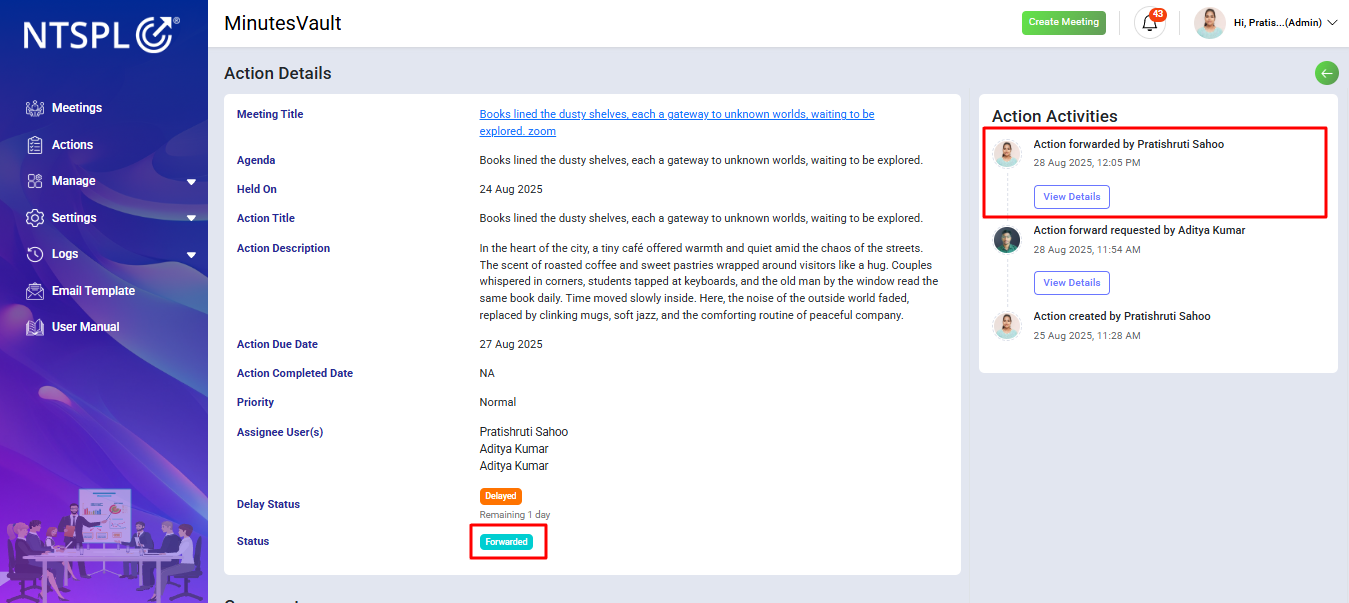
You can now view all the action activities, whether forwarded or rejected.

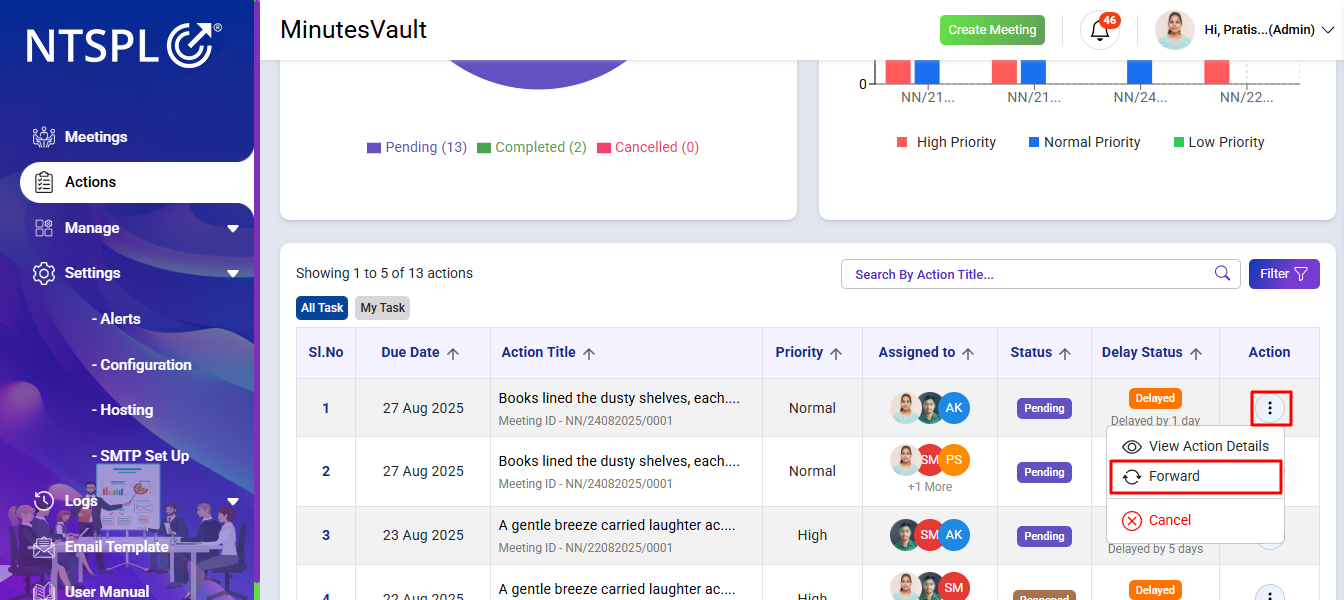
Click on Action menu to view all the actions.
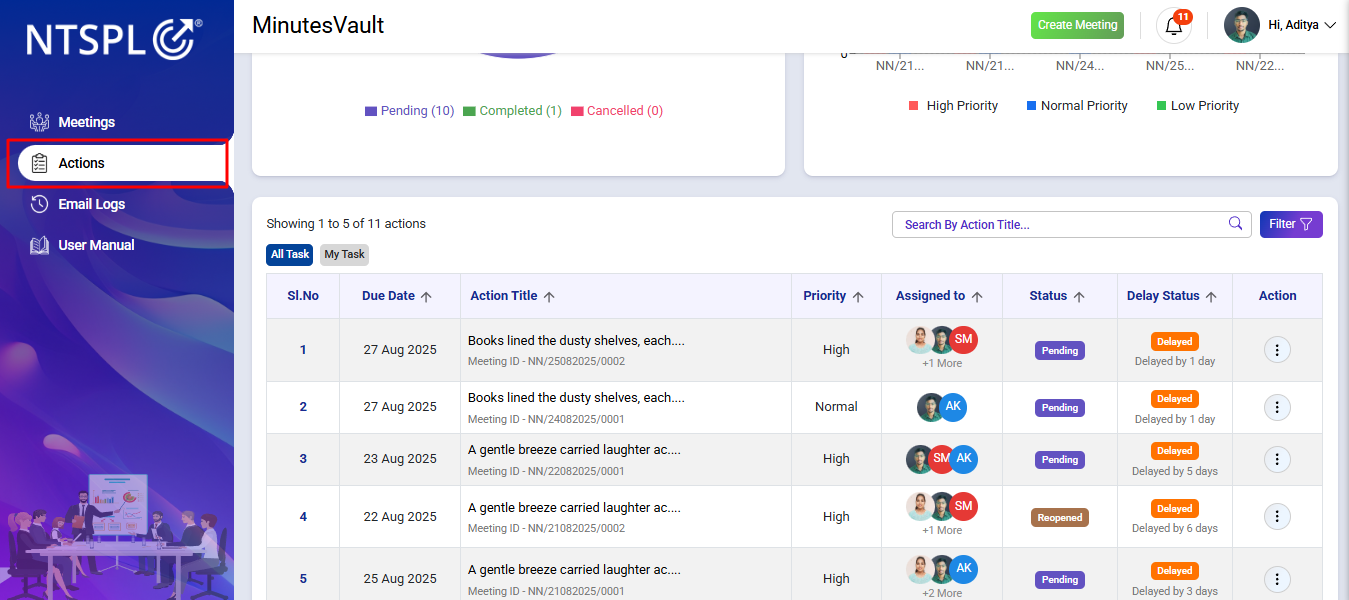
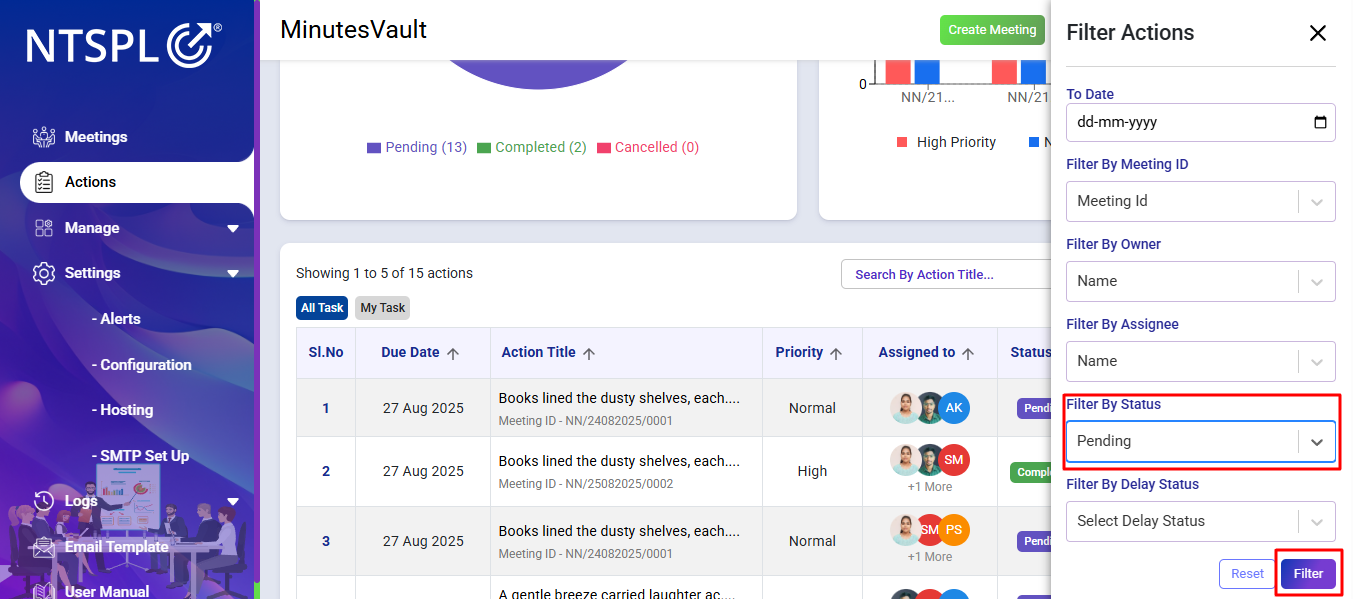
Click on filter button in Dashboard to filter the actions.

Select Filter By Status as Pending and click on Filter for showing only pending actions.
Click on Forward to open the modal for giving a reason to forward an action.
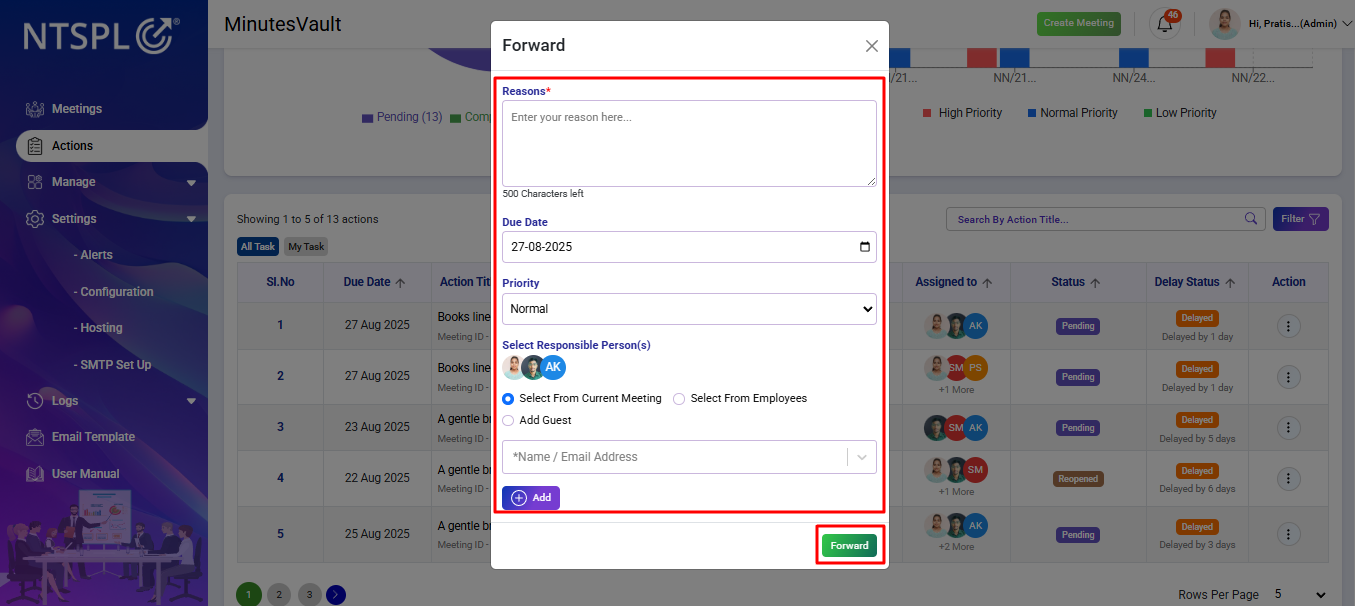
Enter the reason and other details and click on Forward to forward an action to others.
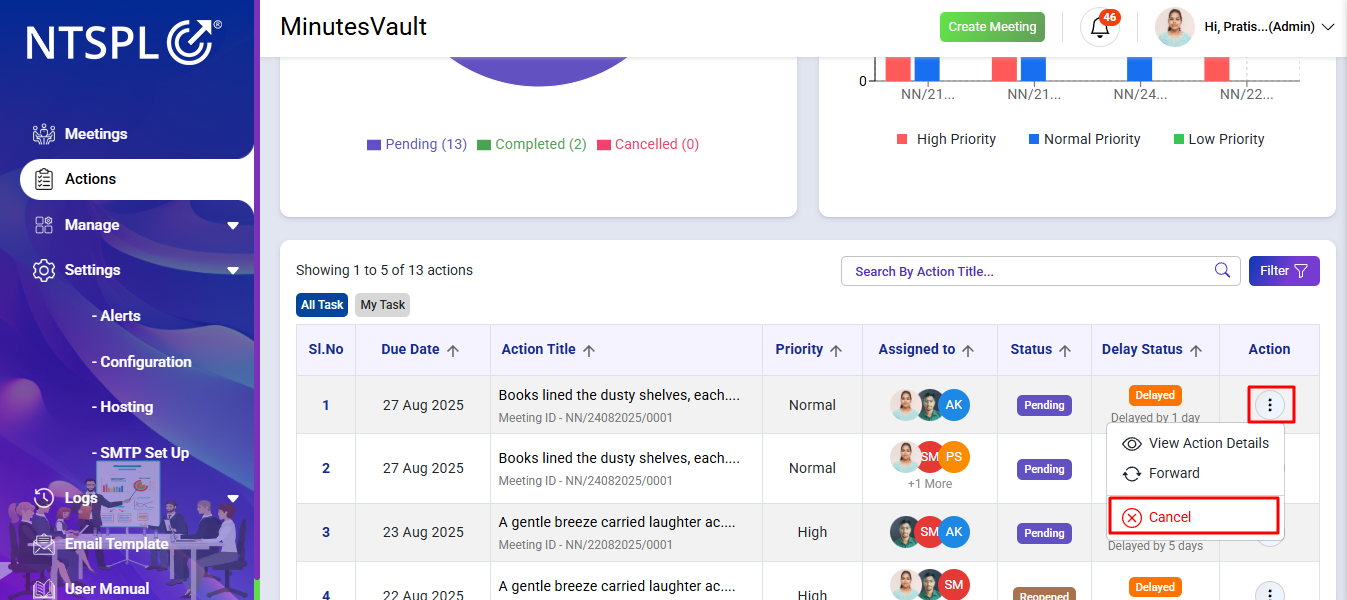
Click on Action menu to view all the actions.
Click on filter button in Dashboard to filter the actions.
Select Filter By Status as Pending and click on Filter for showing only pending actions.
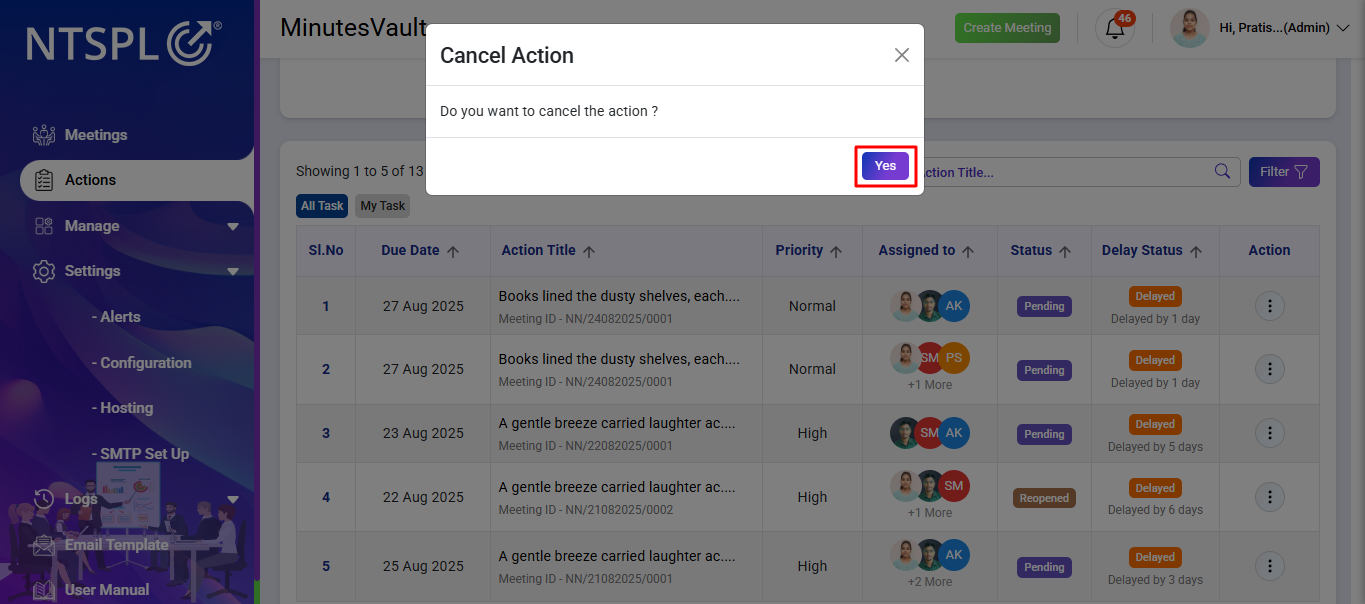
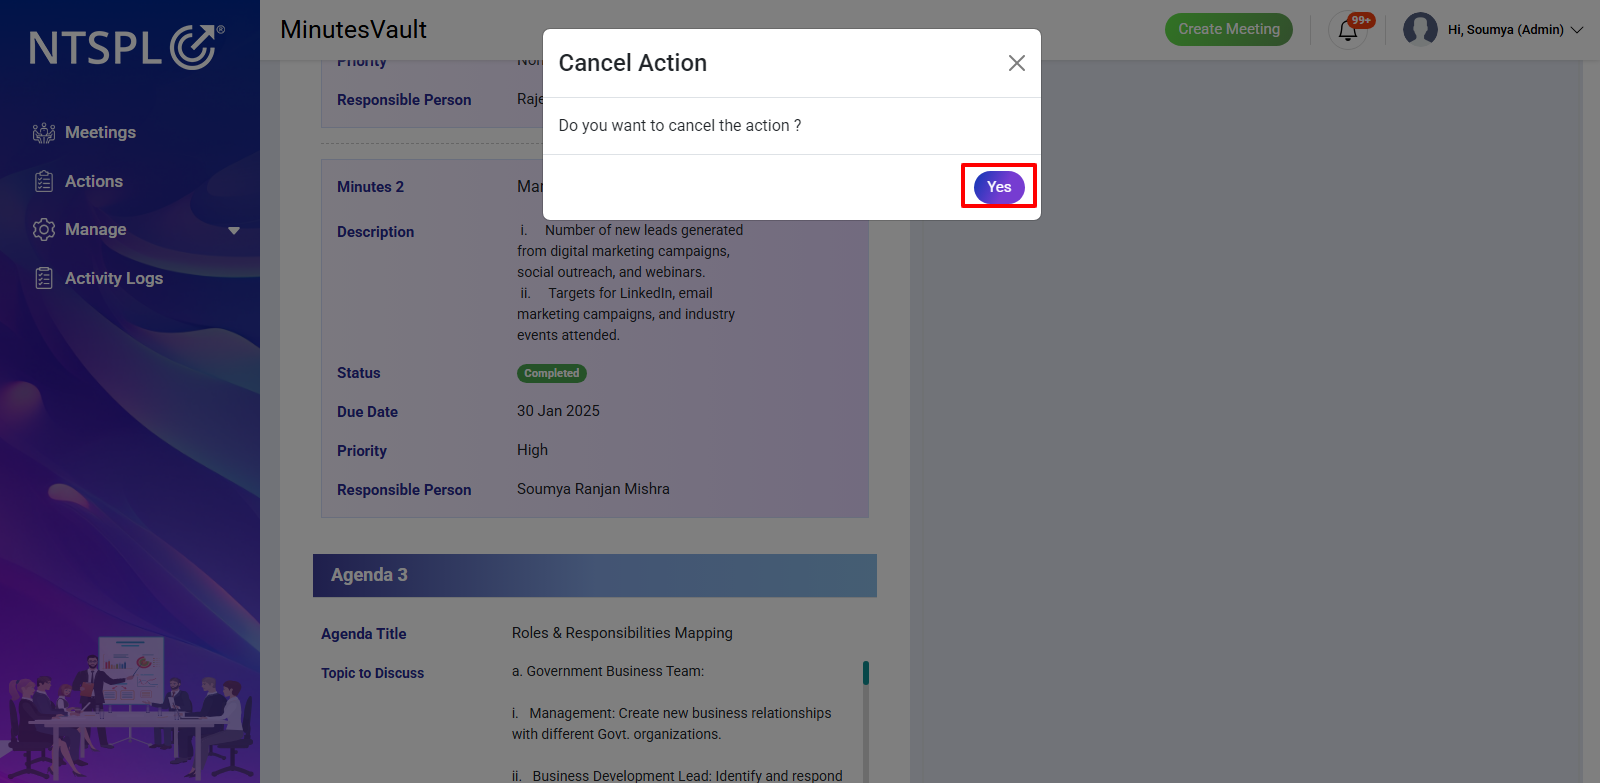
Click on Cancel to cancel an action.
Click on Yes to confirm cancellation.
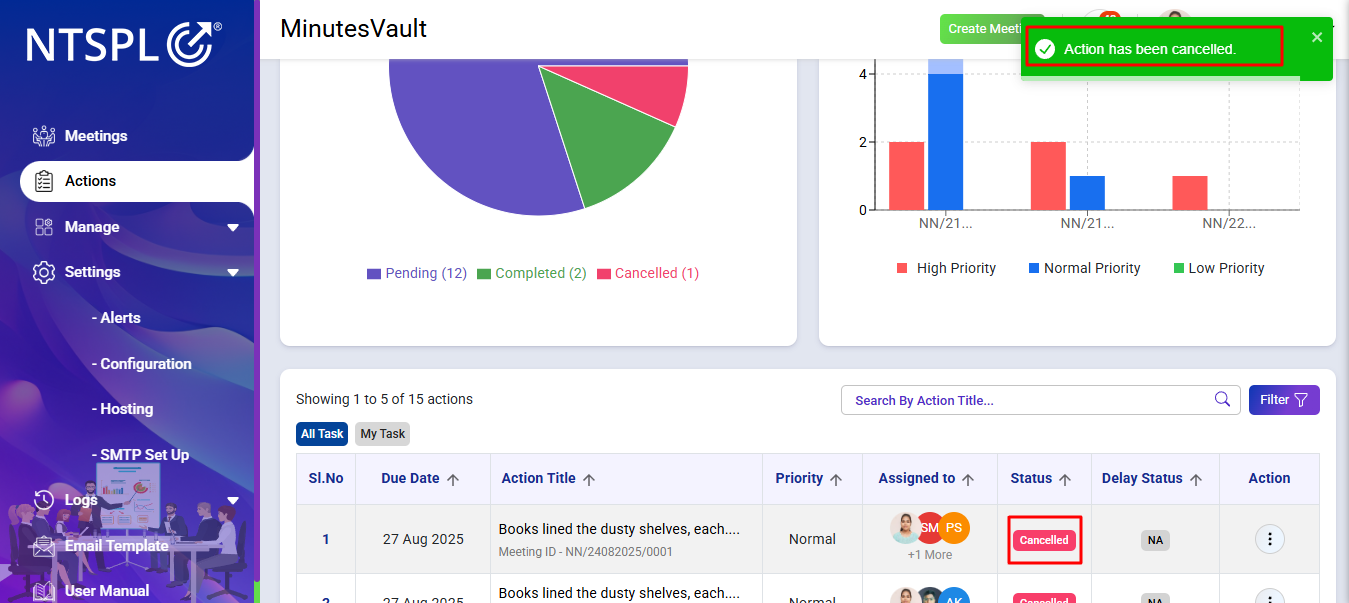
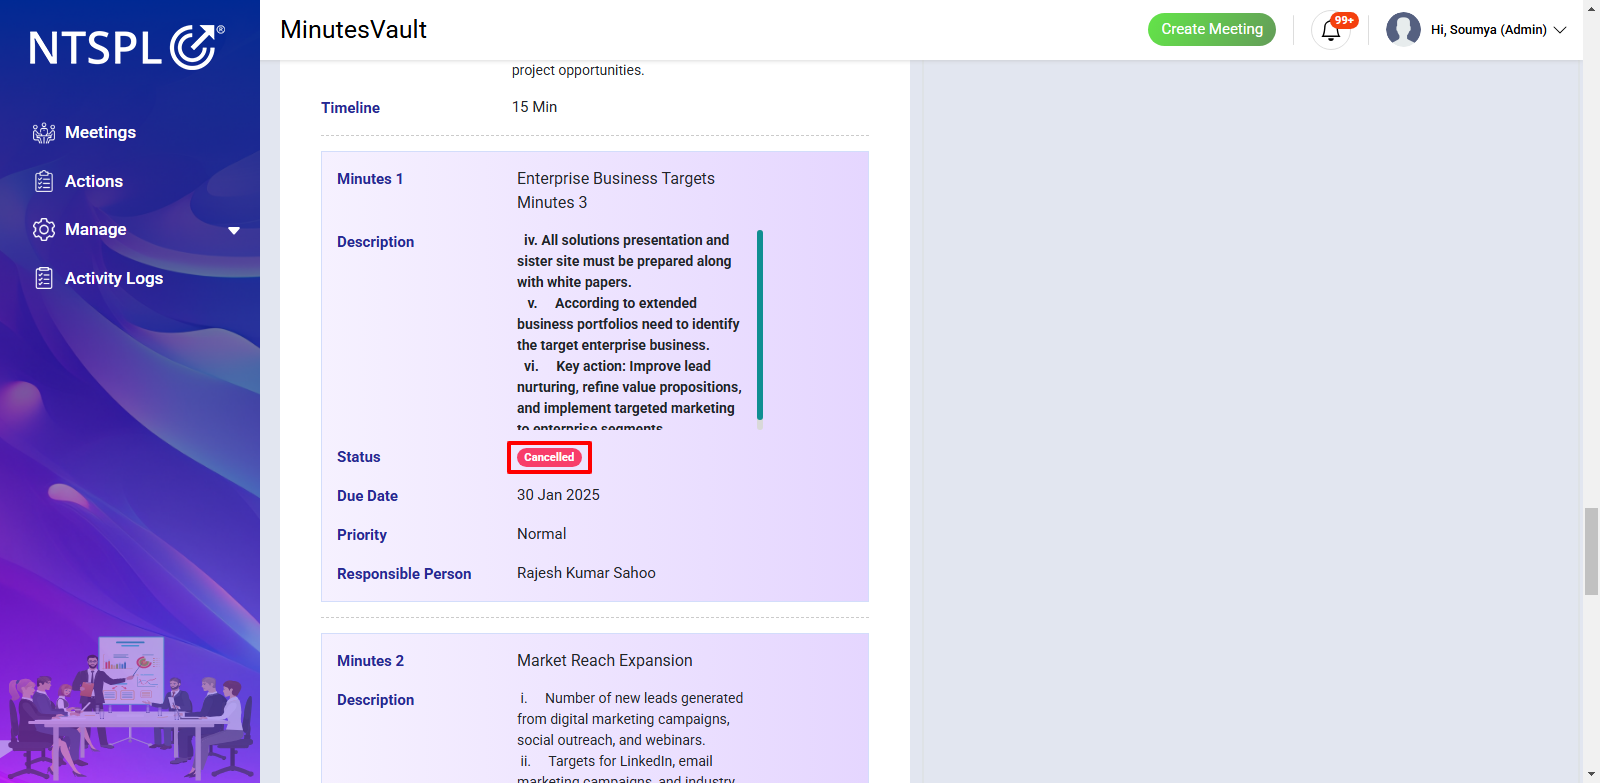
Here you can see the cancellation message and status of the action.
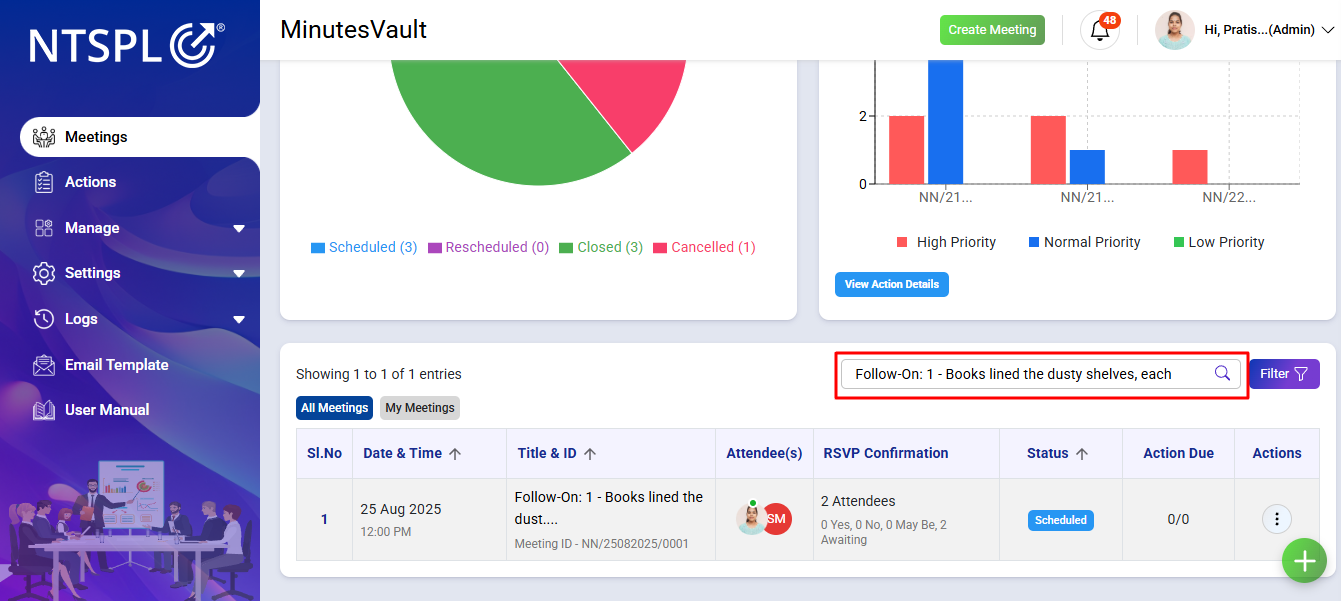
Click on Meeting in Dashboard.
Search for any Follow-on meeting.
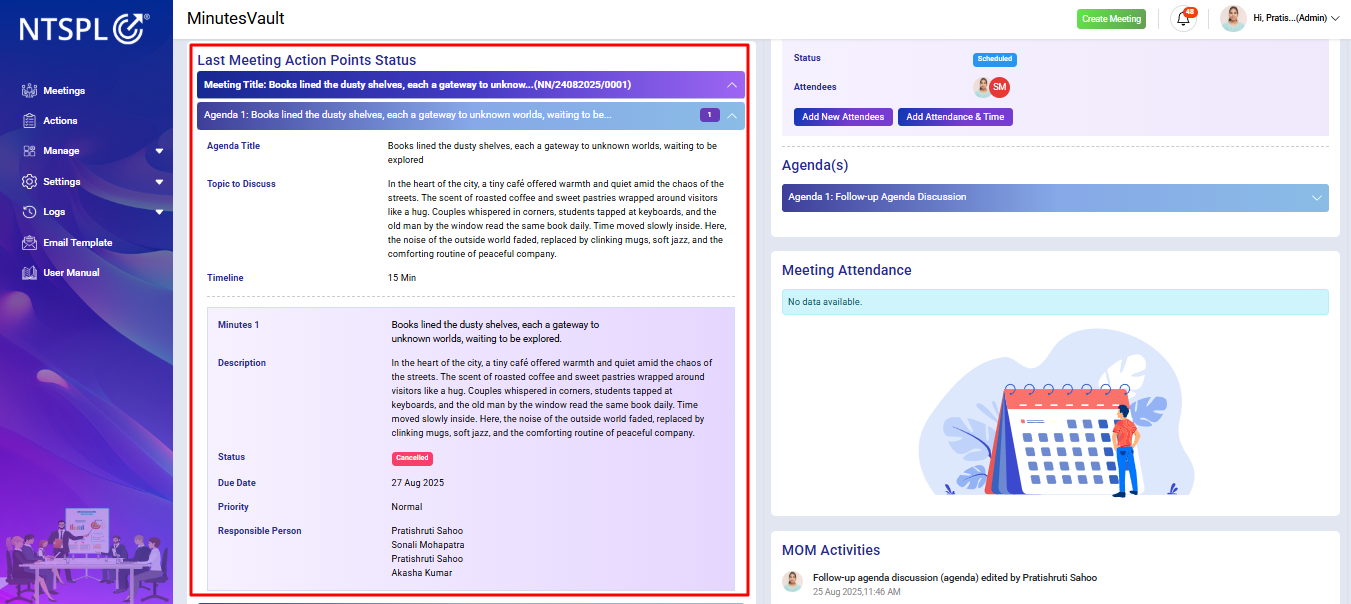
Click on Write Minutes for the follow-on meeting.

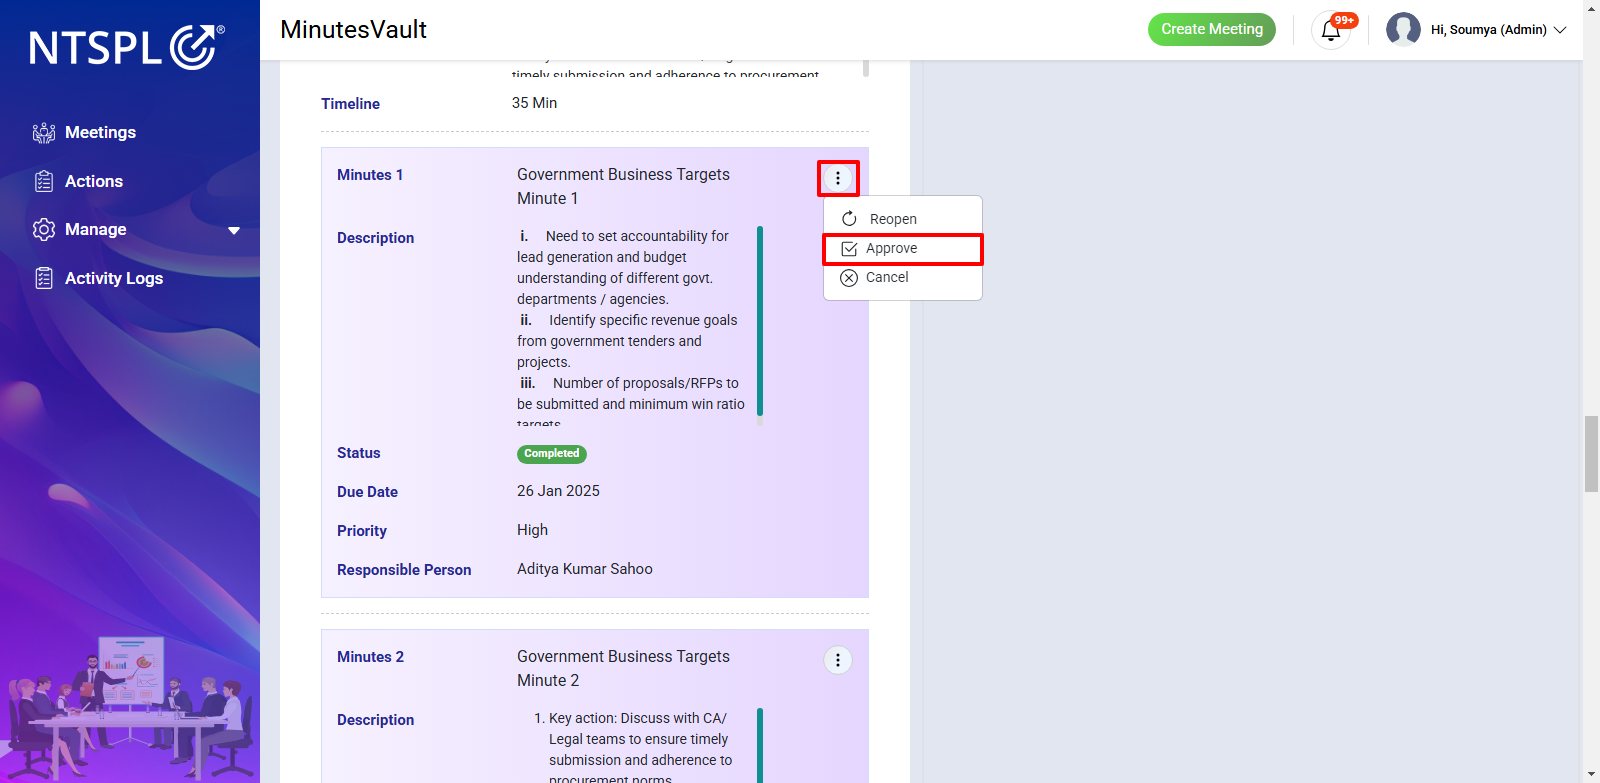
Here you can see the Last Meeting Action Points Status.
Find any Completed action that you want to approve. Click on Approve to approve the completed action.
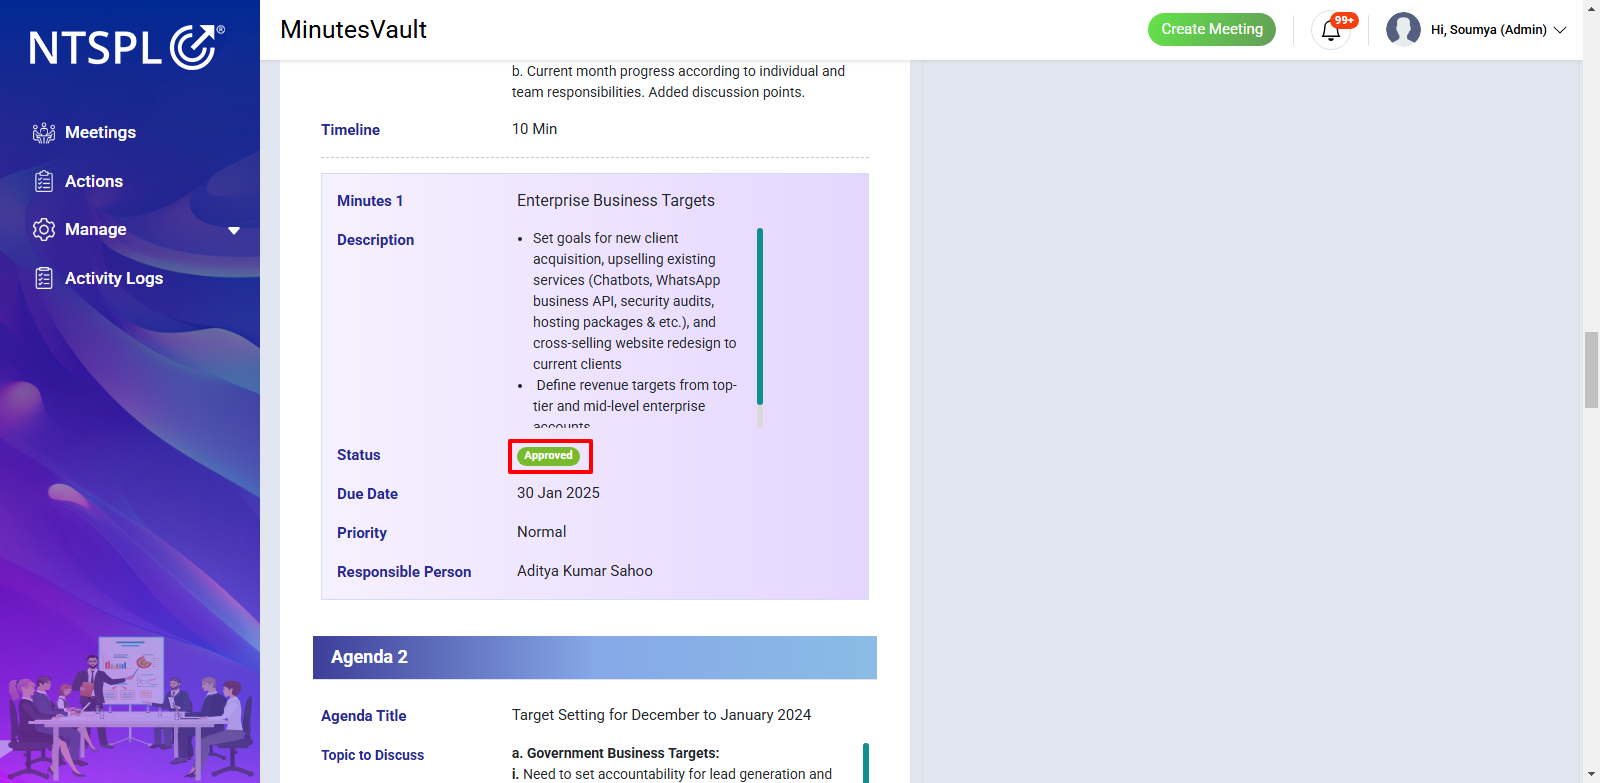
Once approved, the status of the action will change to Approved.
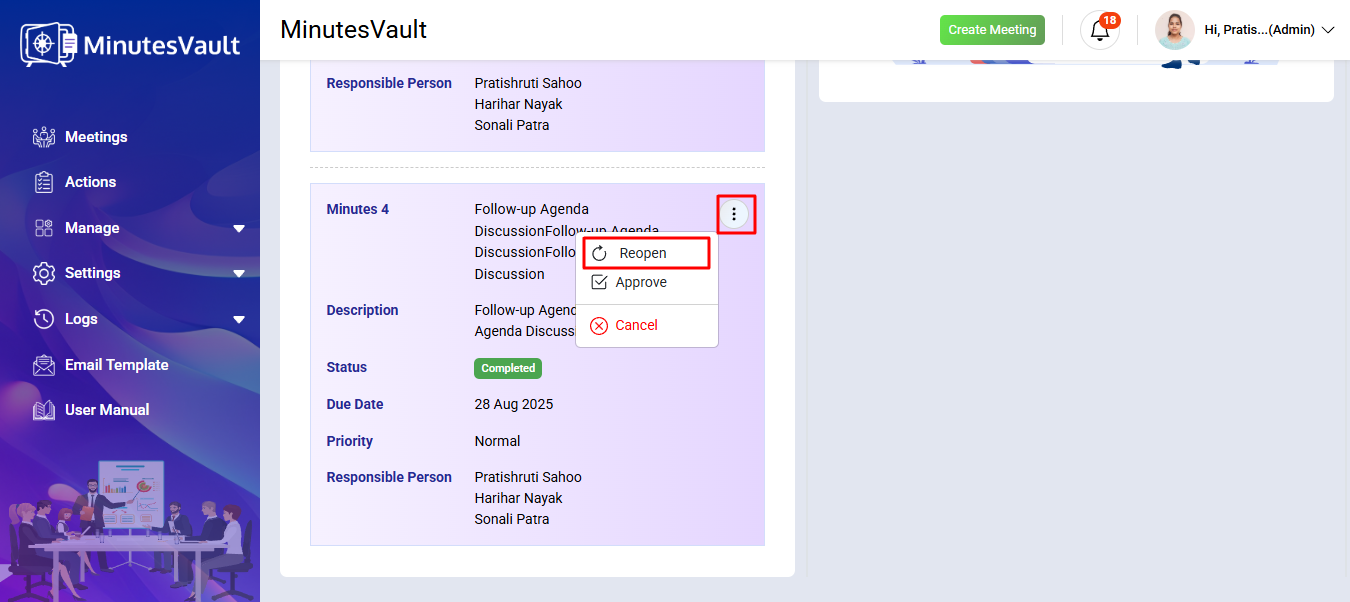
Follow the steps to access the Last Meeting Action Points as shown in section 28.1.
Find any Completed action that you want to reopen. Click on Reopen to open the modal for providing a reason.
Enter the reopen reason and click on Reopen to reopen the action.
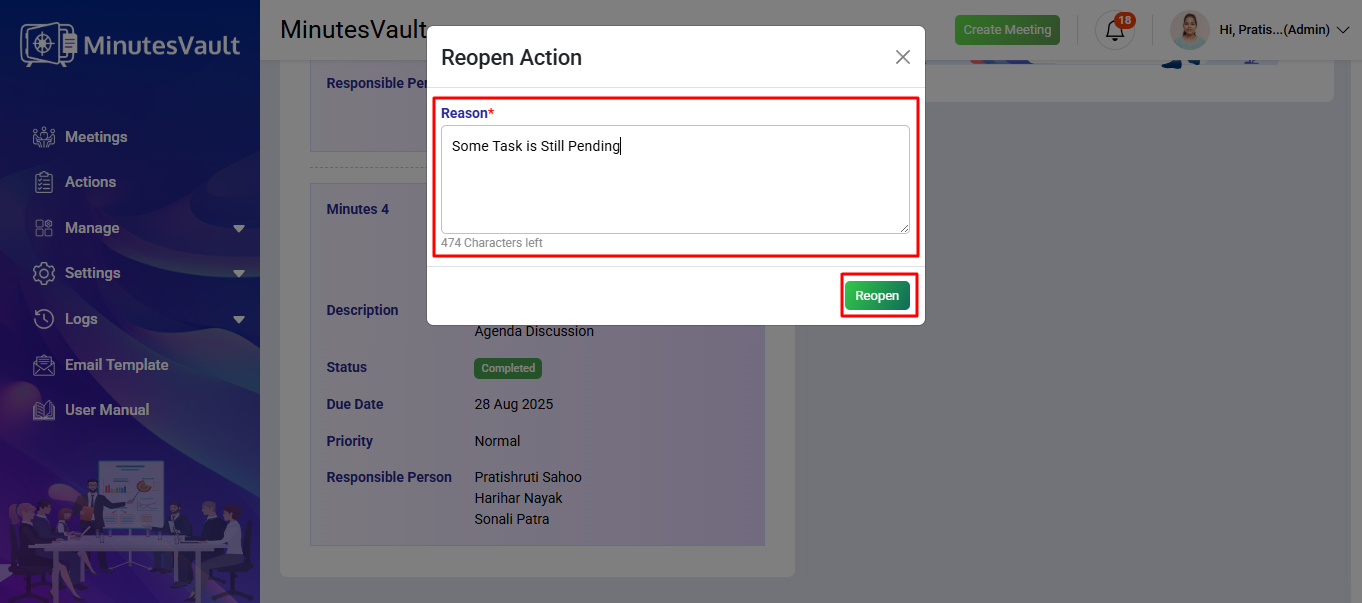
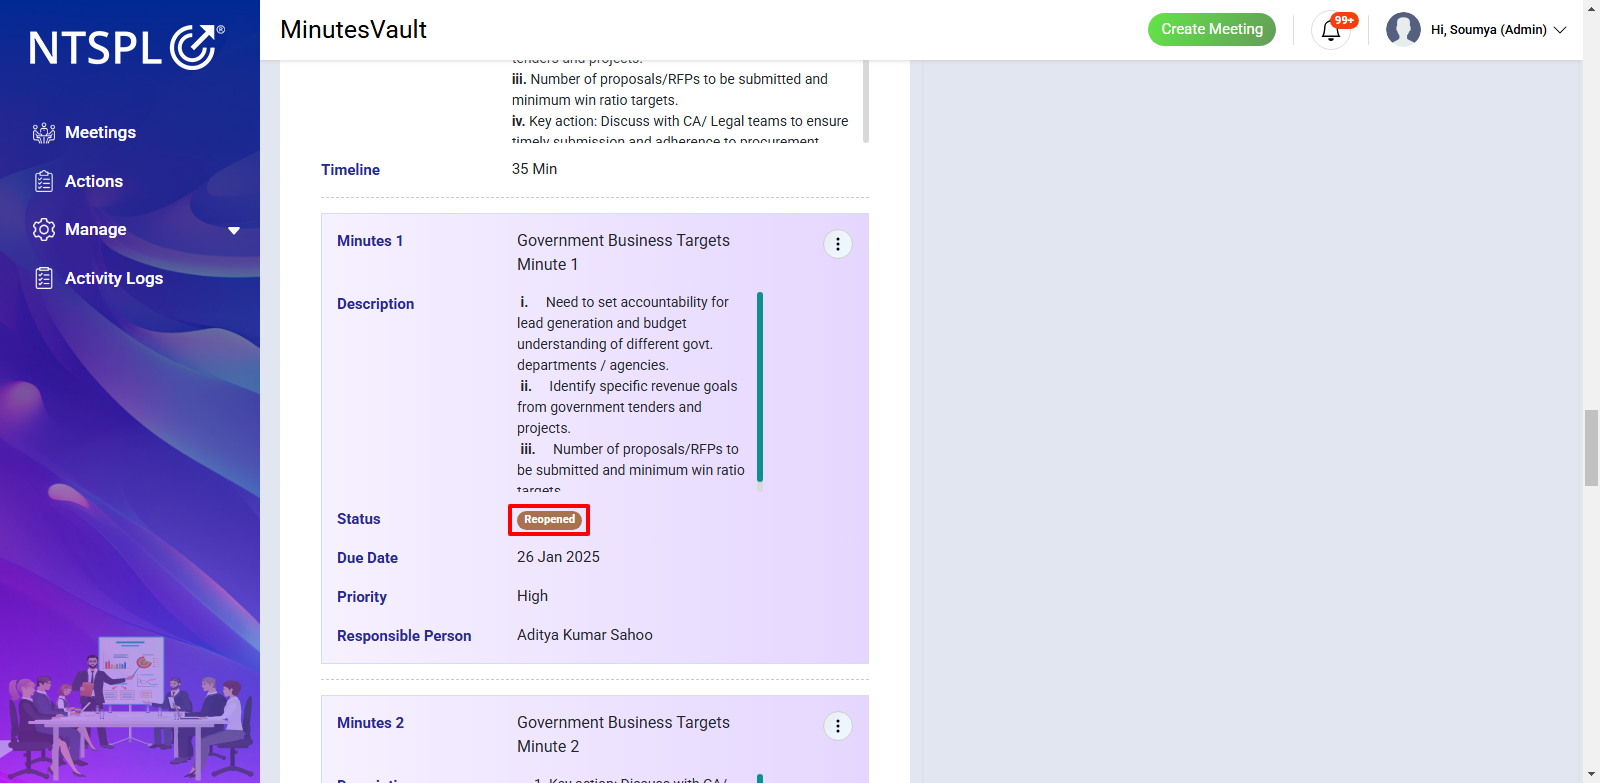
Once reopened, the status of the action will change to Reopened.
Follow the steps to access the Last Meeting Action Points as shown in section 28.
Find any Pending or Reopened action that you want to forward. Click on Forward to open the modal for providing a reason.
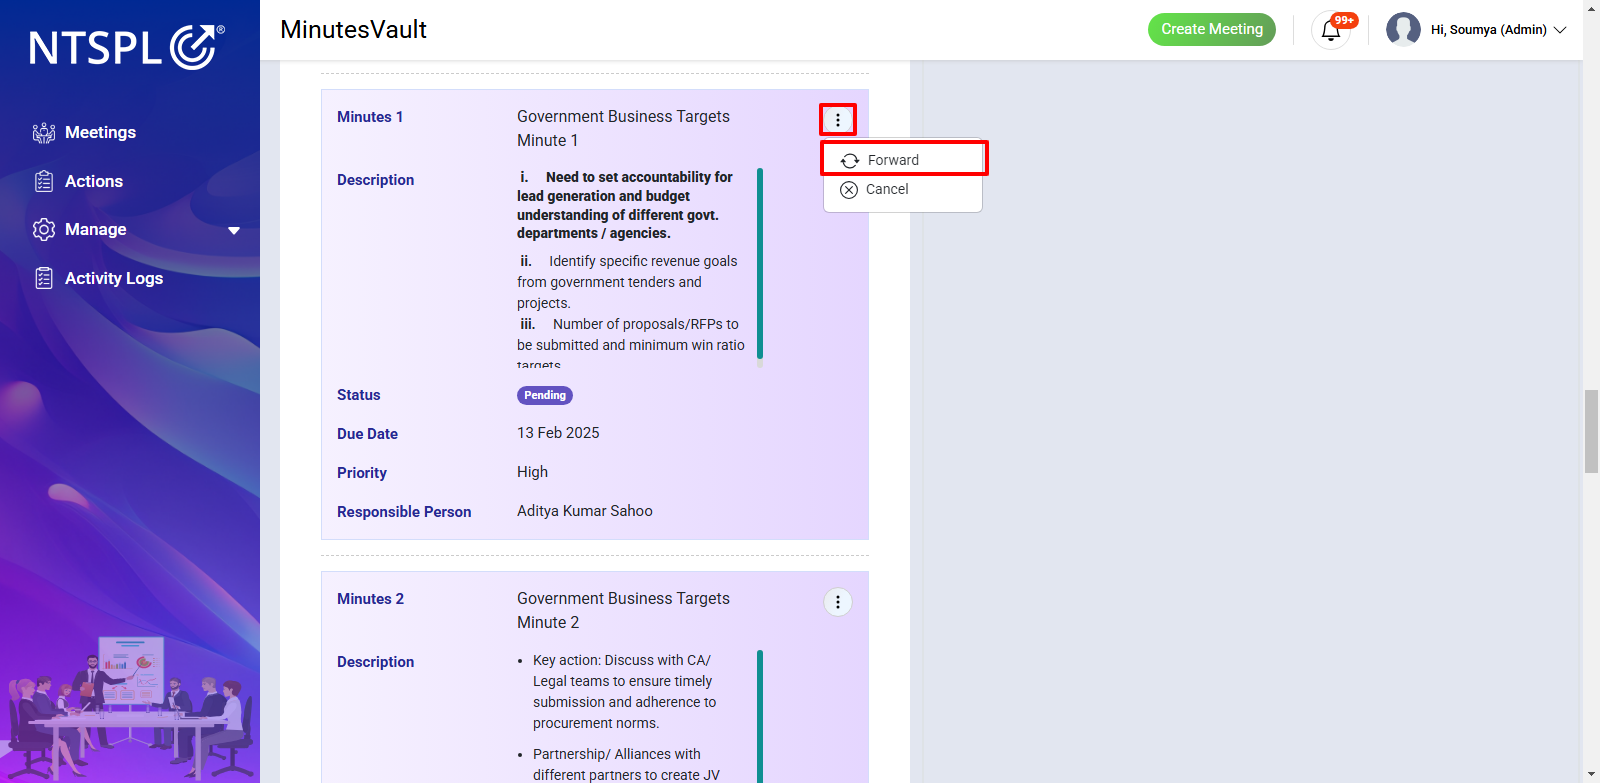
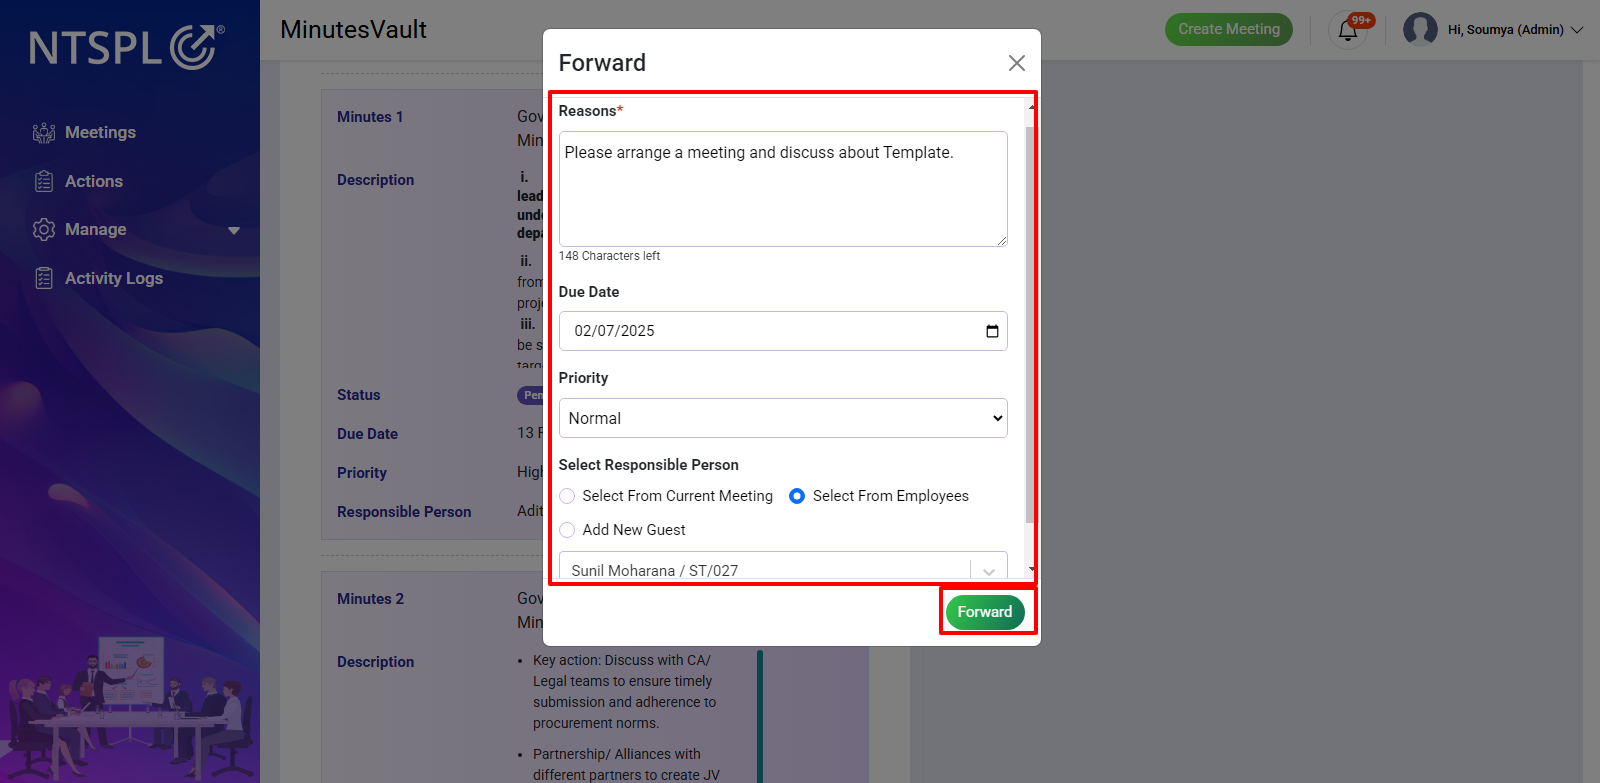
Enter the reason and other details, then click Forward to forward the action.
Follow the steps to access the Last Meeting Action Points as shown in section 28.
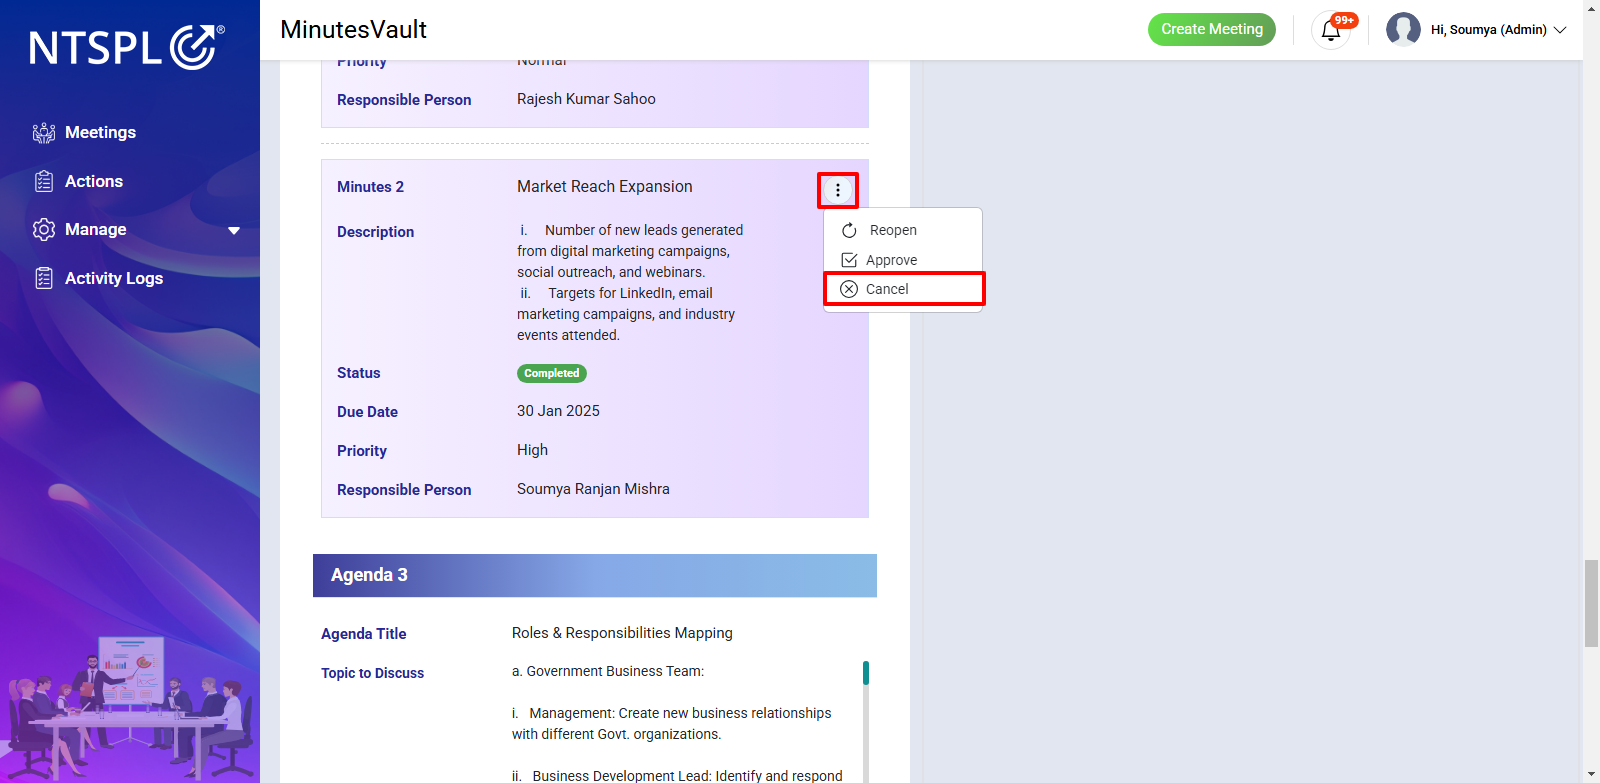
Find any Completed action that you want to cancel. Click on Cancel to cancel the action.
Click Yes to confirm the cancellation.
Once canceled, the status of the action will be updated to Canceled.
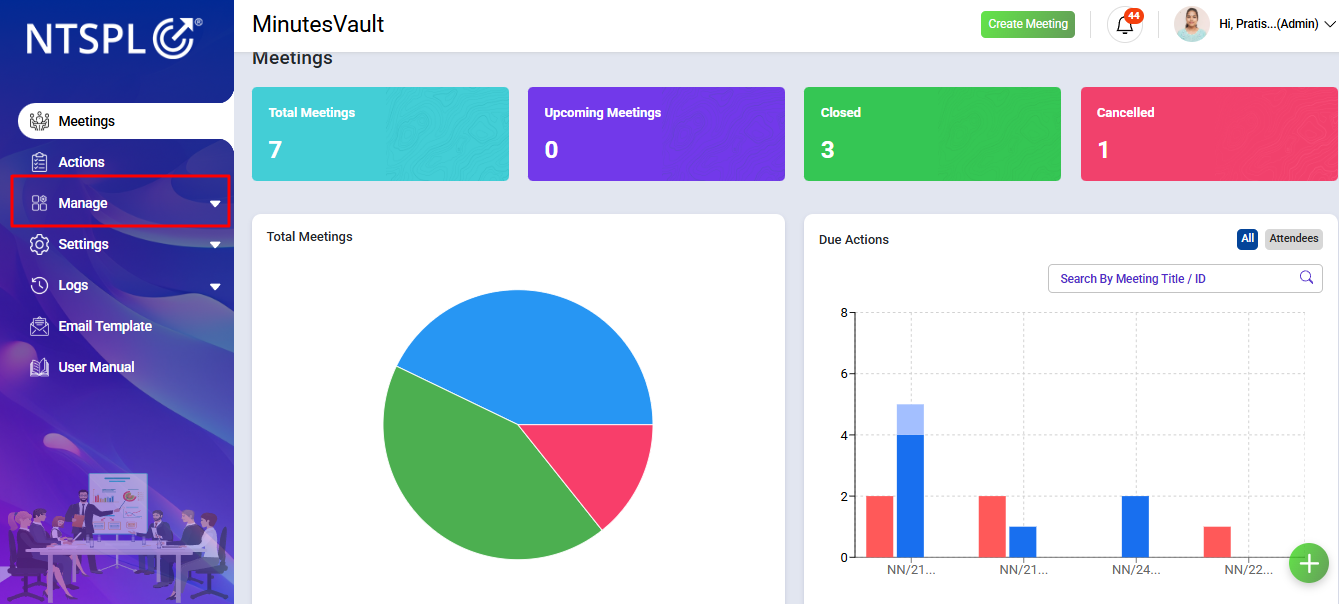
To manage modules (such as Organization, Units, Designations, Employees, Meeting Rooms, Alerts, Configuration, Hosting) effectively, navigate to the Manage section located next to the Actions section.
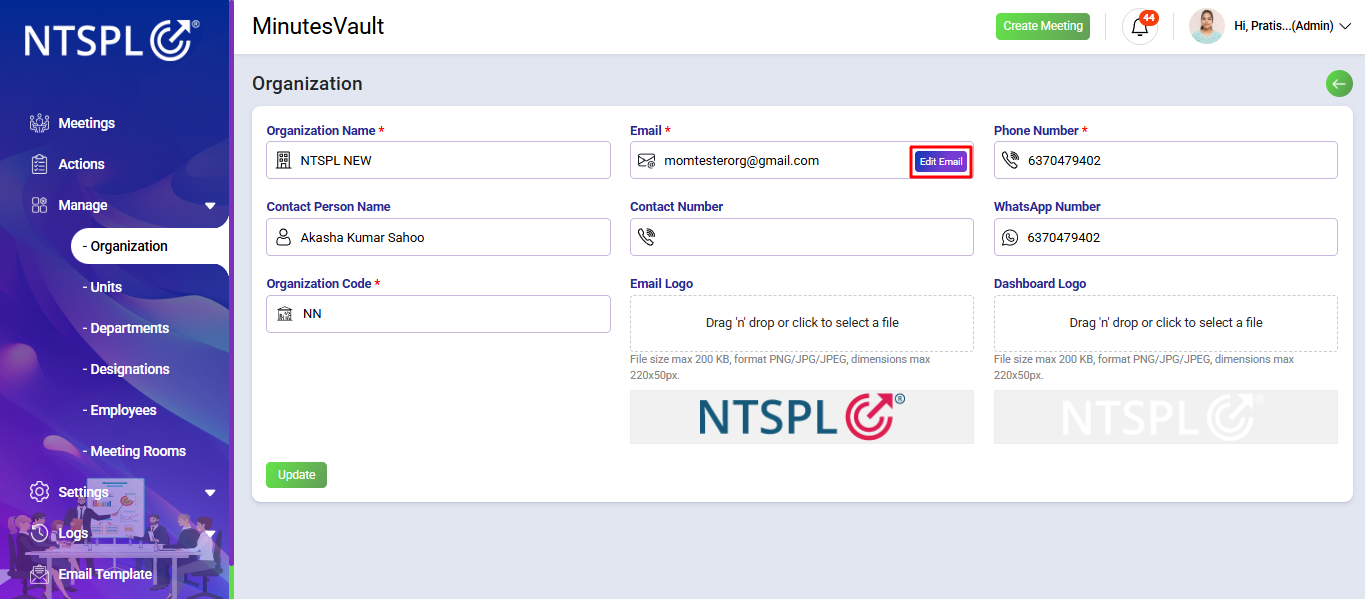
Select the Organization option under the Manage section to manage your organization's details.
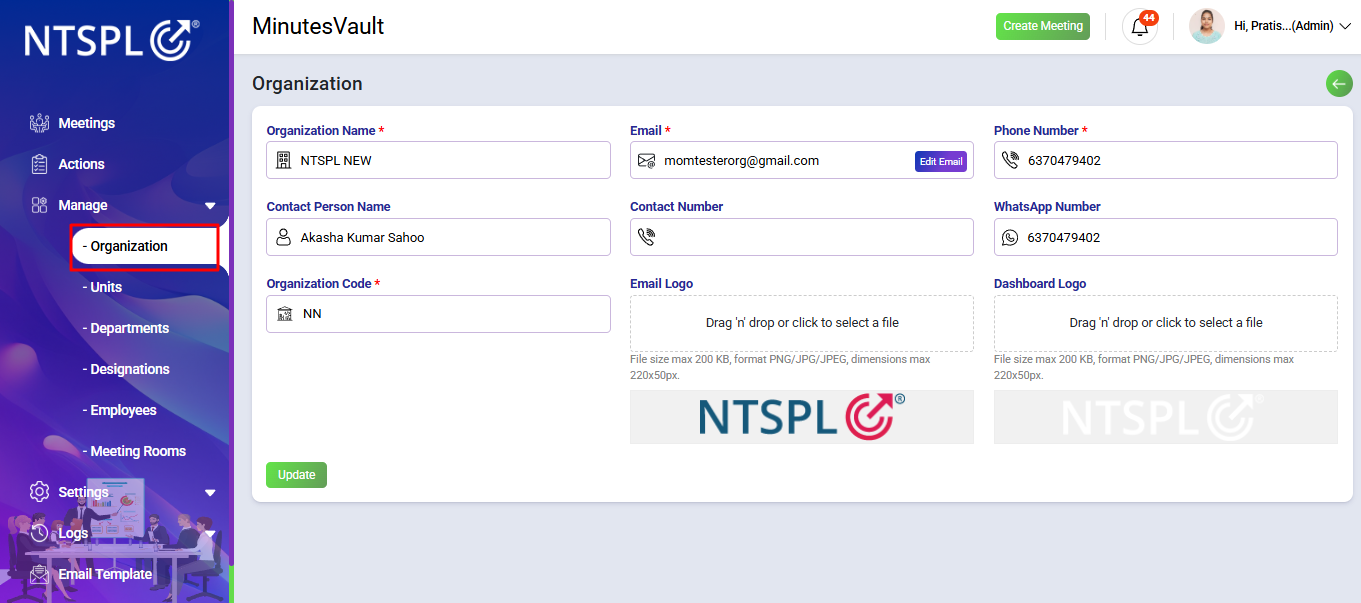
Enter the organization's details. To update the email, click the Edit Email button.
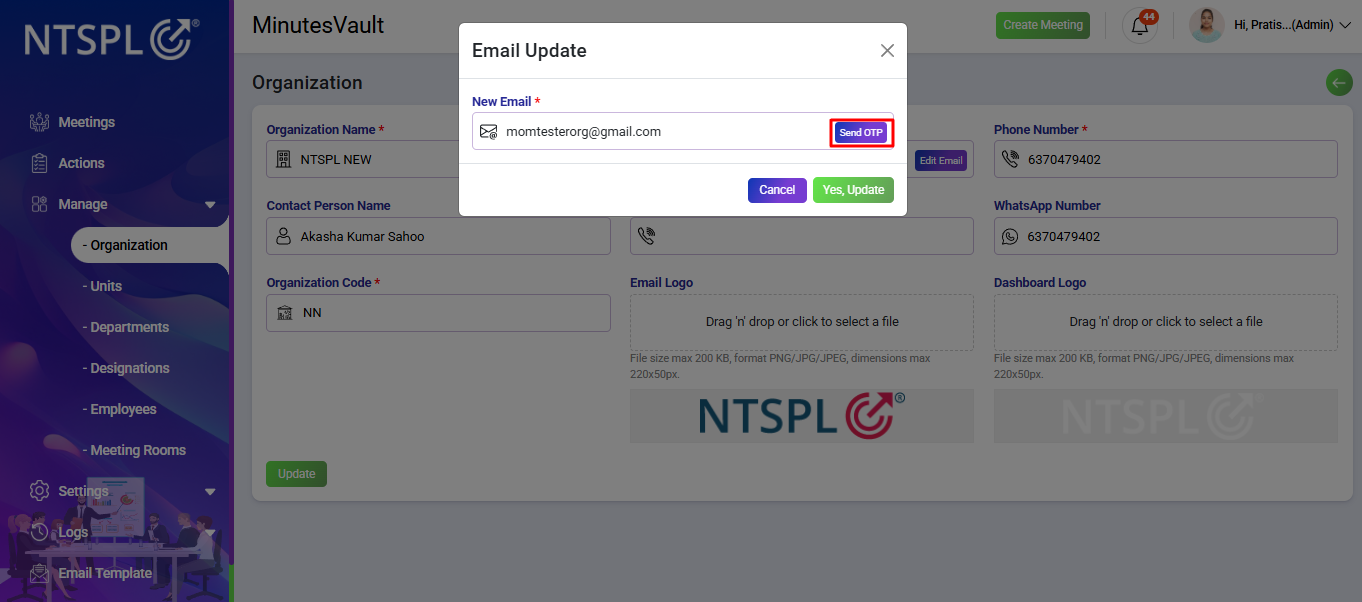
Enter the New Email and click the Send OTP button. An OTP will be sent to your email.
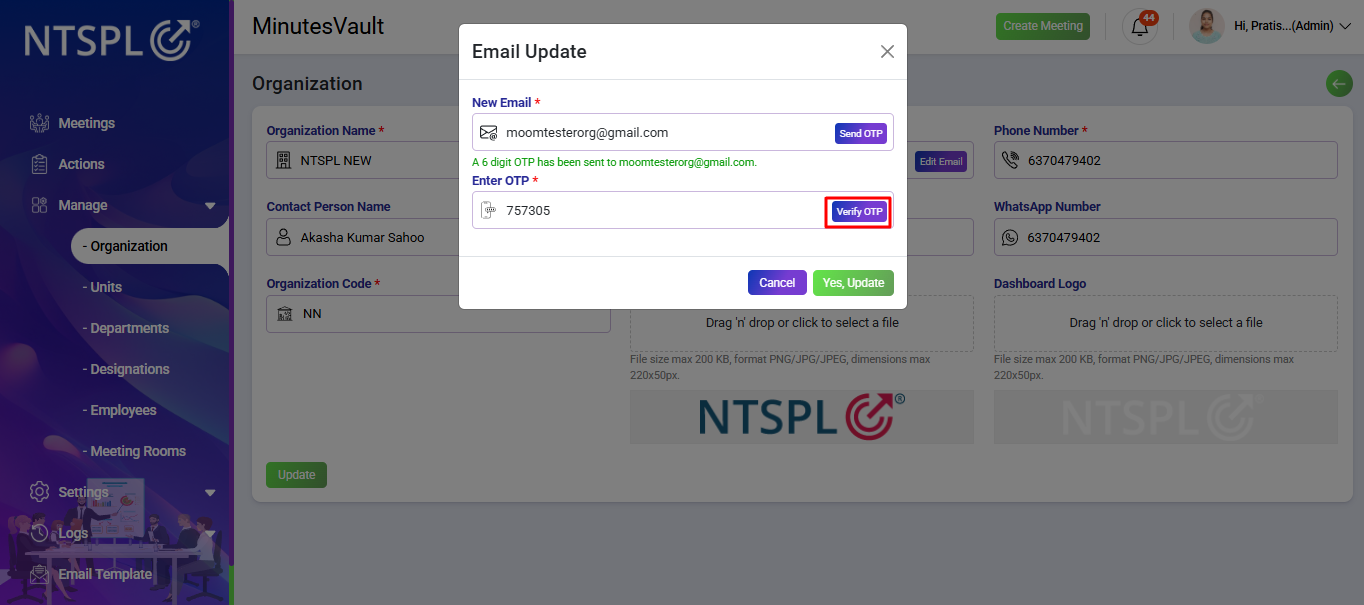
Enter the OTP sent to your email, then click the Verify OTP button to complete the verification.
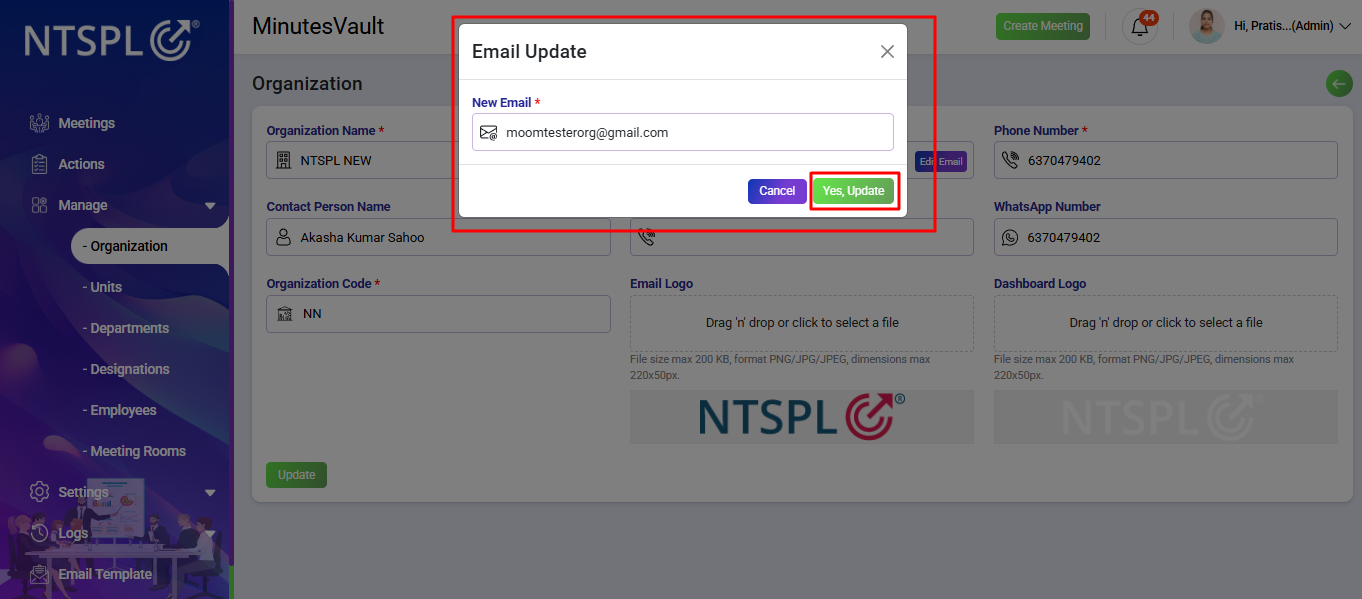
After OTP verification, the New Email will be displayed. Click on Yes, Update to confirm the changes.
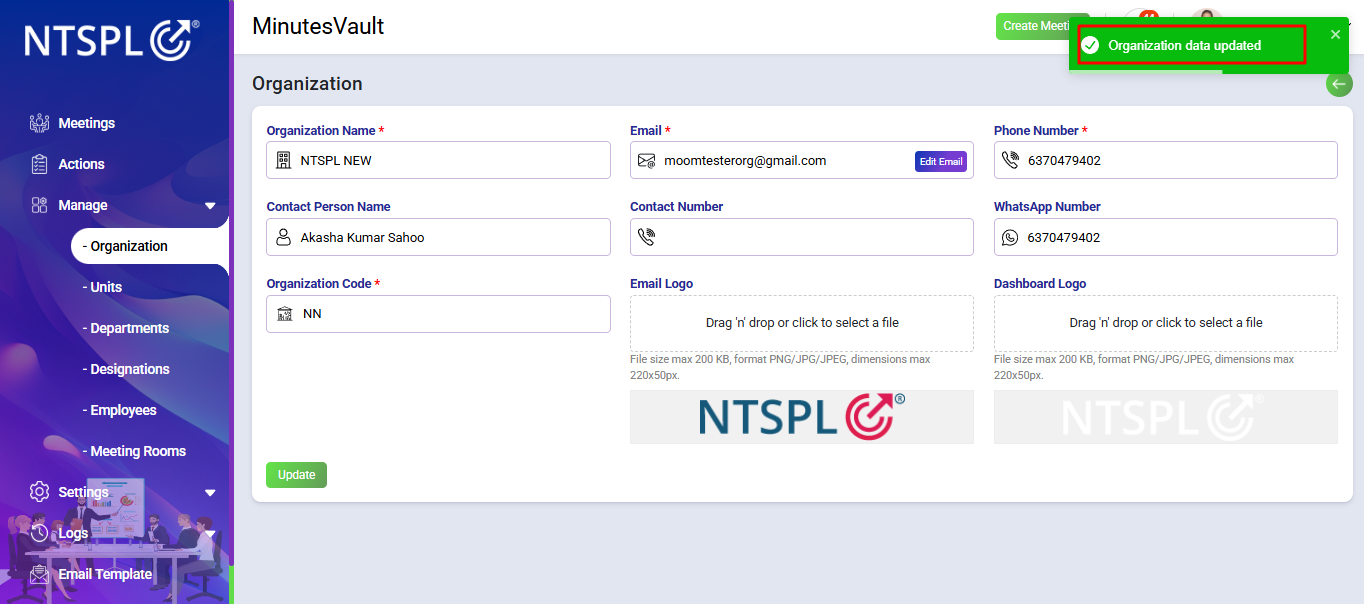
The organization's email has been updated. To update the entire organization details, click the Update button.

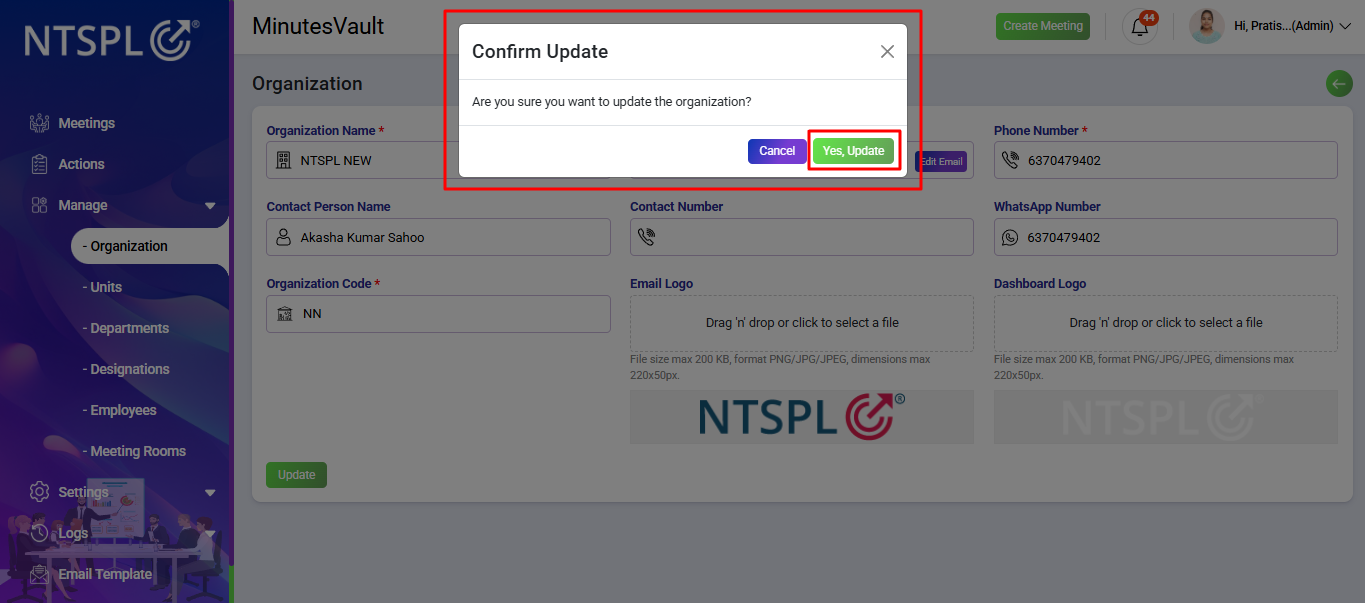
A confirmation message will appear asking if you want to update. To proceed, click Yes, Update. Otherwise, click the Cancel button.
The organization details have been successfully updated.
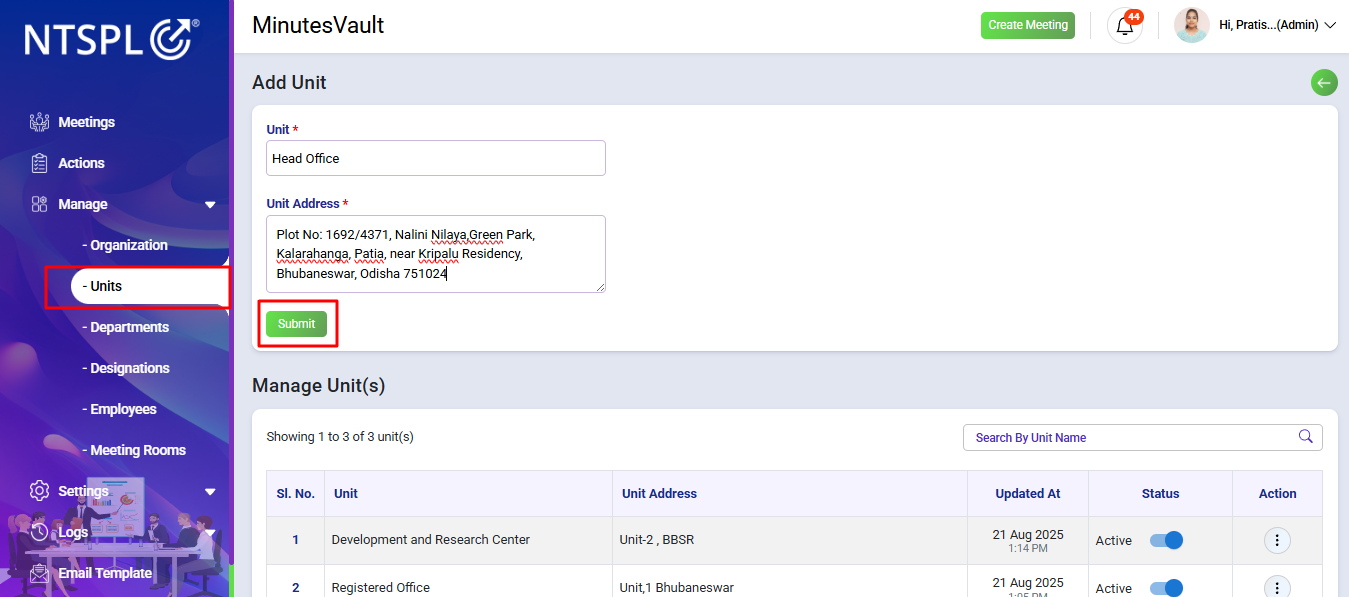
To add Units, enter the Unit Name and Unit Address in the designated fields, then click the Submit button.
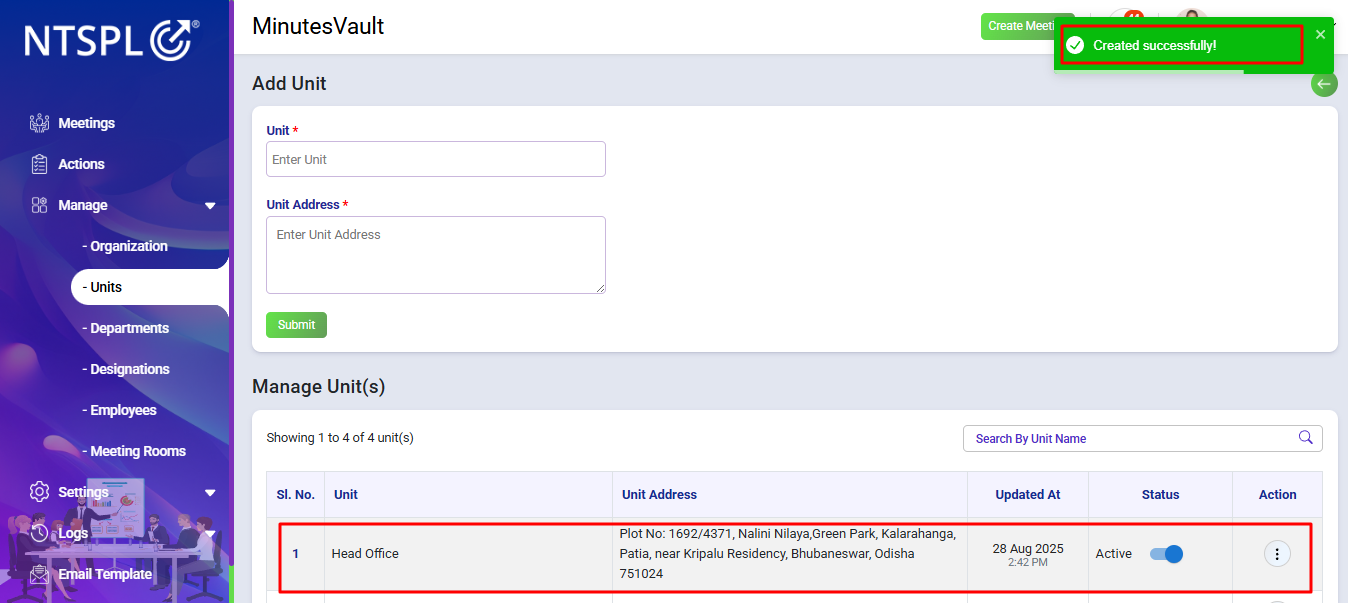
The Unit is added, it will appear in the Manage Unit list.
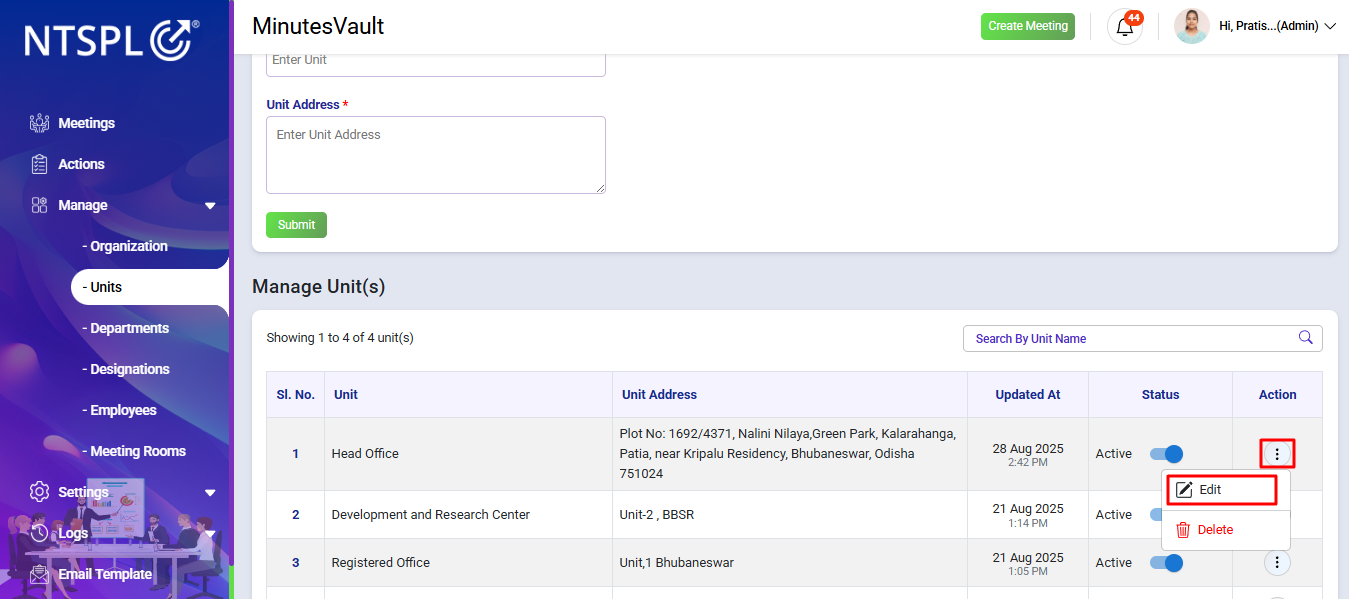
You can now manage this Unit, such as editing it, from the Manage Unit list. To edit the Unit, click the Edit button under the Action menu of the Manage Unit.
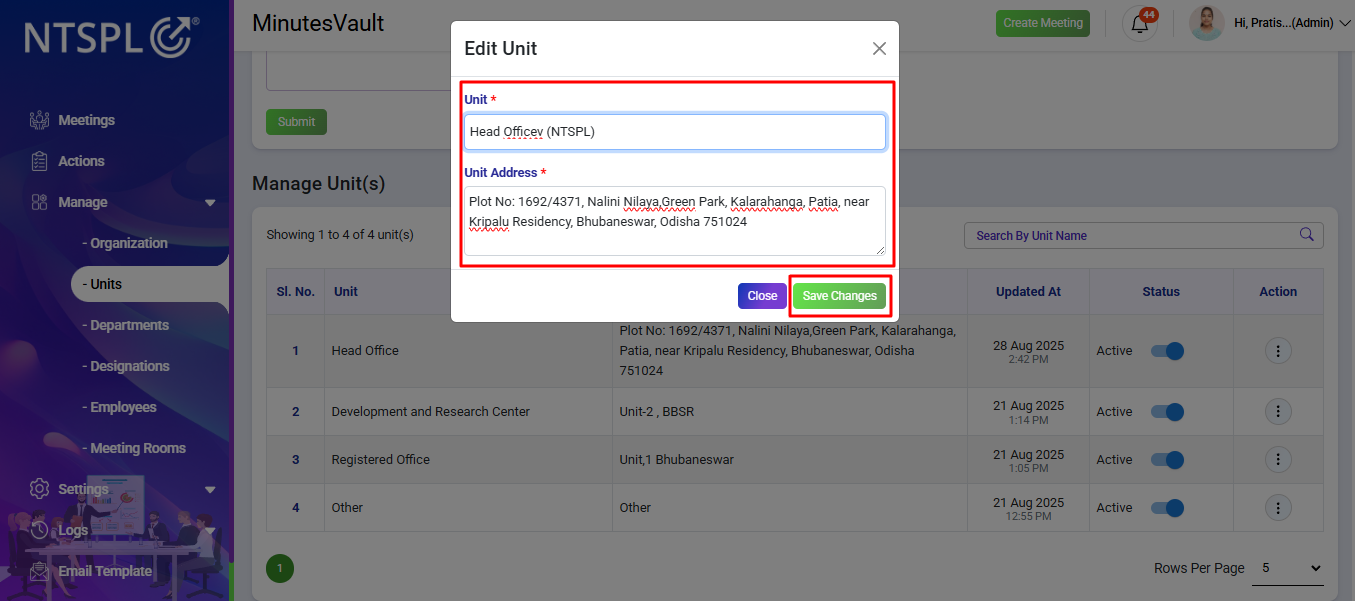
Enter the new Unit Name and Address, then click on Save Changes to update.
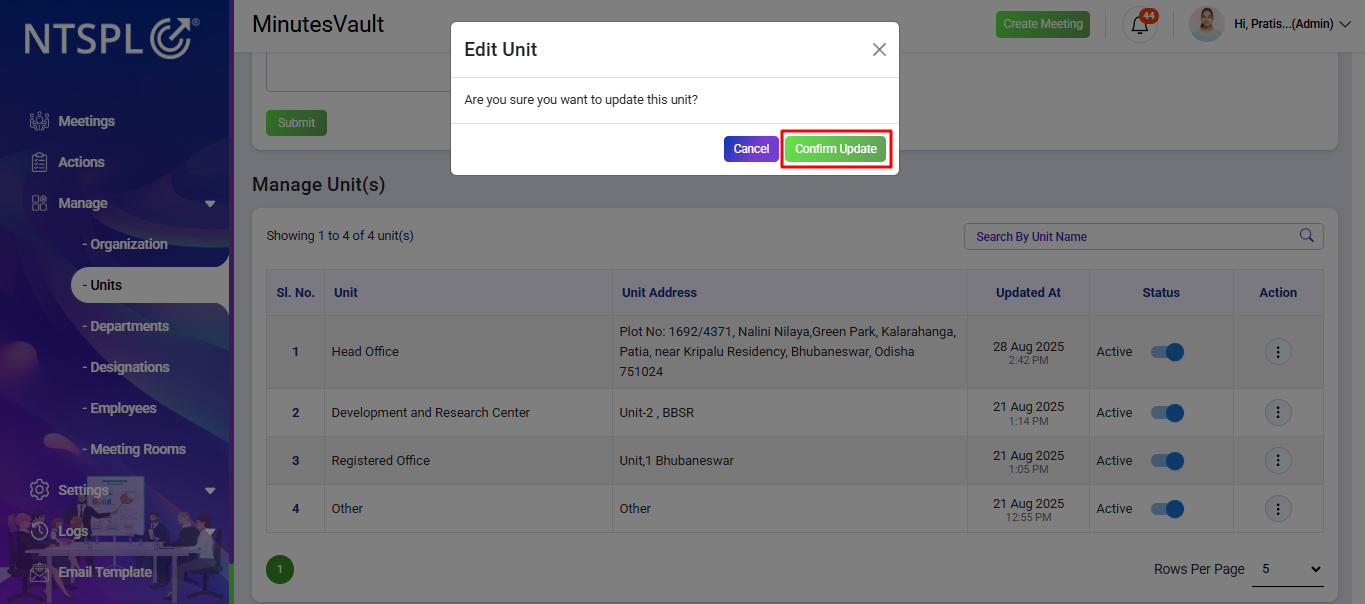
After clicking Save Changes, a confirmation will appear. If you want to update, click on Confirm Update; otherwise, click on Cancel.
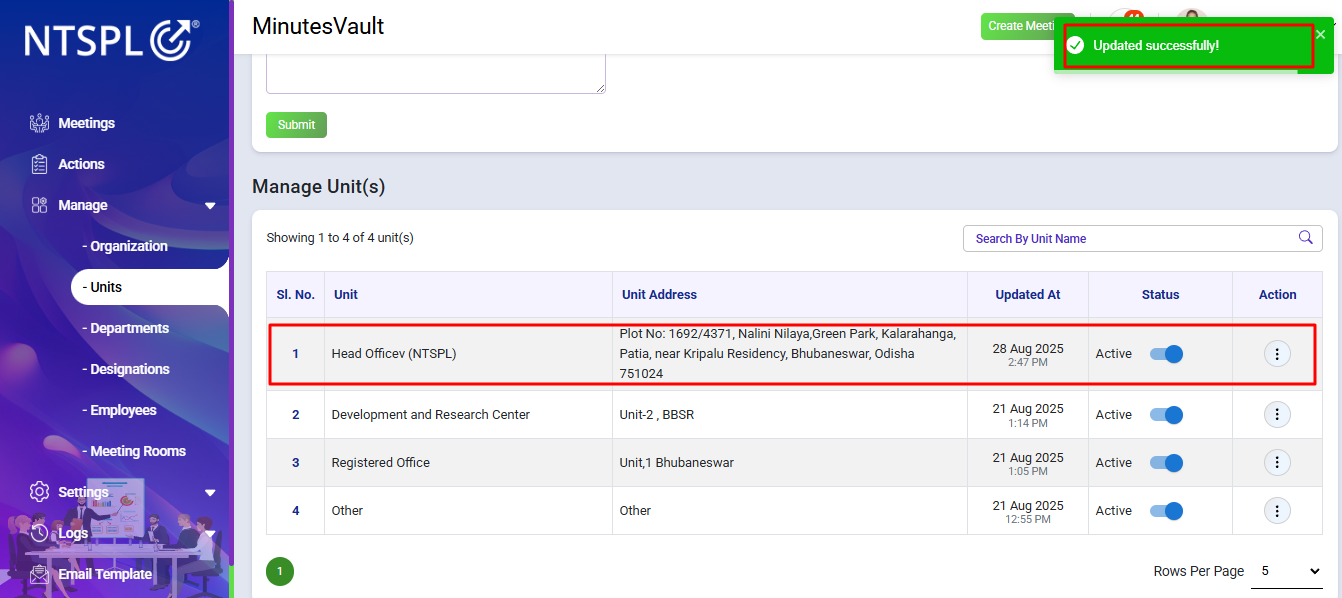
The Unit is updated and will display the updated unit address in the Manage Unit list.
To add departments, navigate to the Departments option under the Manage section.
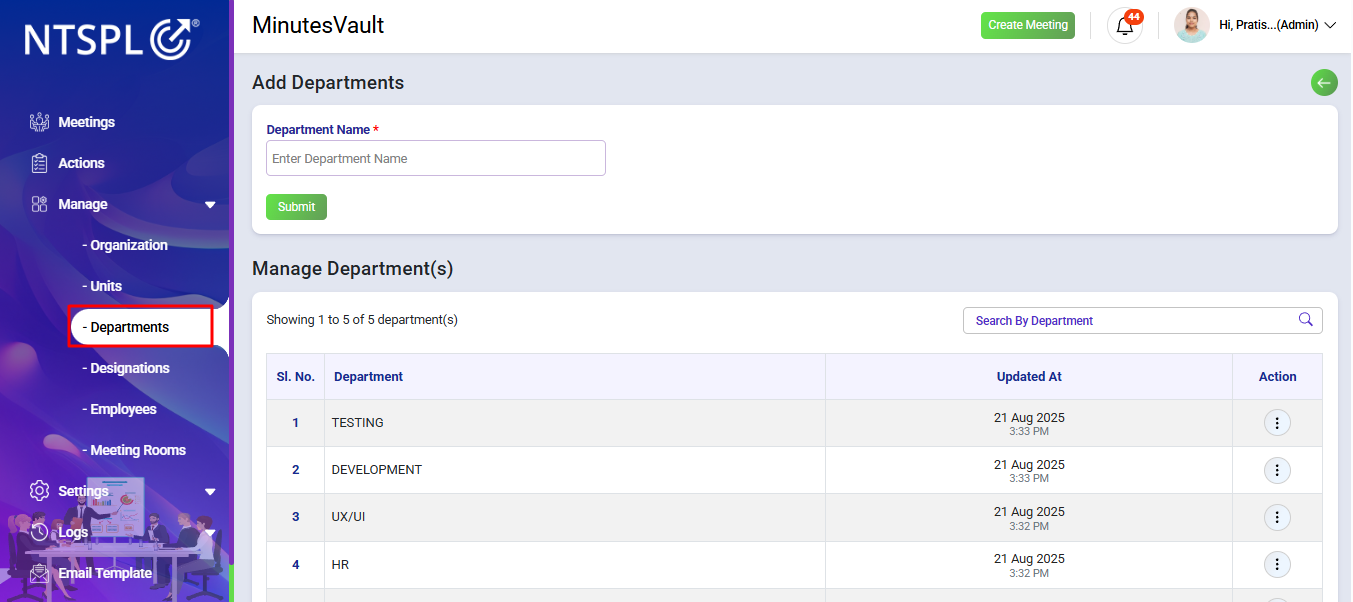
Enter the department name and click on the Submit button to add the department.

The department has been successfully added and will display in the Manage Departments list.

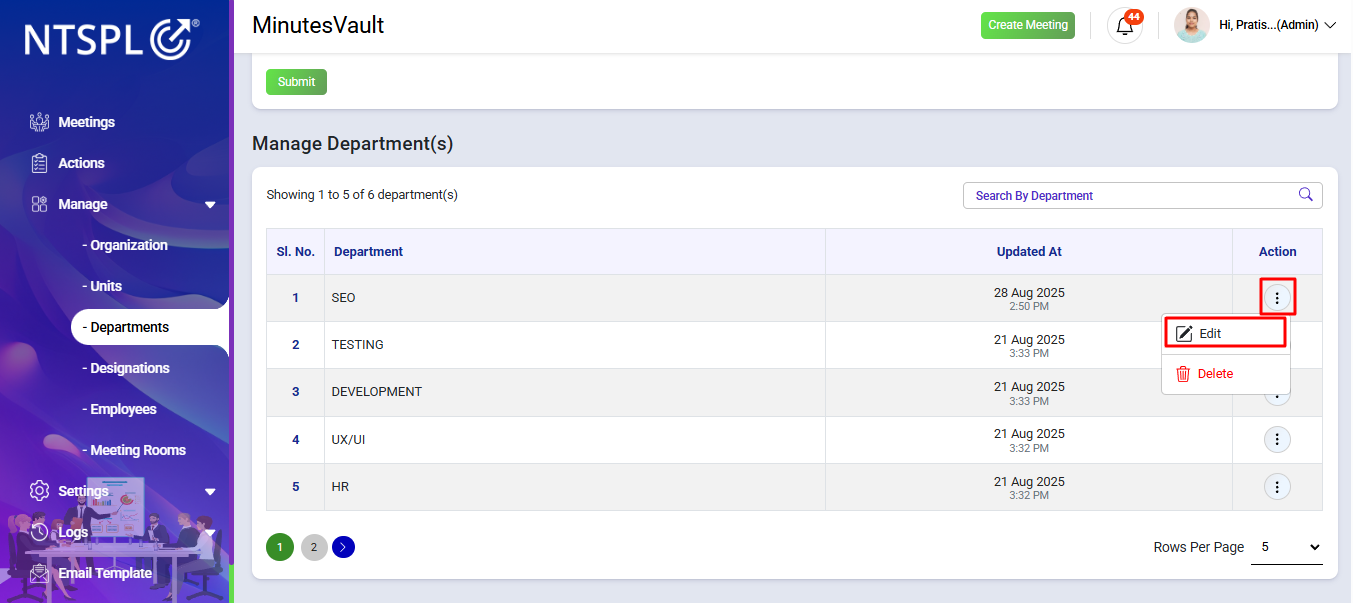
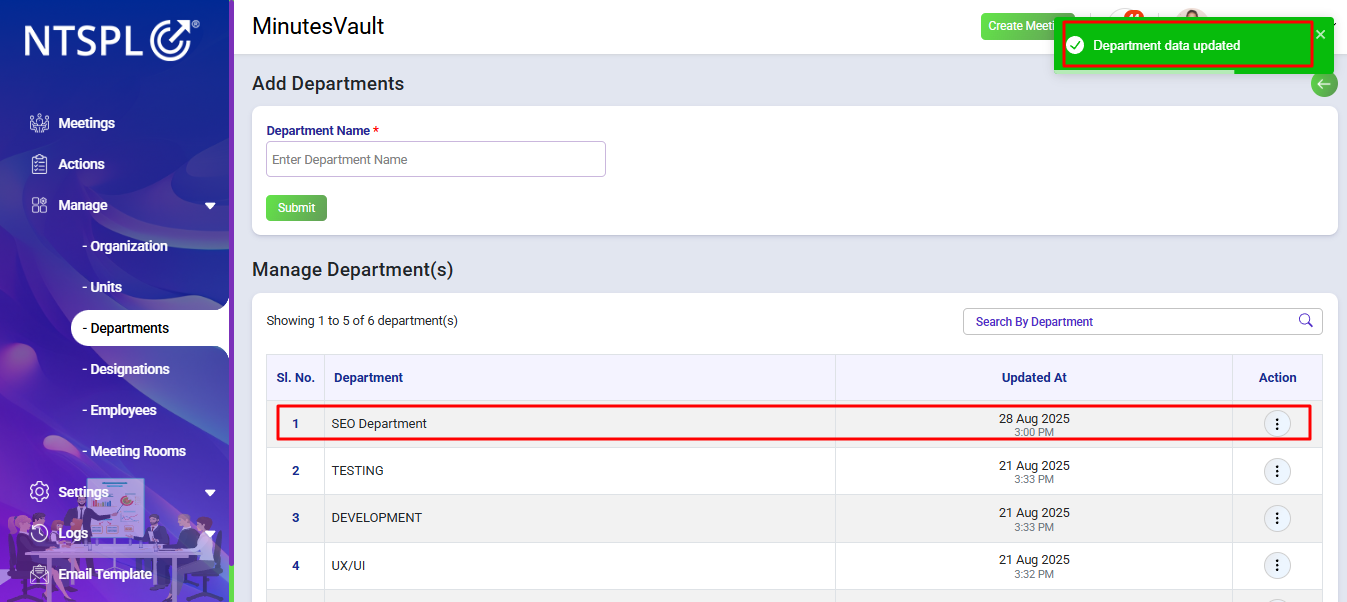
You can now manage this department, such as editing it, from the Manage Departments list. To edit the department, go to the department you want to edit and click the Edit button under the Action menu of the Manage Departments section.
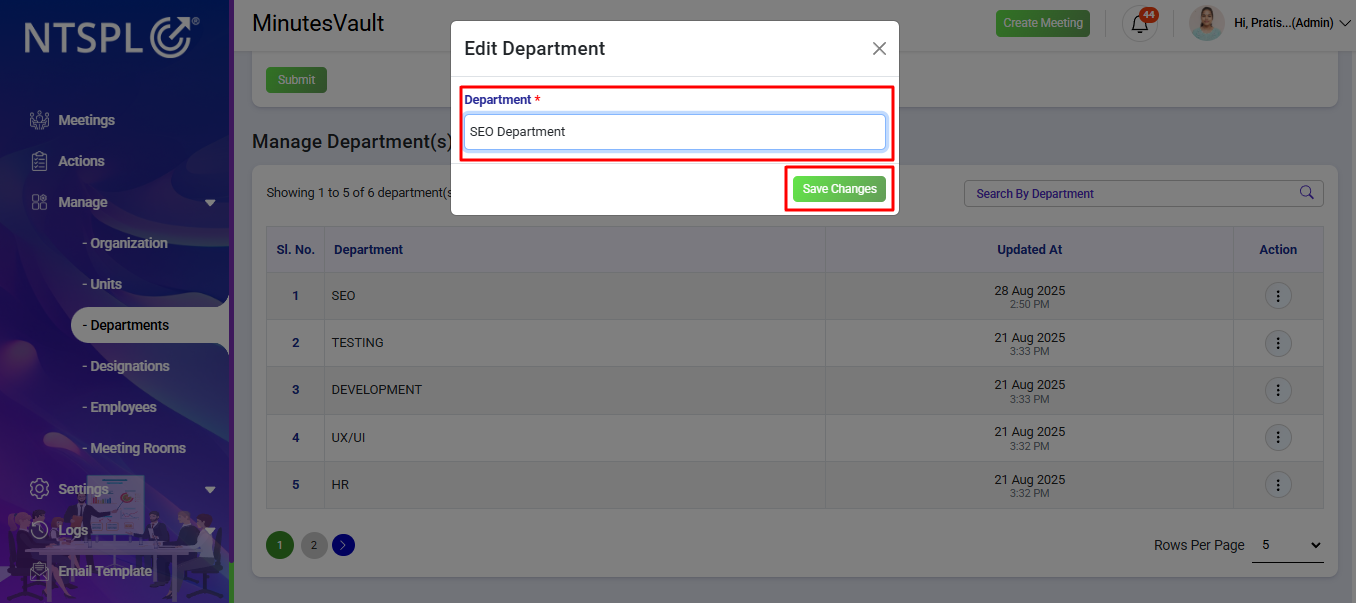
Enter the new department name and click on Save Changes to update.
After clicking Save Changes, a confirmation will appear. If you want to update, click on Confirm Update; otherwise, click on Cancel.
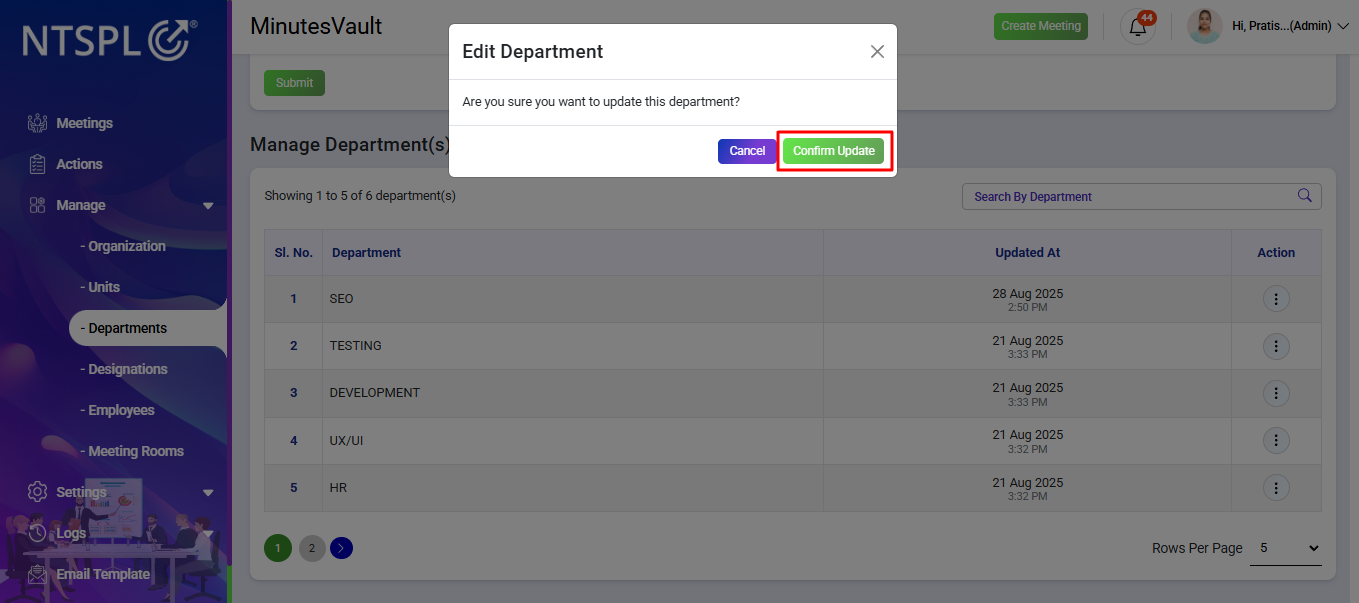
The Department is updated and will display the updated department in the Manage Department list.
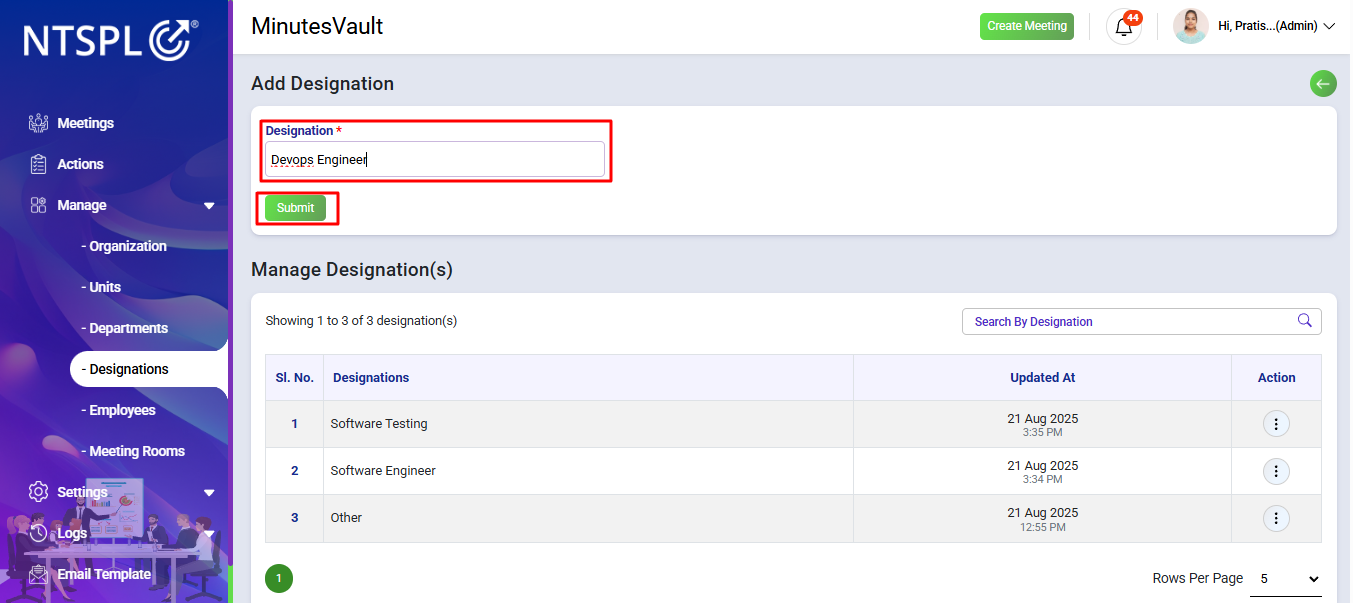
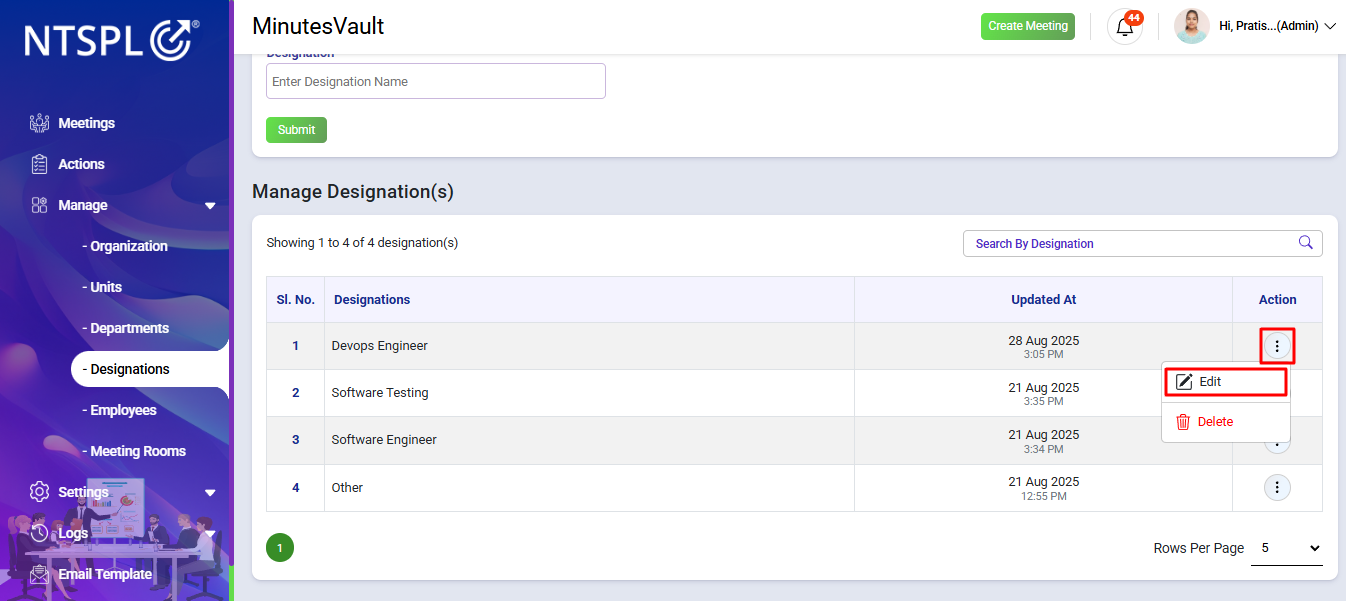
To add designation, navigate to the Designations option under the Manage section.
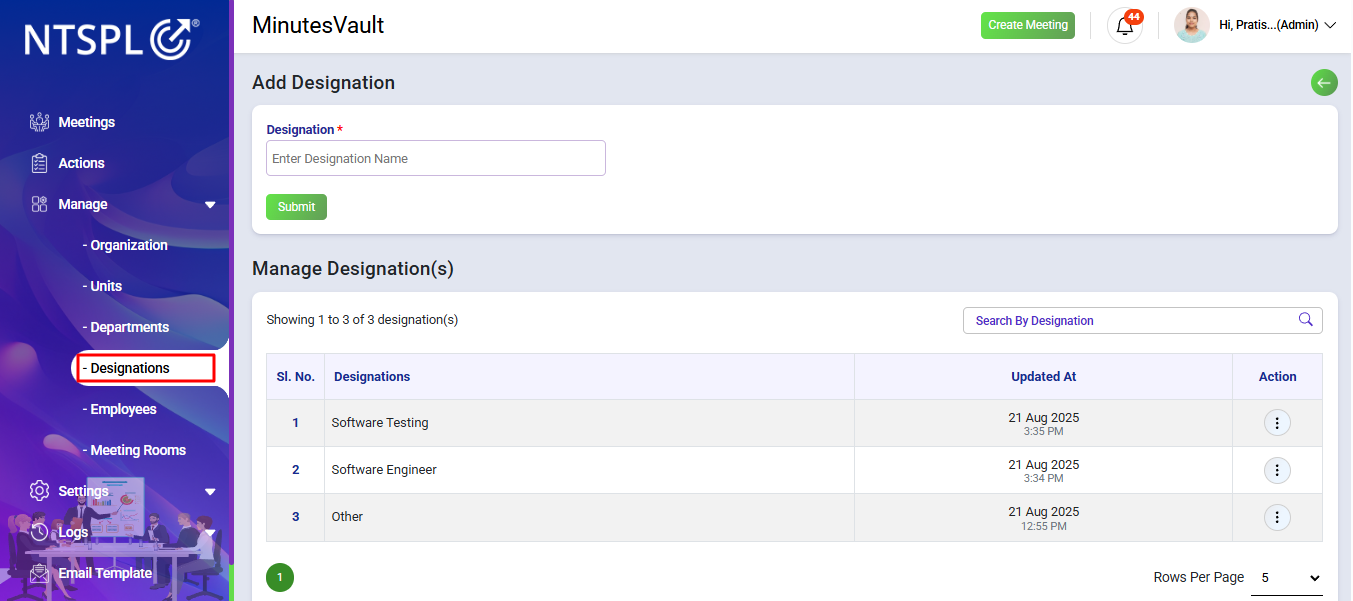
Enter the designation name and click on the Submit button to add the designation.
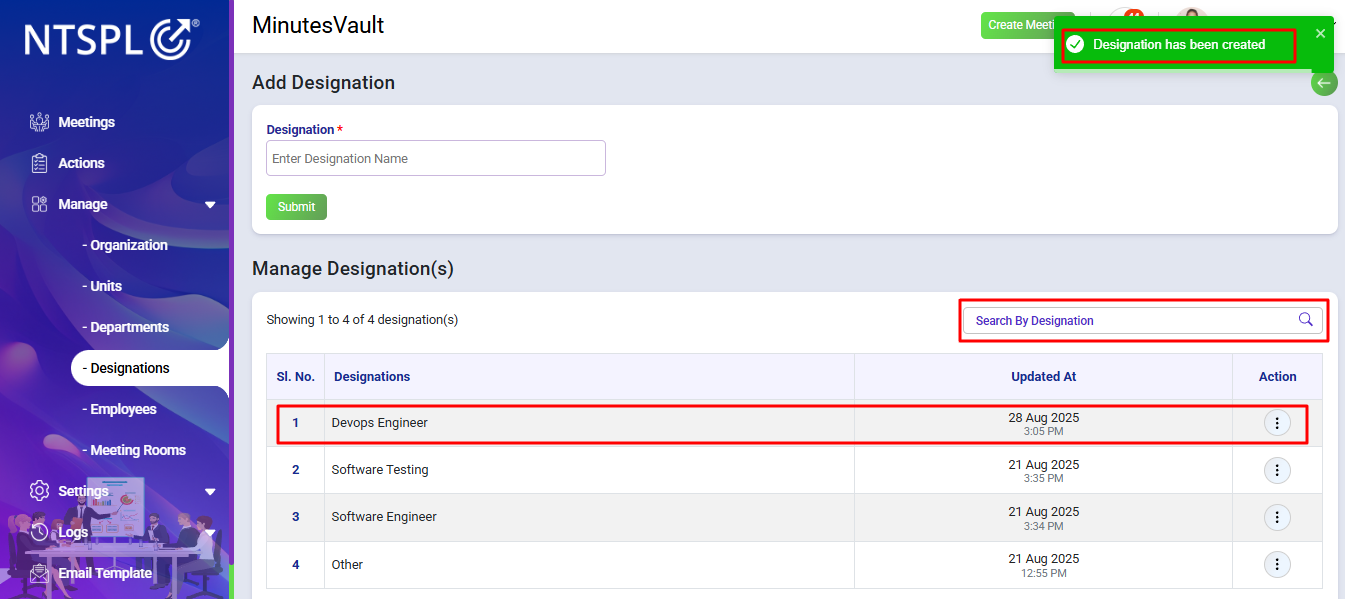
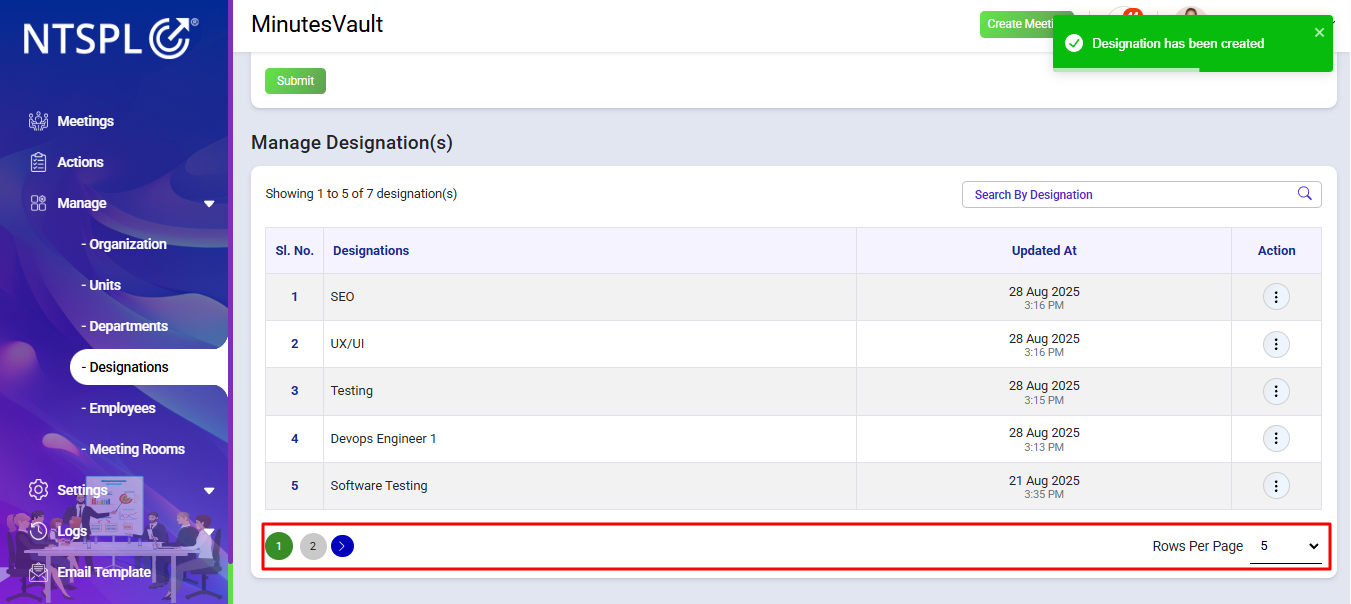
The designation has been successfully added and will be displayed in the Manage Designation list. You can also search for a designation using the search bar.
You can now manage this designation, such as editing it, from the Manage Designation list. To edit the designation, go to the designation you want to edit and click the Edit button under the Action menu of the Manage Designations section.
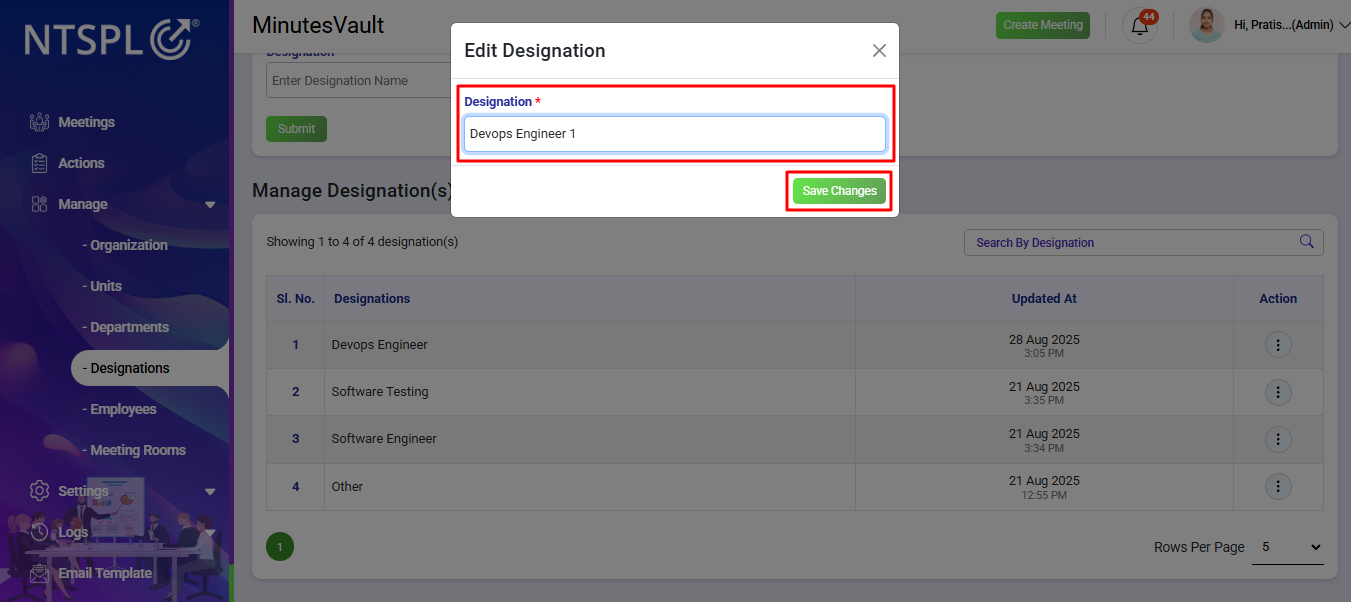
Enter the new designation and click on Save Changes to update.
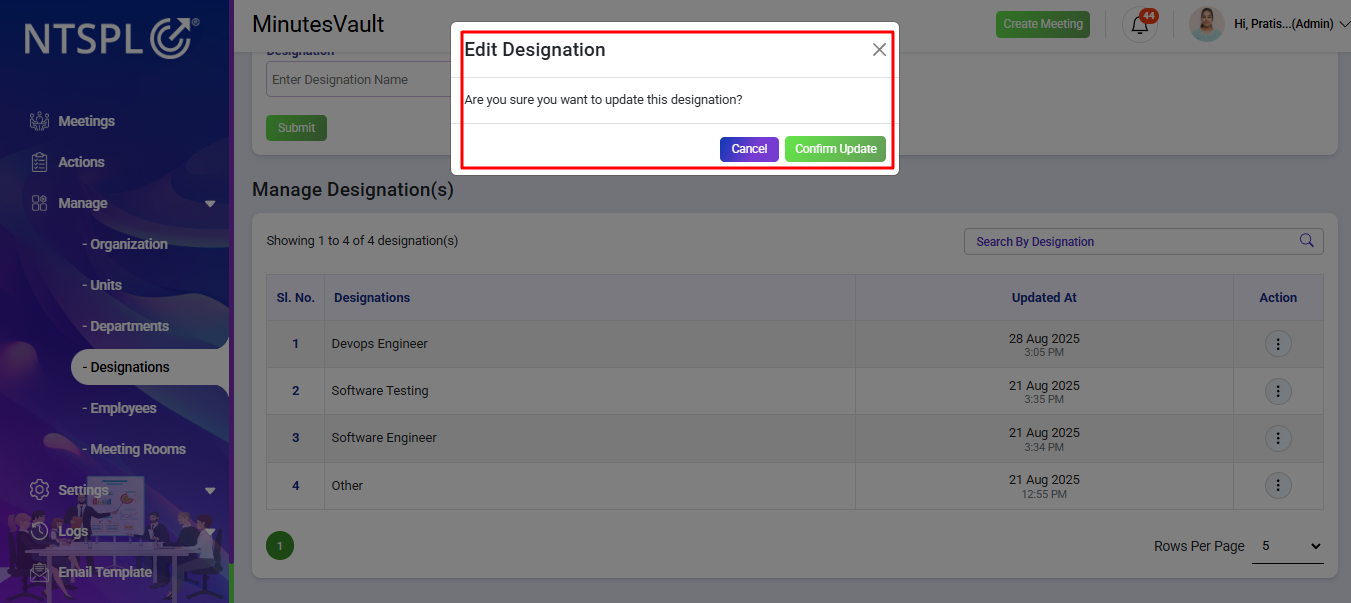
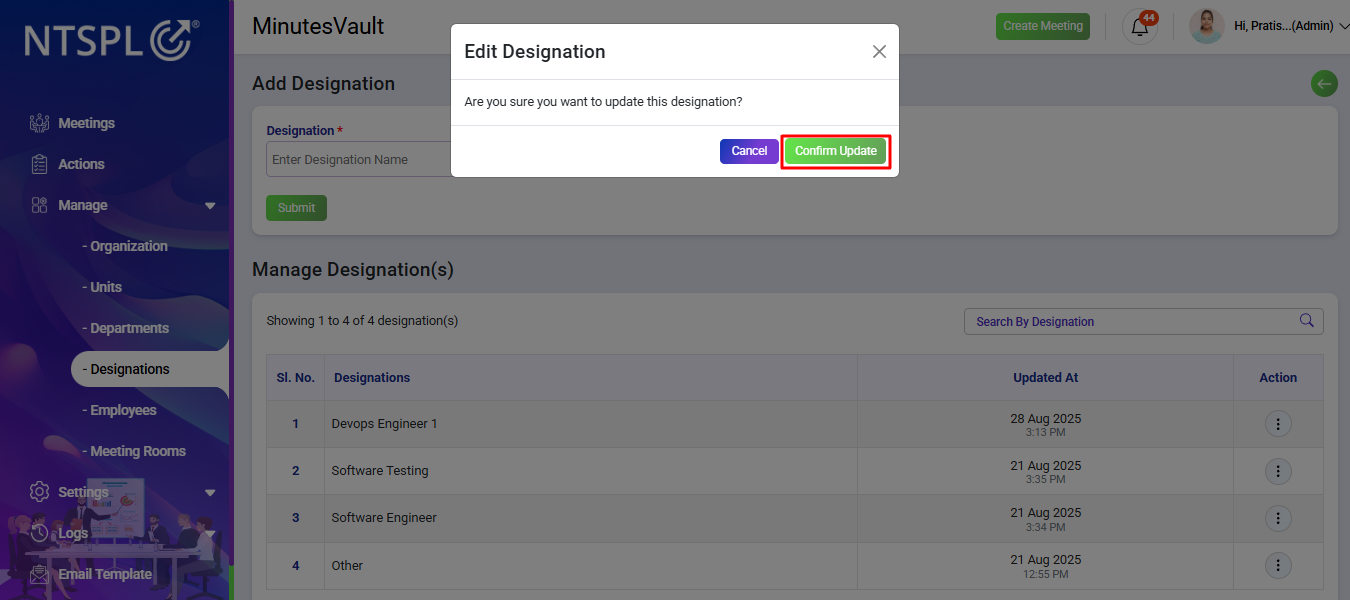
After clicking Save Changes, a confirmation will appear. If you want to update, click on Confirm Update; otherwise, click on Cancel.
The designation is updated and will display the updated designation in the Manage Designation list.
For easy navigation, use pagination and adjust the number of entries displayed per page in the designation list.
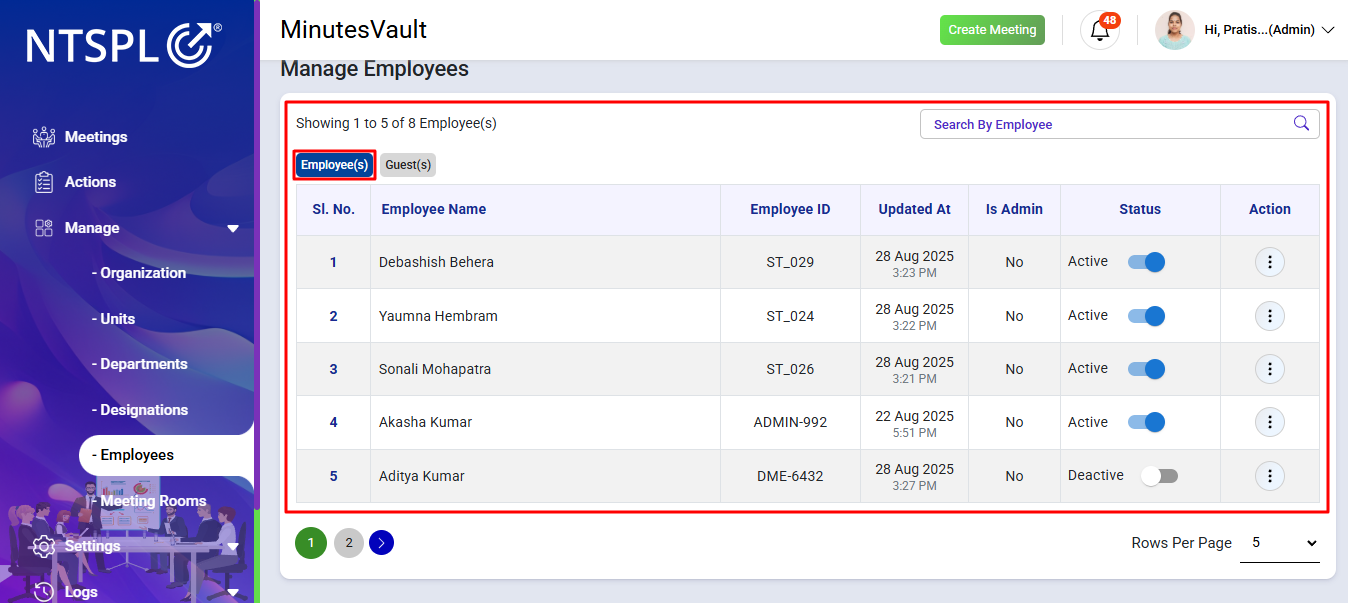
To manage employees, click on Employee option under Manage section.
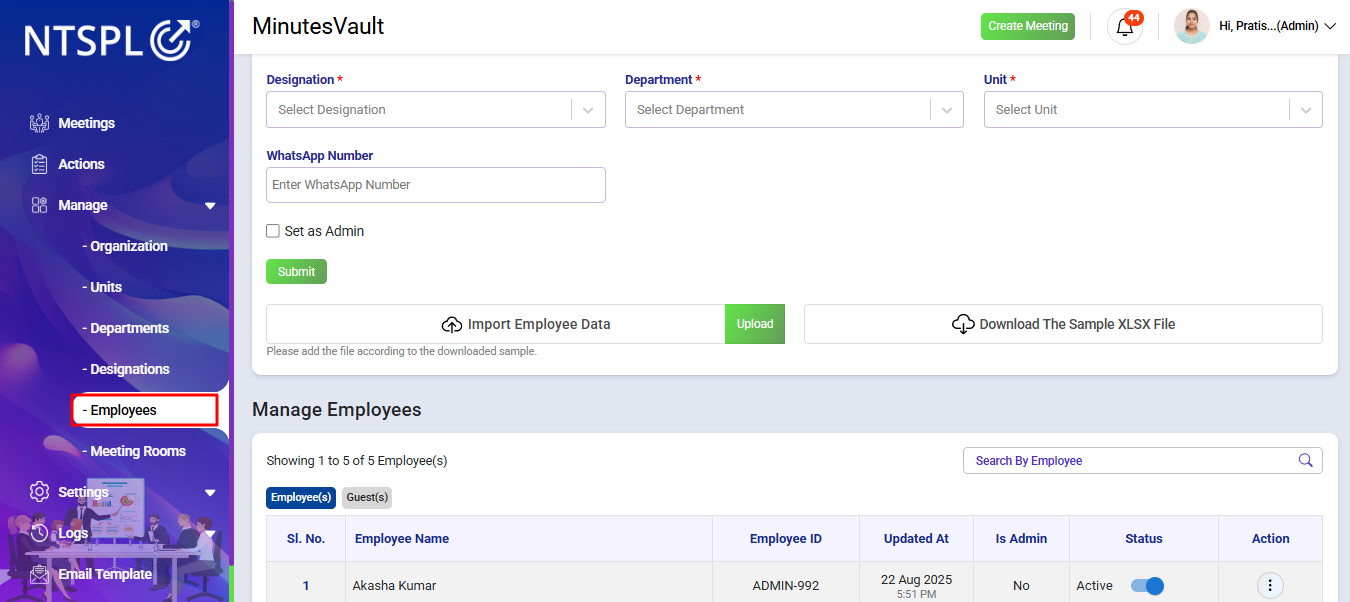
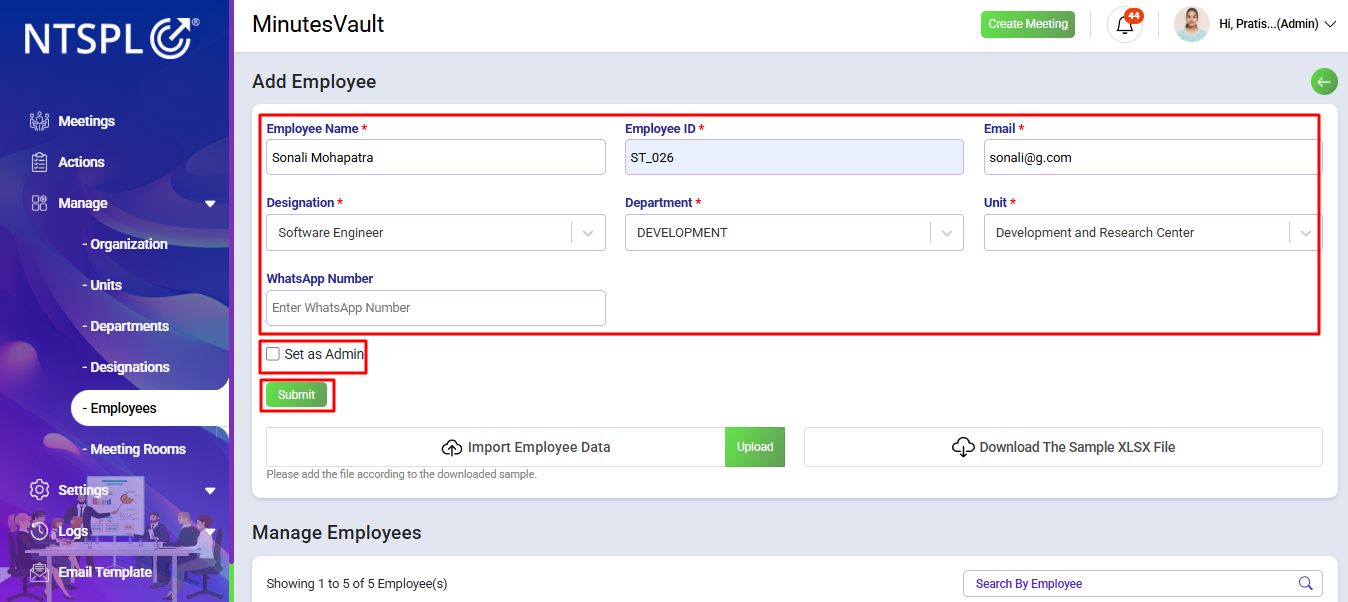
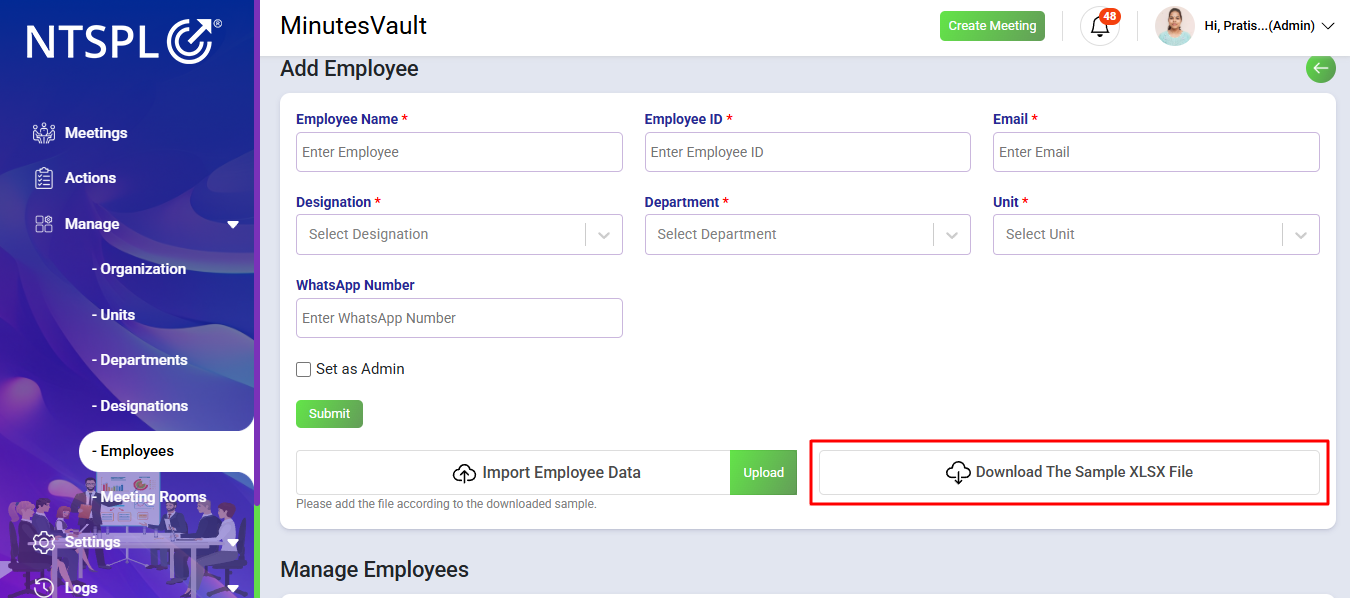
Enter employee details and click on Submit to add the employee. If you want to set the employee as Admin, Click on Set as Admin checkbox.
After that you can see Success message and the added employee in the Employee list.
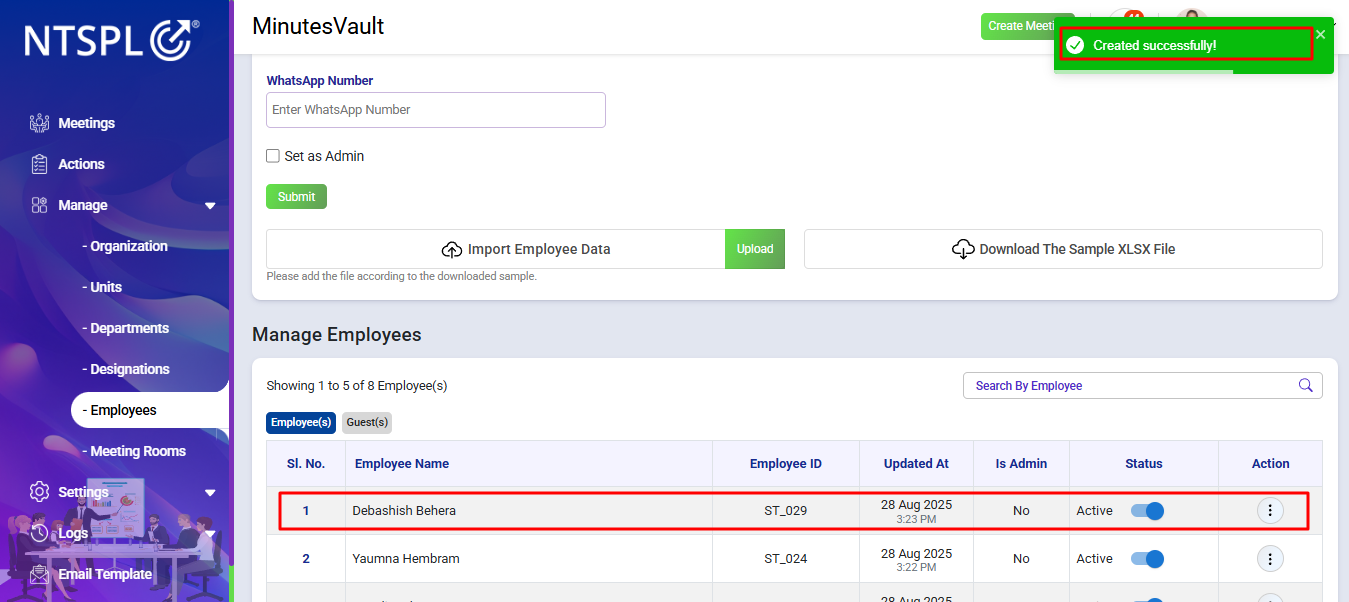
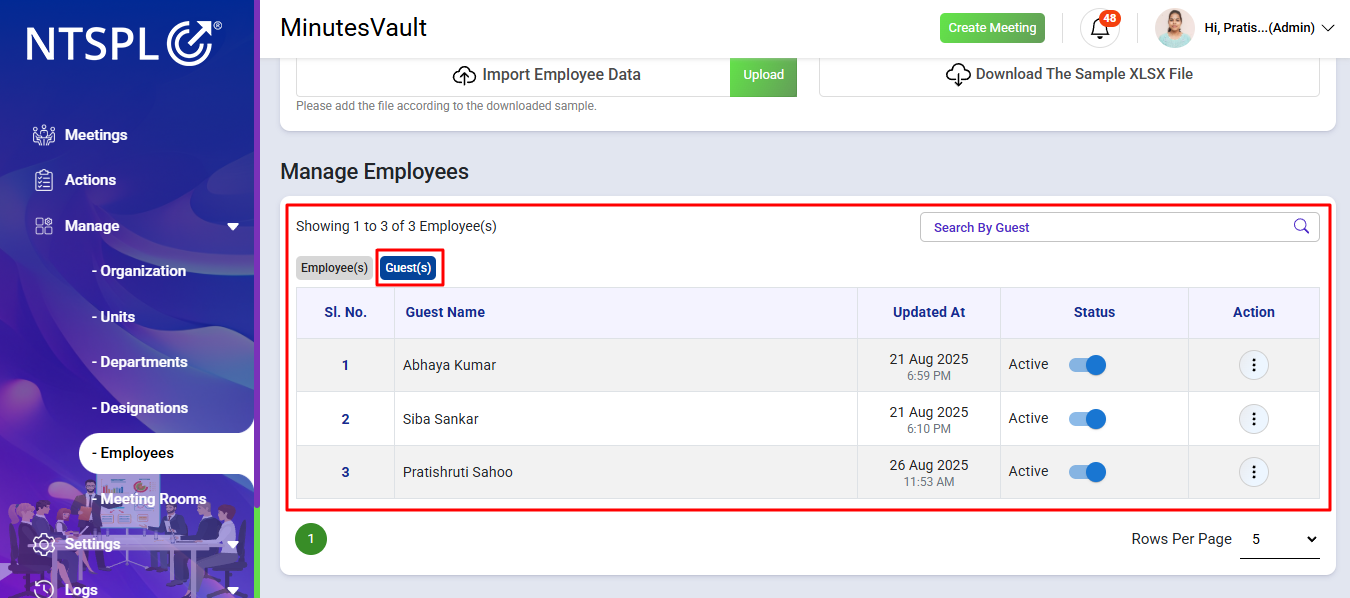
Here you can see both Employees and Guests in the list. Both types of users can be managed and edited as needed.
First, you need to download the sample XLSX file. The sheet will contain required columns such as Name, Email, Emp Id, Unit ID, Department ID, and Designation ID. You must use only the IDs that already exist in the system — new IDs cannot be added manually.
After filling the sheet with valid employee data, you can import the same file by clicking on Import Employee Data. The system will process the file, and employees will be added automatically.
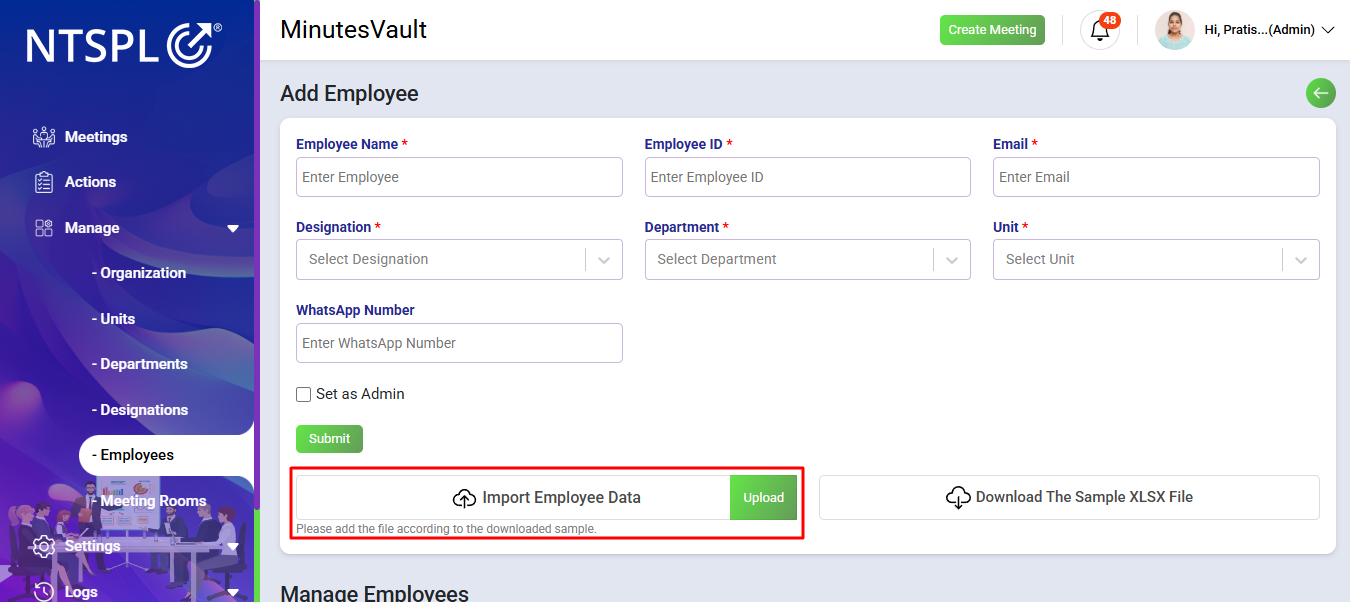
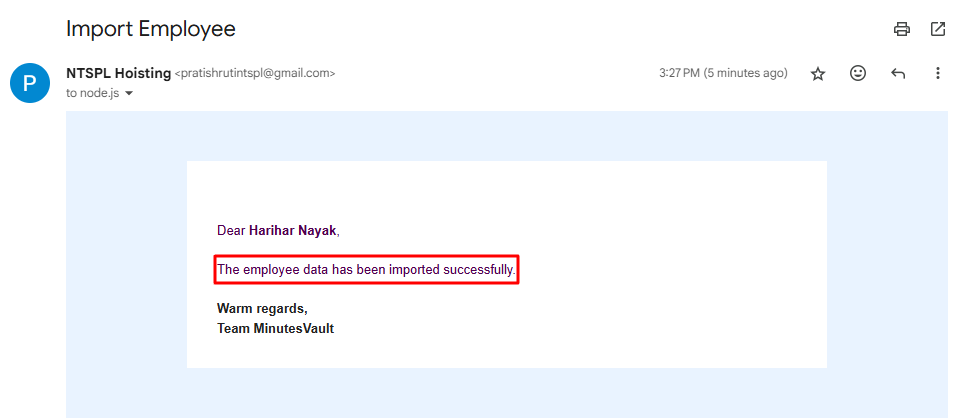
Once the import is successful, you will receive an email confirmation that the employees have been added successfully.
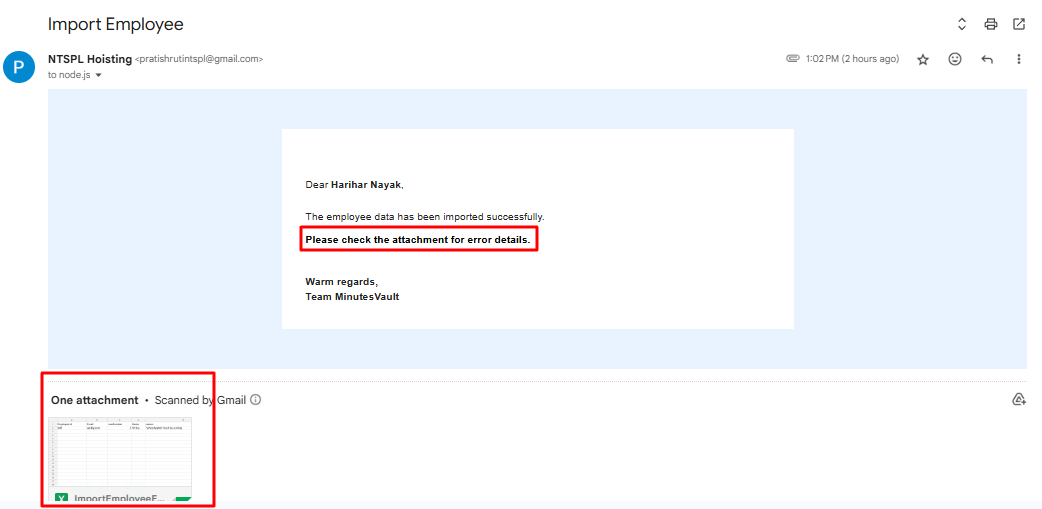
If there are any errors during the import process, the system will send you an error sheet via email. This sheet will list all invalid or missing data so you can correct and re-upload the file.
Here you can see the list of all Employees.
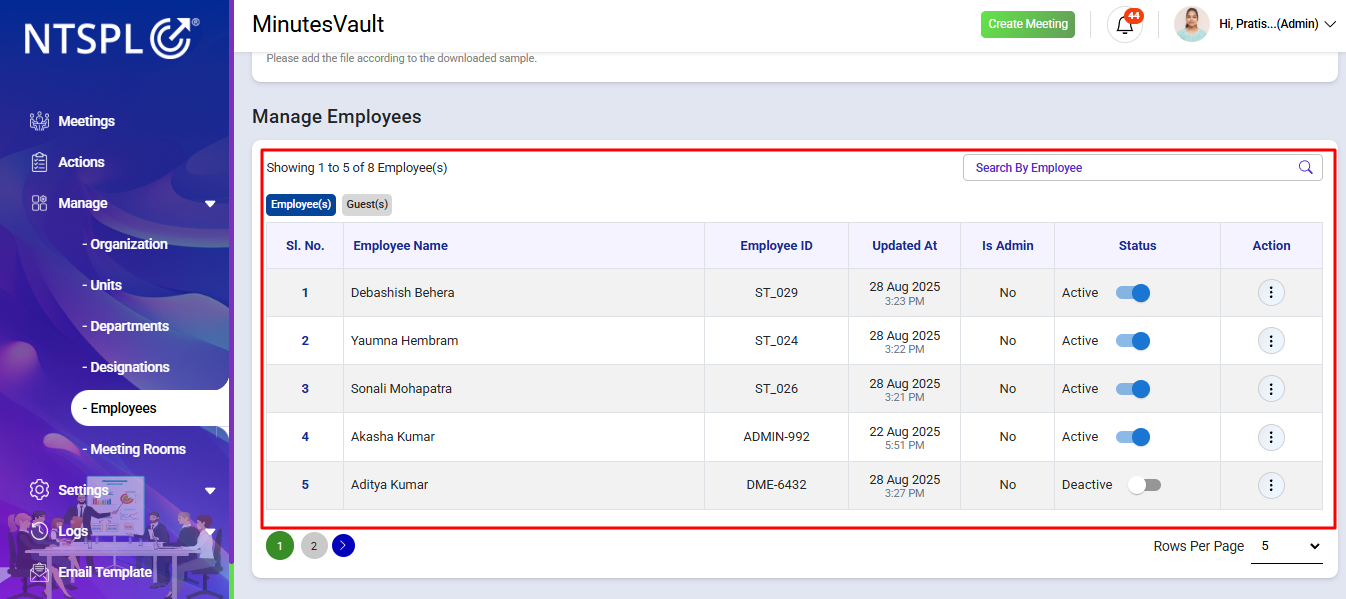
Click on the Page Number to go the desired page or use Arrow Mark to navigate the page by using pagination.

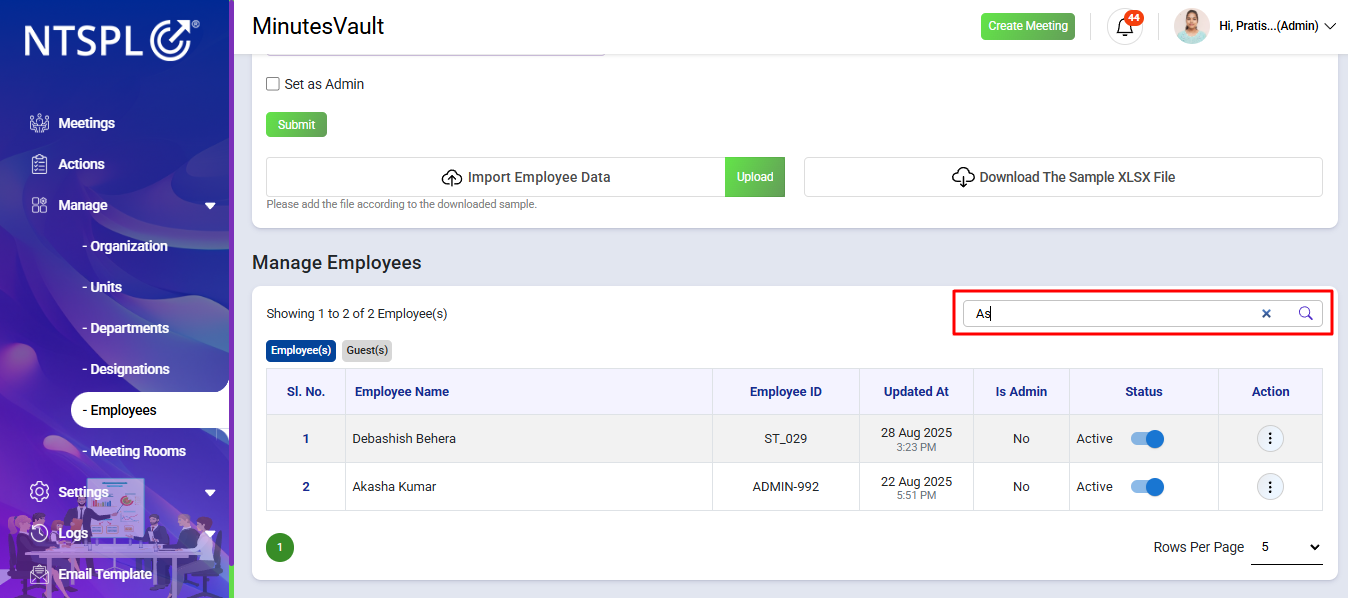
You can Search the Employee by Employee Name/Employee Id to see a particular employee.
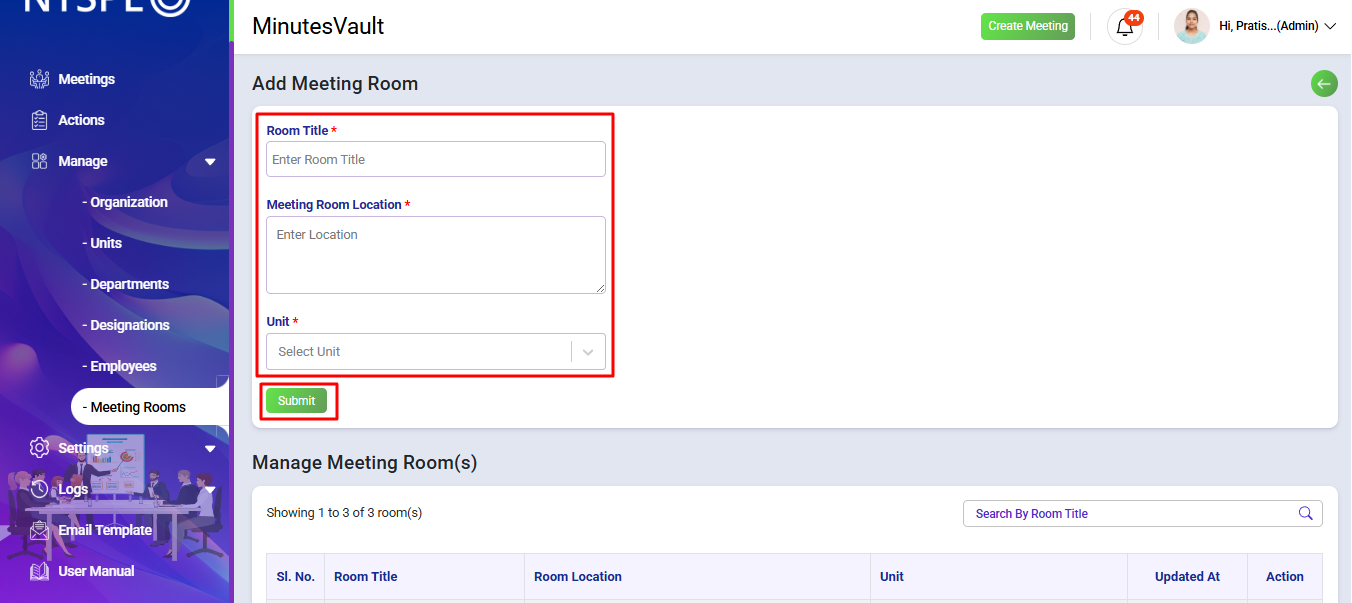
To manage Meeting Rooms, click on Meeting Rooms option under Manage section.
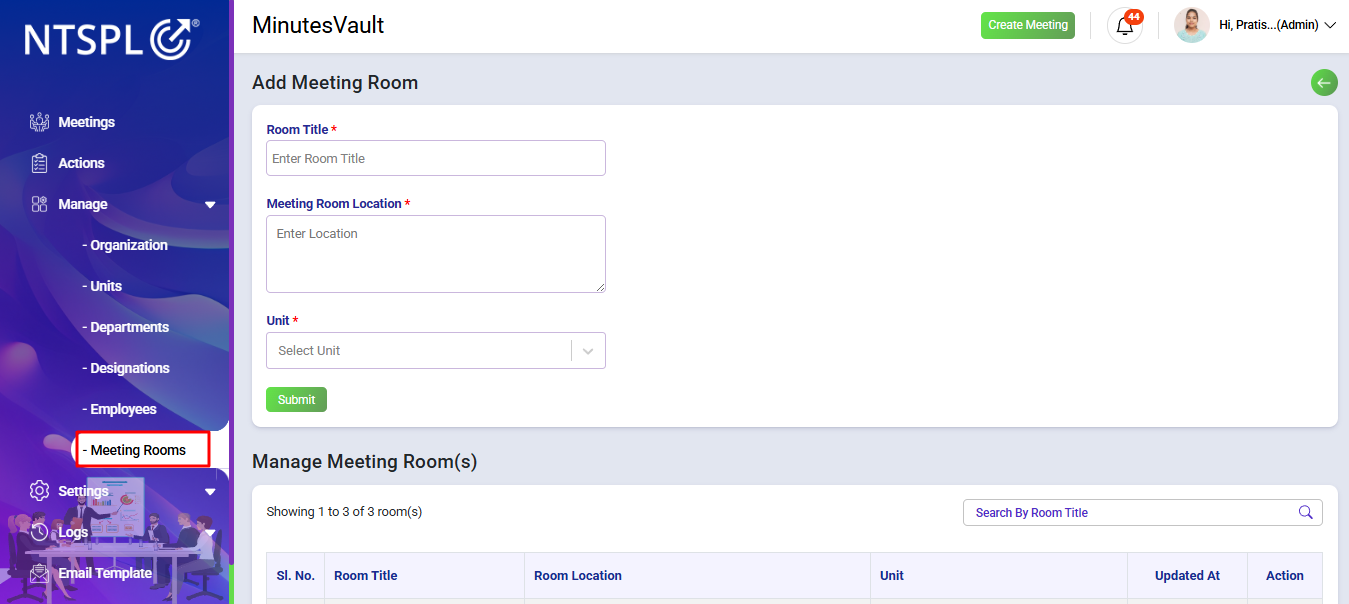
Enter meeting room details and click on Submit to add the meeting room.
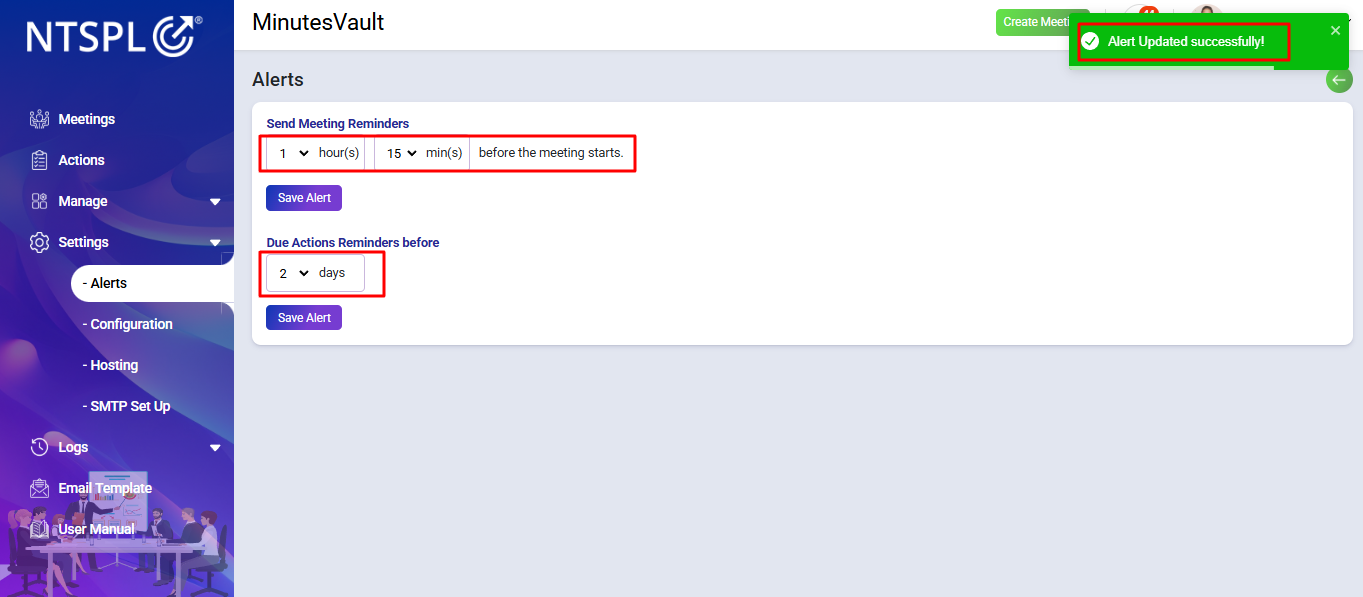
To configure alerts, navigate to the Alerts option under the Manage section.
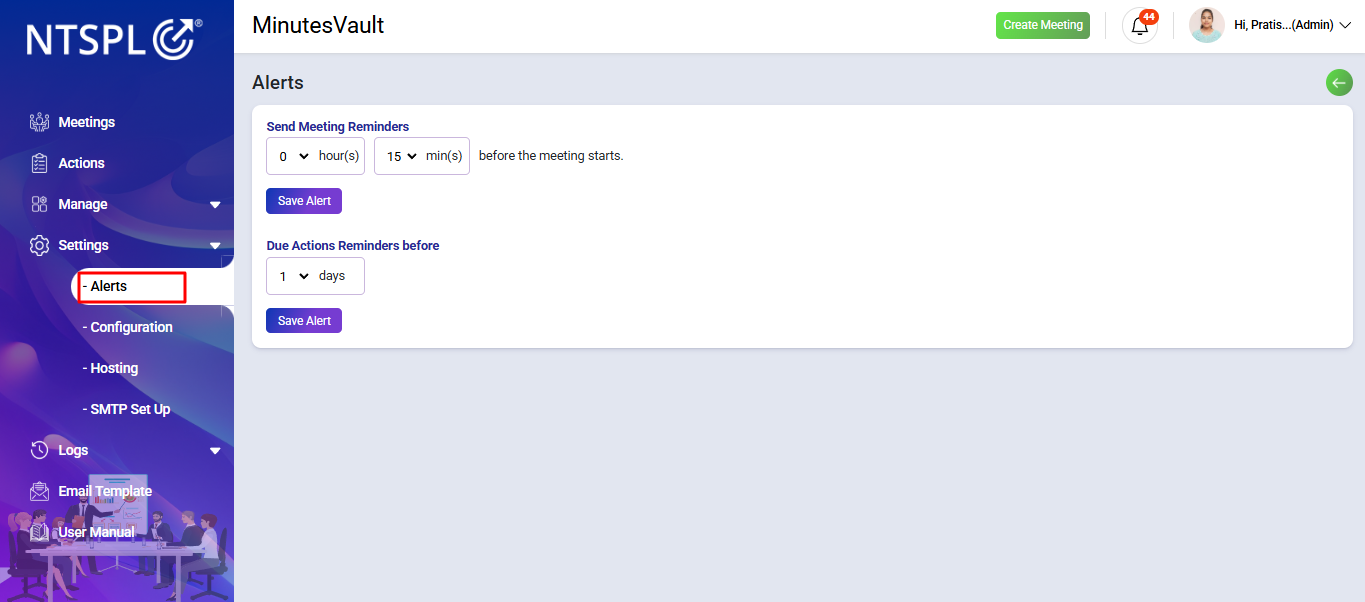
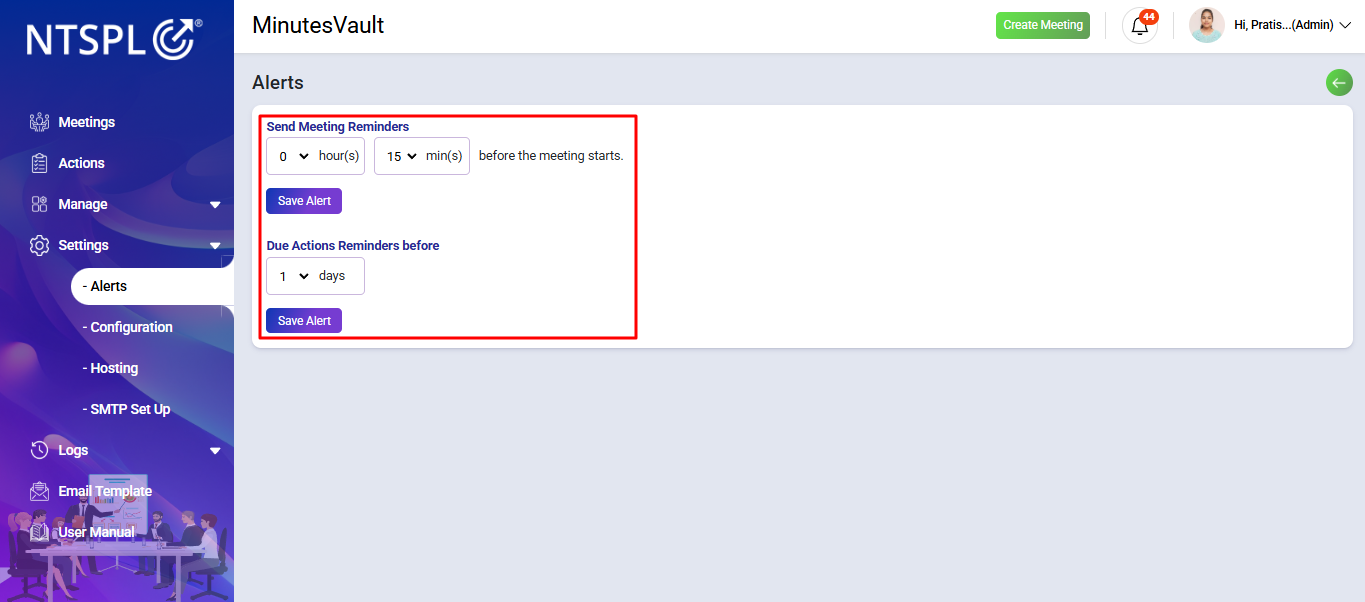
To configure meeting reminders and follow-up actions to stay on track. Set alerts to notify participants a specific number of hours or minutes before a meeting.
Additionally, schedule periodic chase-up actions to ensure timely follow-ups. Customize these settings and click 'Save Alert Setting' to apply your preferences.
Alert reminders have been successfully updated.
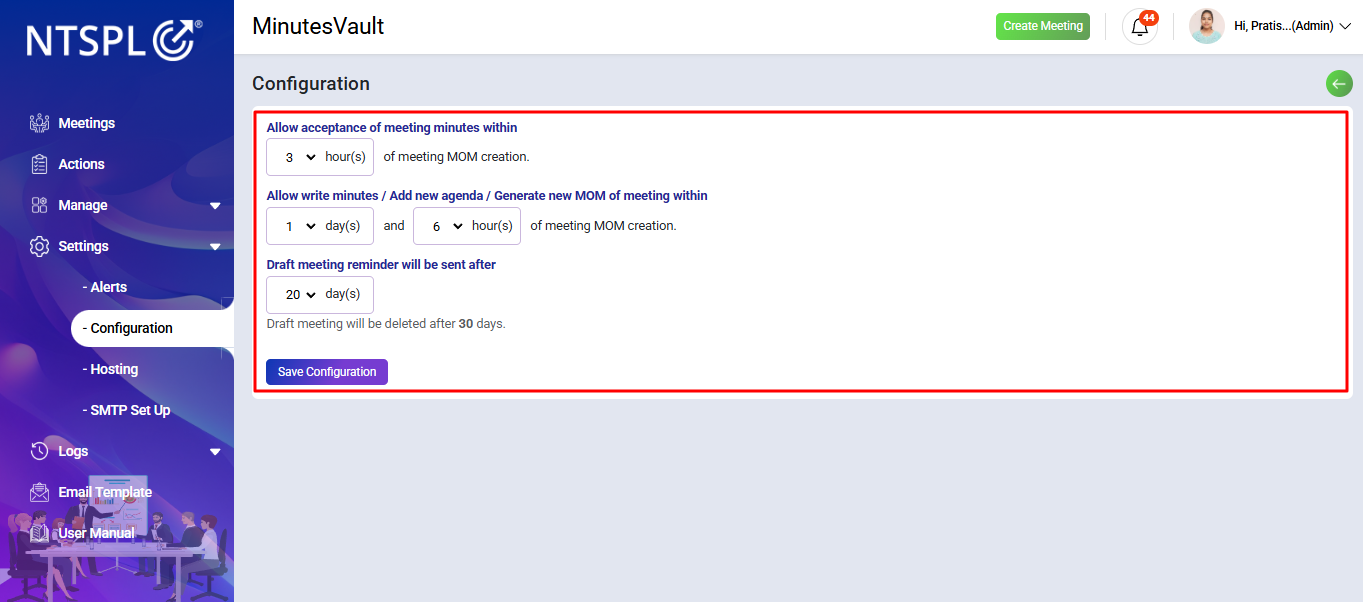
To configure meeting minutes, navigate to the Configuration option under the Manage section.
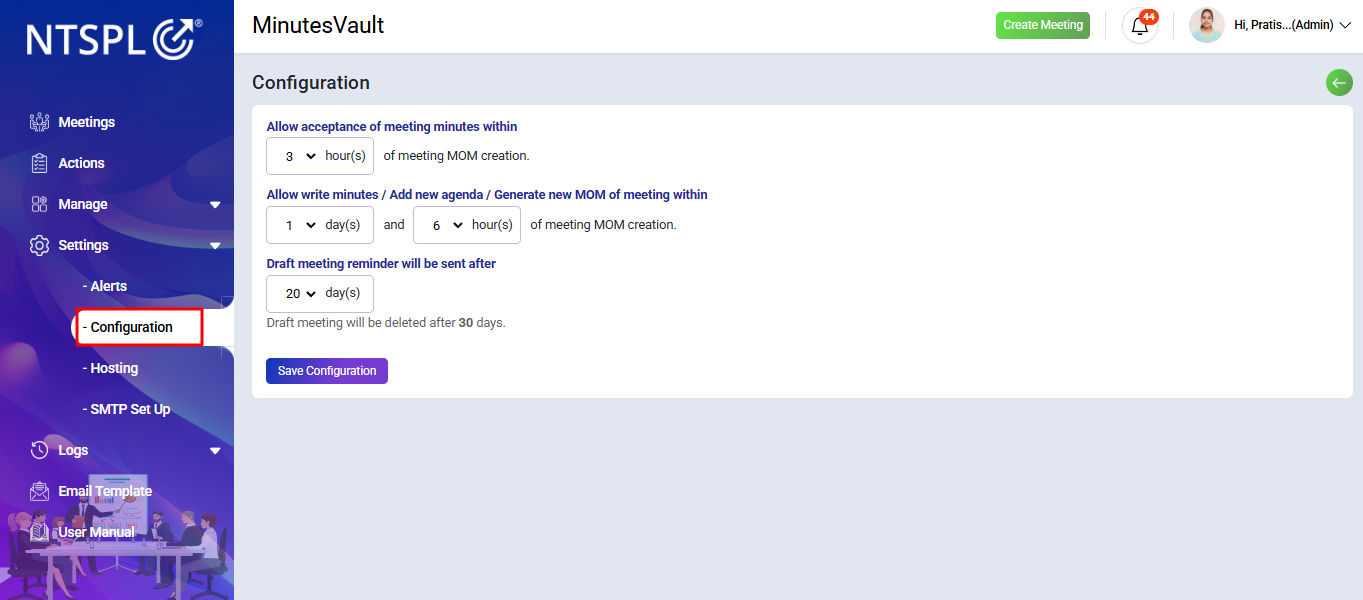
Customize the meeting minutes workflow by setting time limits for key actions. Define the allowed duration for accepting meeting minutes within a specific number of hours after the MOM (Minutes of Meeting) is created.
Additionally, set a time limit for writing minutes, adding new agenda items, or generating a new MOM within a specified number of days and hours after MOM creation.
Click Save Configuration to apply your settings.
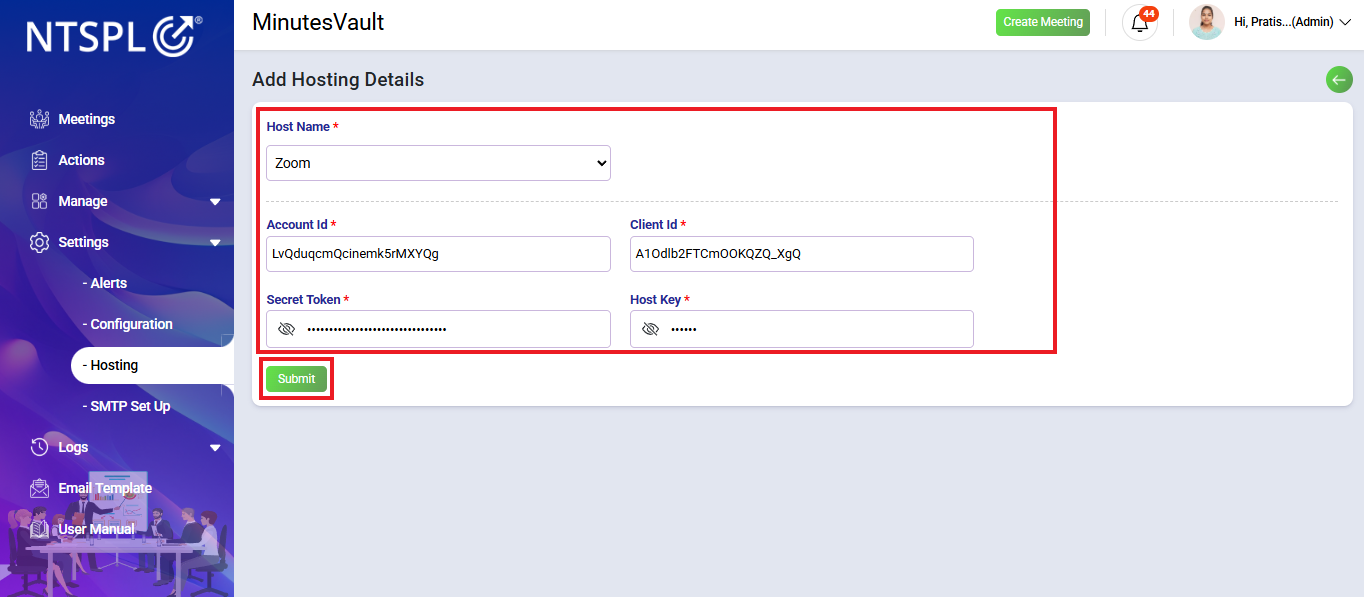
To add Hosting Details navigate to the Hosting option under the Manage section.
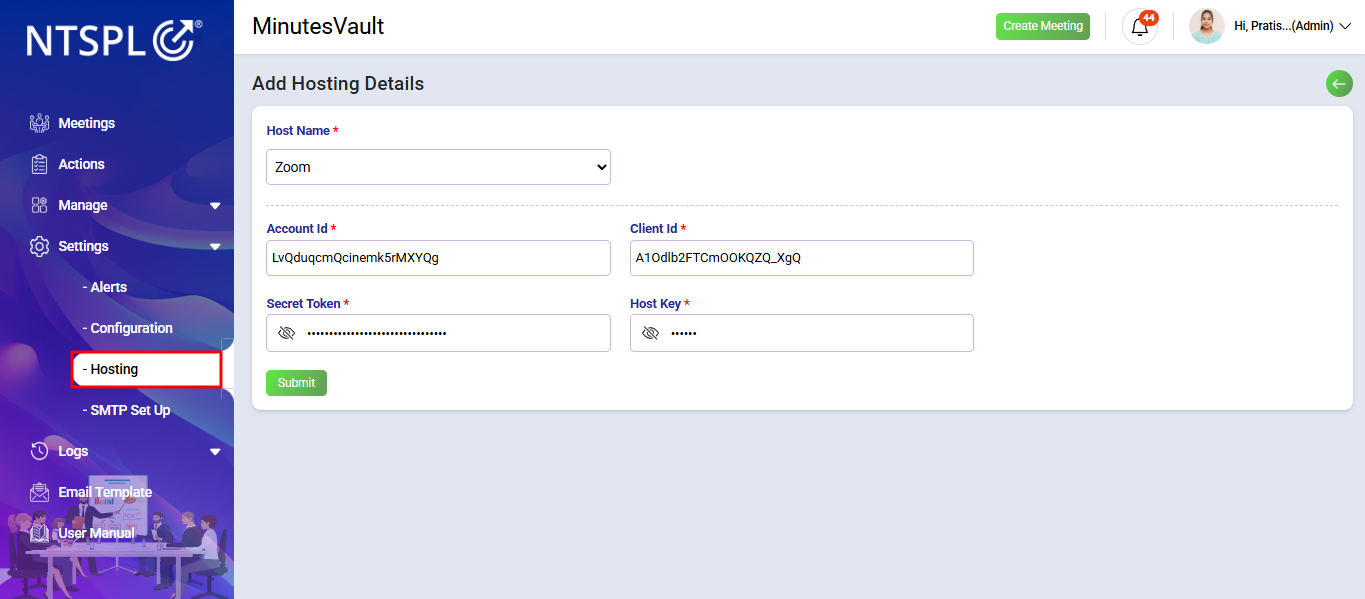
Enter the required hosting details to configure your Zoom integration.
Provide the Host Name, Account ID, Client ID, Secret Token, and Host Key to authenticate and enable seamless meeting management. Ensure the information is accurate for seamless integration.
Once all details are entered, click on Submit to save the configuration.
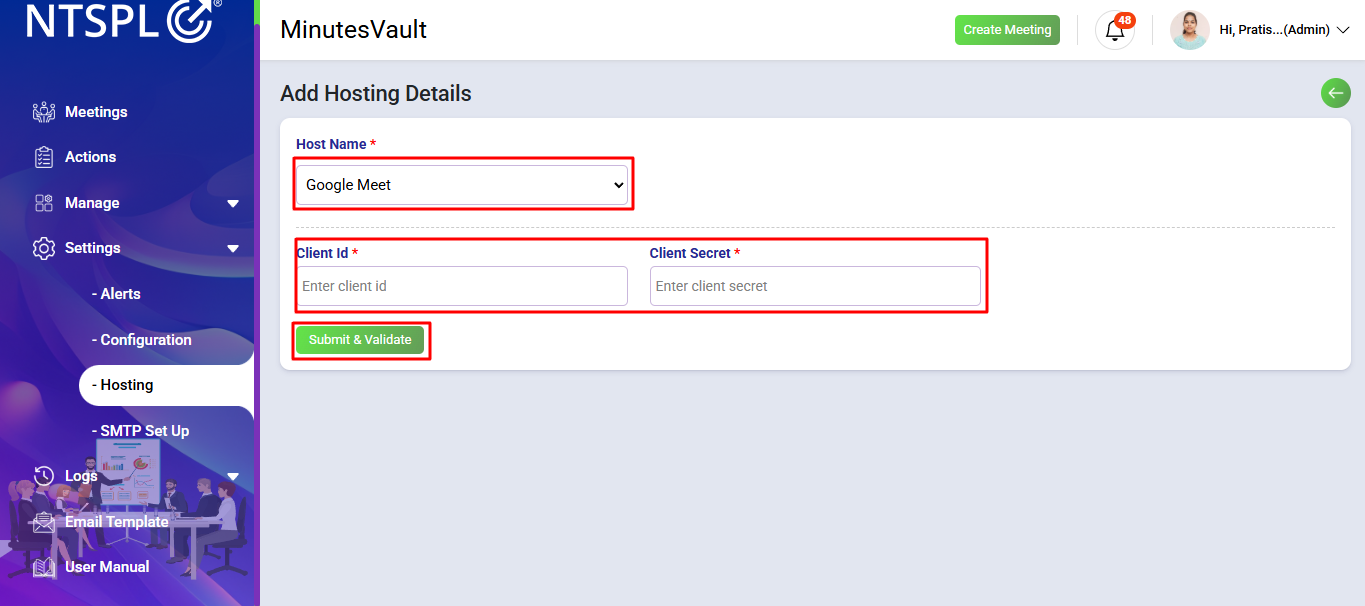
To configure Google Meet, select Google Meet from the hosting options. Enter the required Client ID, Client Secret, and Redirect URI to authenticate with Google Workspace. This allows you to create and manage Google Meet meetings directly from MinutesVault.
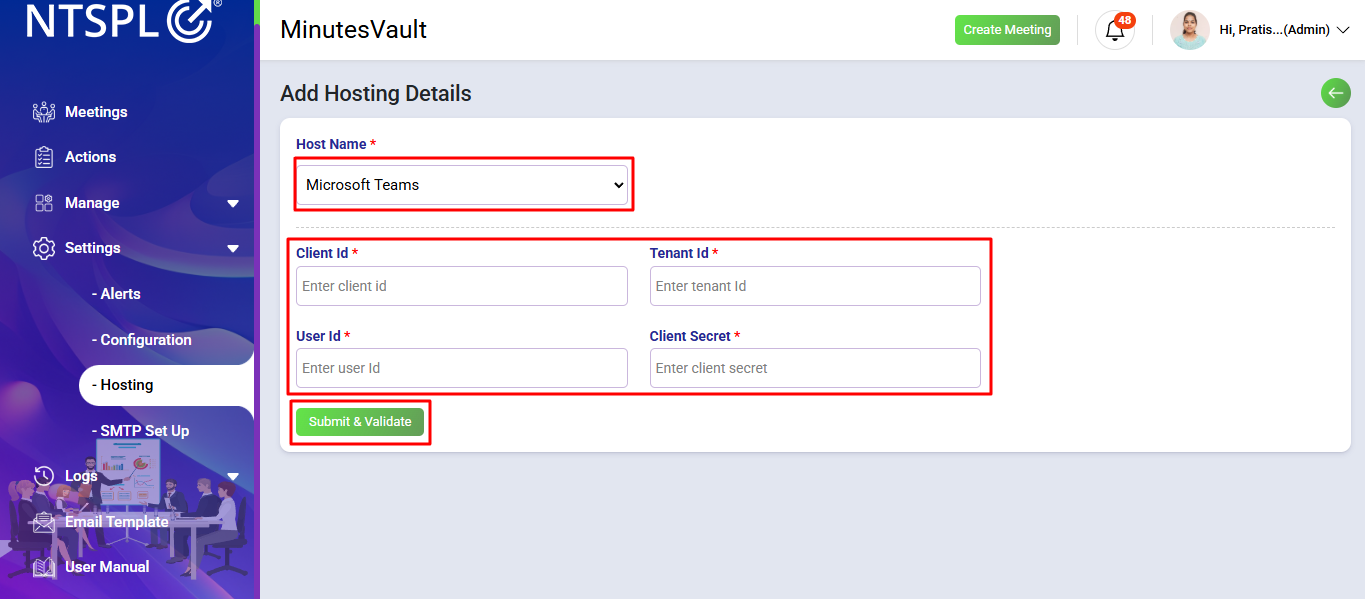
To configure Microsoft Teams, select Microsoft Teams from the hosting options. Provide the Tenant ID, Client ID, Client Secret, and Redirect URI to connect with Microsoft Azure AD. This allows you to seamlessly schedule and manage Teams meetings inside MinutesVault.
To configure your SMTP settings for email notifications, navigate to the SMTP Setup option under the Manage section.
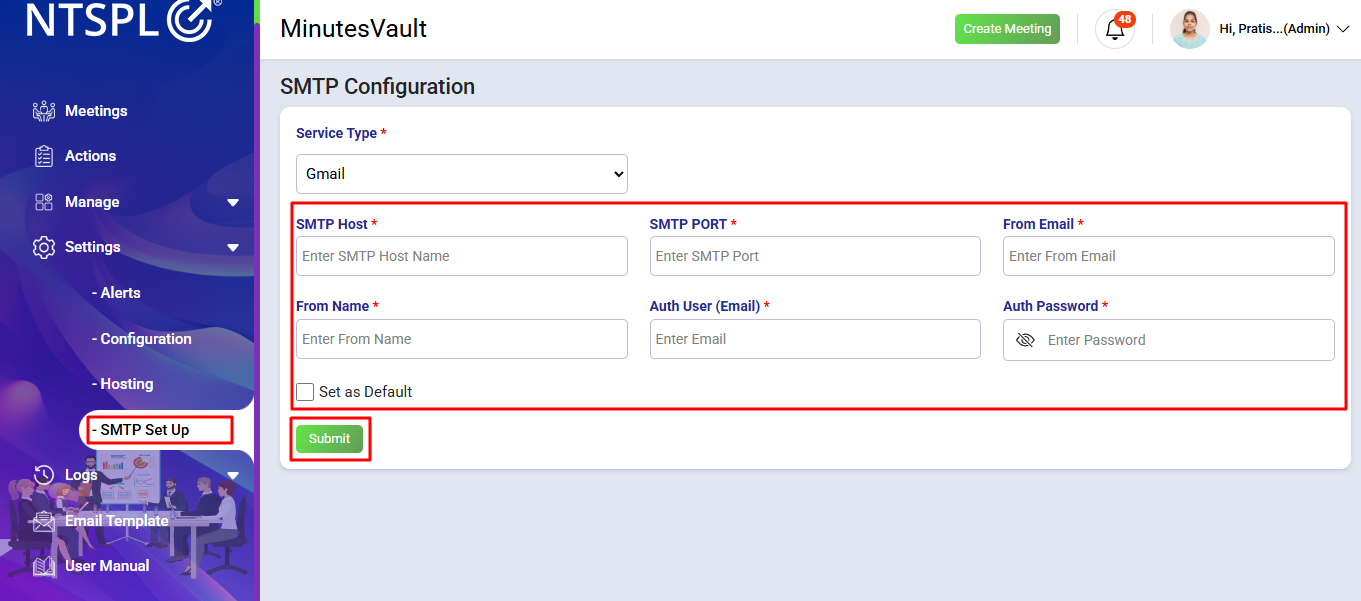
Enter the following details:
After filling in all the SMTP credentials, click on Submit. The system will verify your credentials and save them for sending meeting invitations, reminders, and notifications.
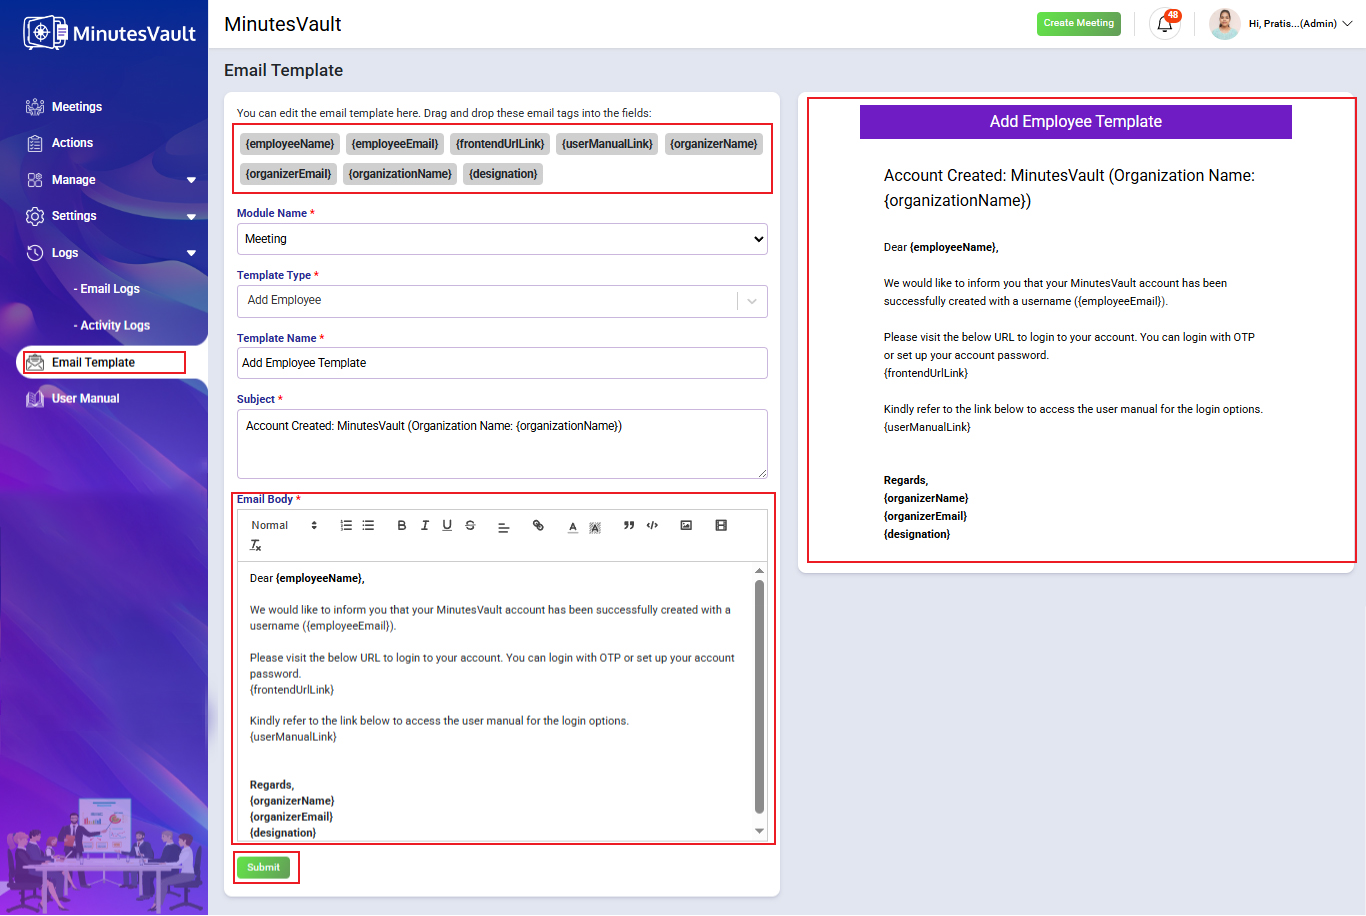
When a new Organization is created, the Email Template will be auto-added by the system. If you want to change any content in the email, you can update it here.
To maintain dynamic placeholders (keys), simply drag the key from the available list and drop it into the Subject or Body of the email. Do not edit the key text directly, otherwise it will break the template’s functionality.
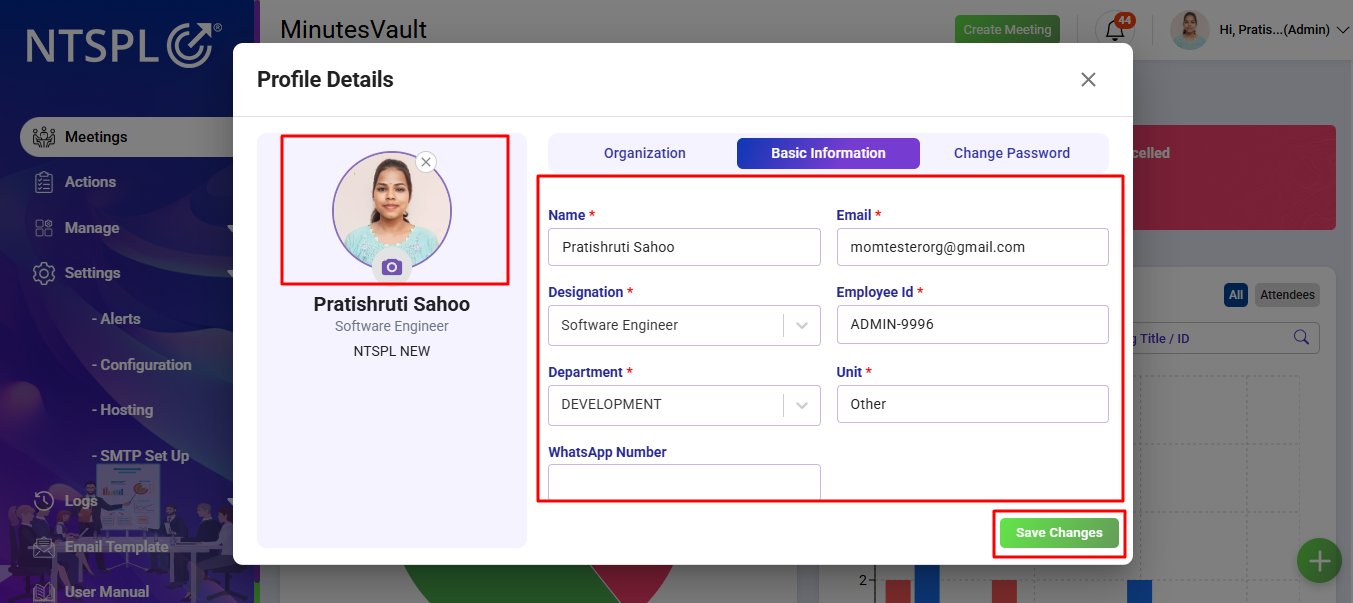
The application provides a Profile feature where you can manage your personal information and organization settings. If your account is linked with multiple organizations, you can switch between organizations directly (multi-organization login support).

In the Basic Information section, you can:
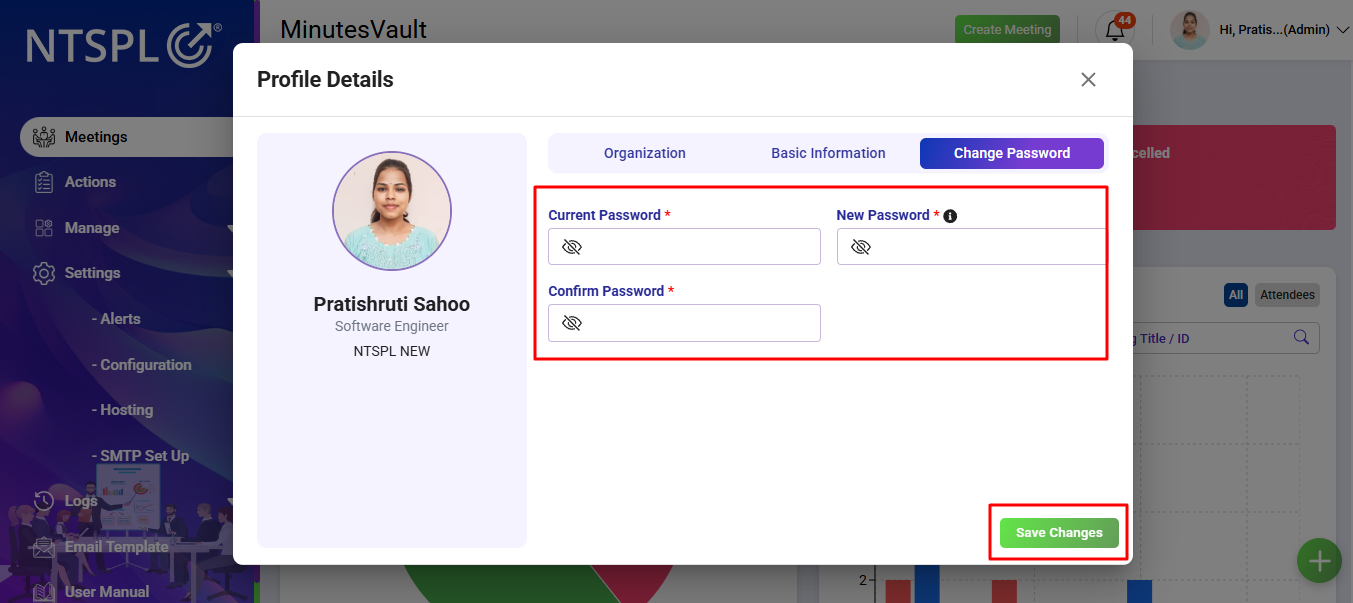
In the Password section:
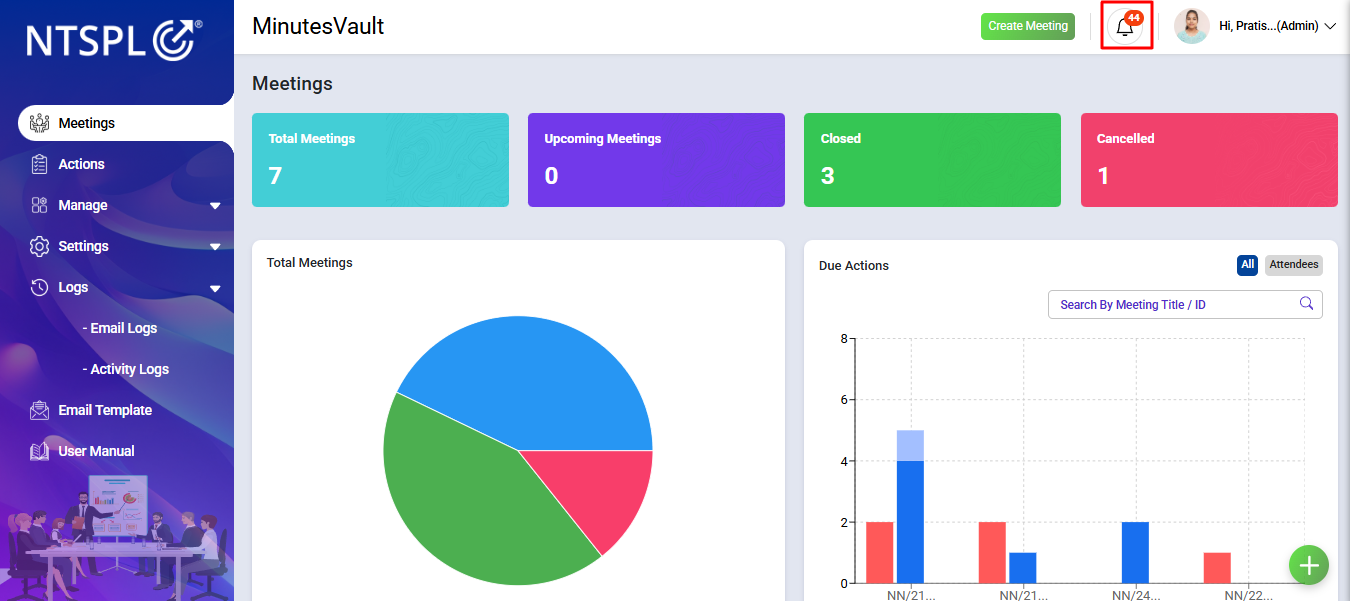
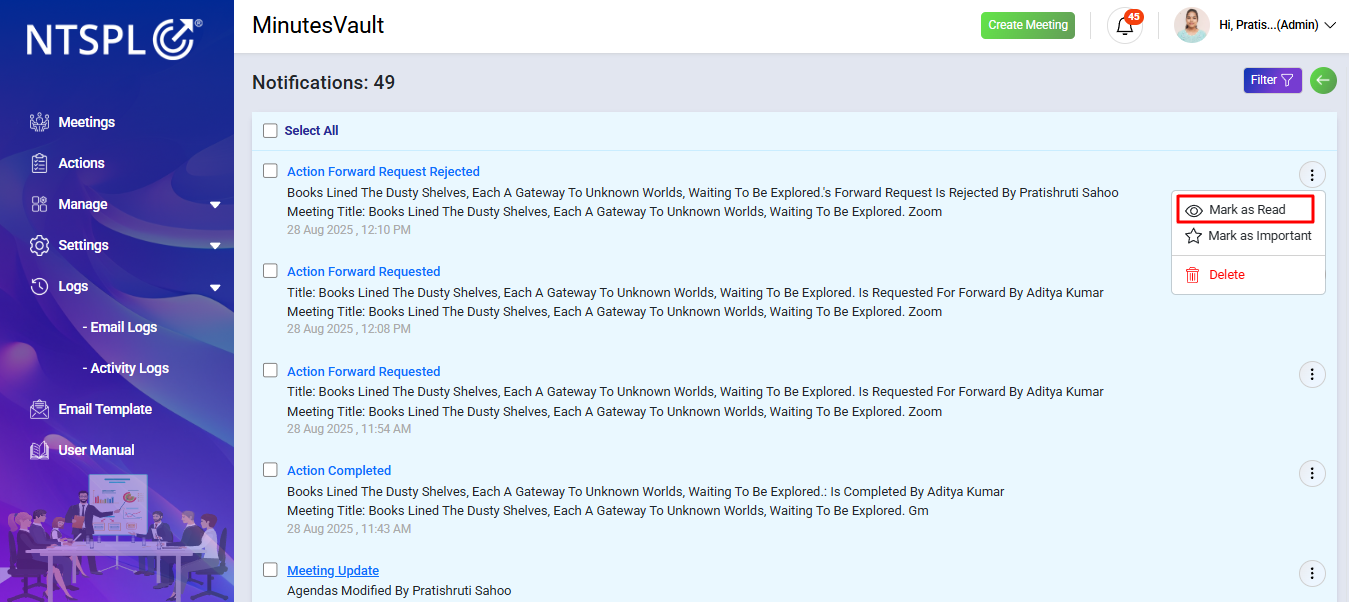
To view the Notification List, navigate to the Notification section in the application.
This can be accessed via a bell icon on the dashboard.
To mark a notification as read, click on the Mark As Read option to remove it from the unread status, indicating that you have seen it.
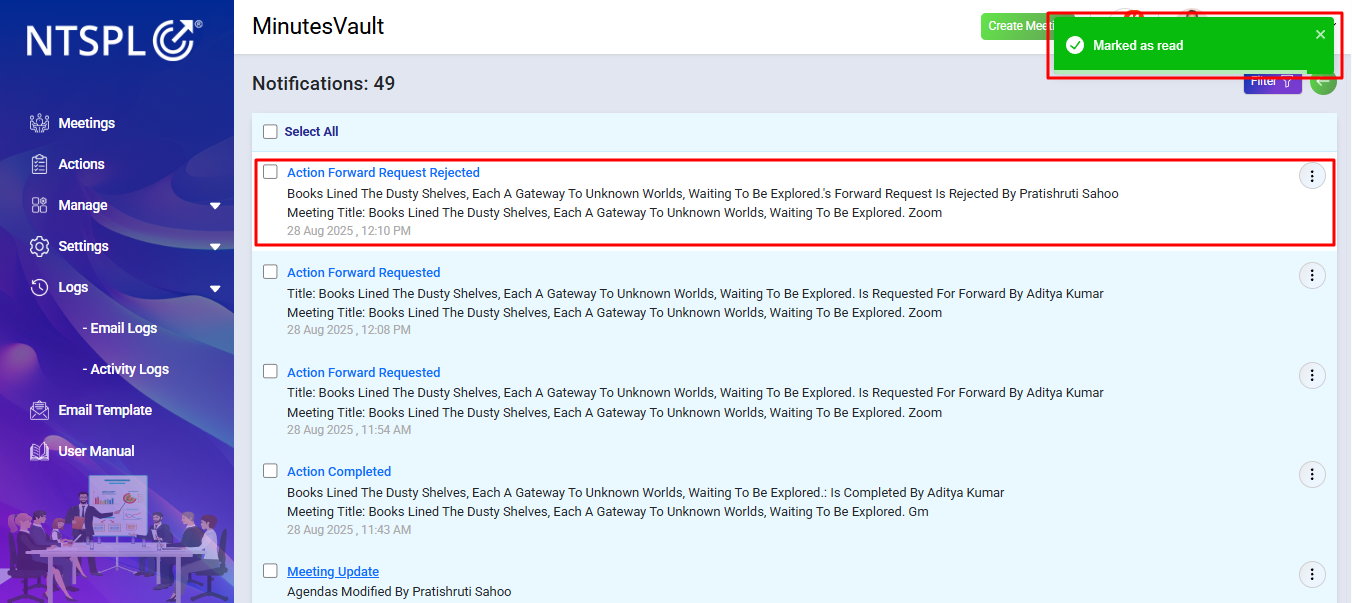
The notification is now Marked as read and will no longer appear as an unread.
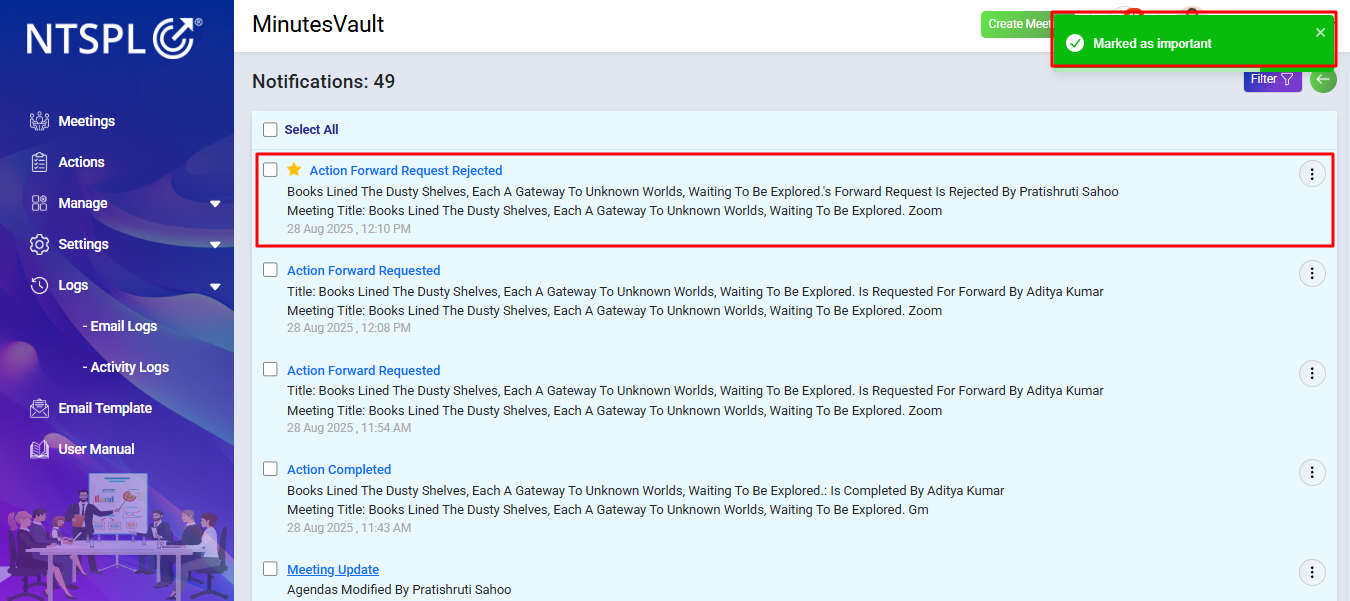
To mark a notification as important, click on the Mark As Important option, highlighting it for easy reference and ensuring it stands out in your notification list.

The notification is now Marked as important and will be highlighted for easy identification in your notification list.
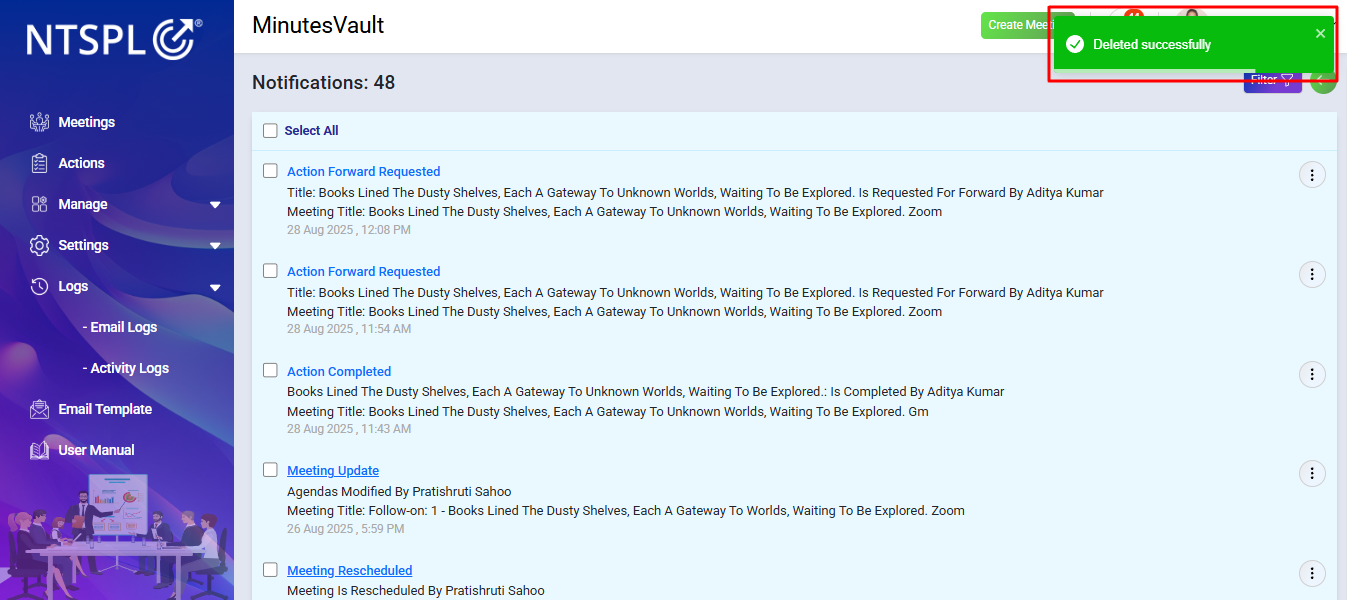
To delete a notification, click on the Delete option next to the Mark As Important option. This will permanently remove the notification from your list.
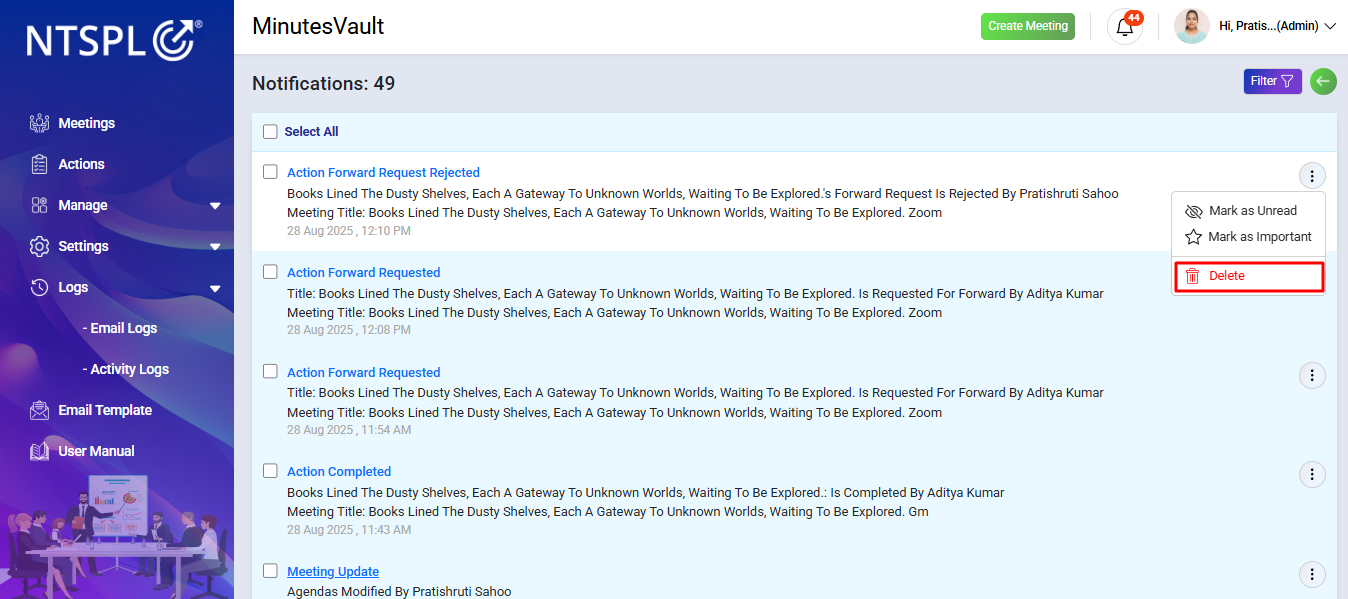
The notification has now been deleted and is no longer visible in your notification list.
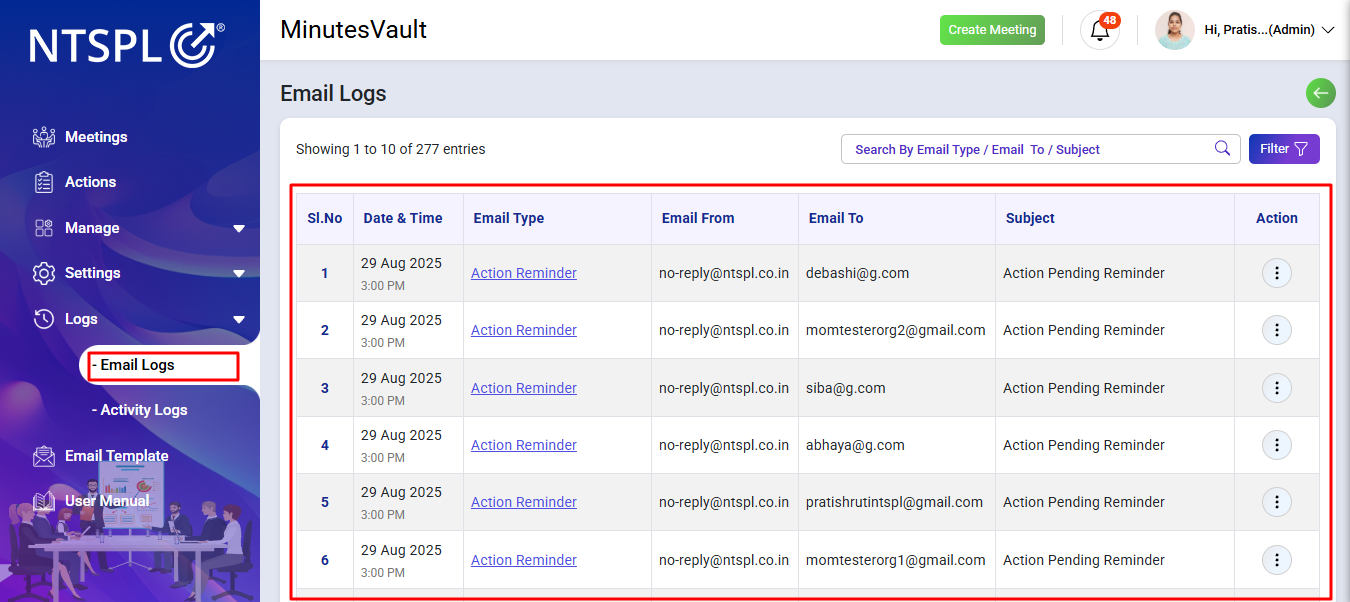
Logs help you track system activities and communications. There are two types of logs available in Minutes Vault: Email Logs and Activity Logs.
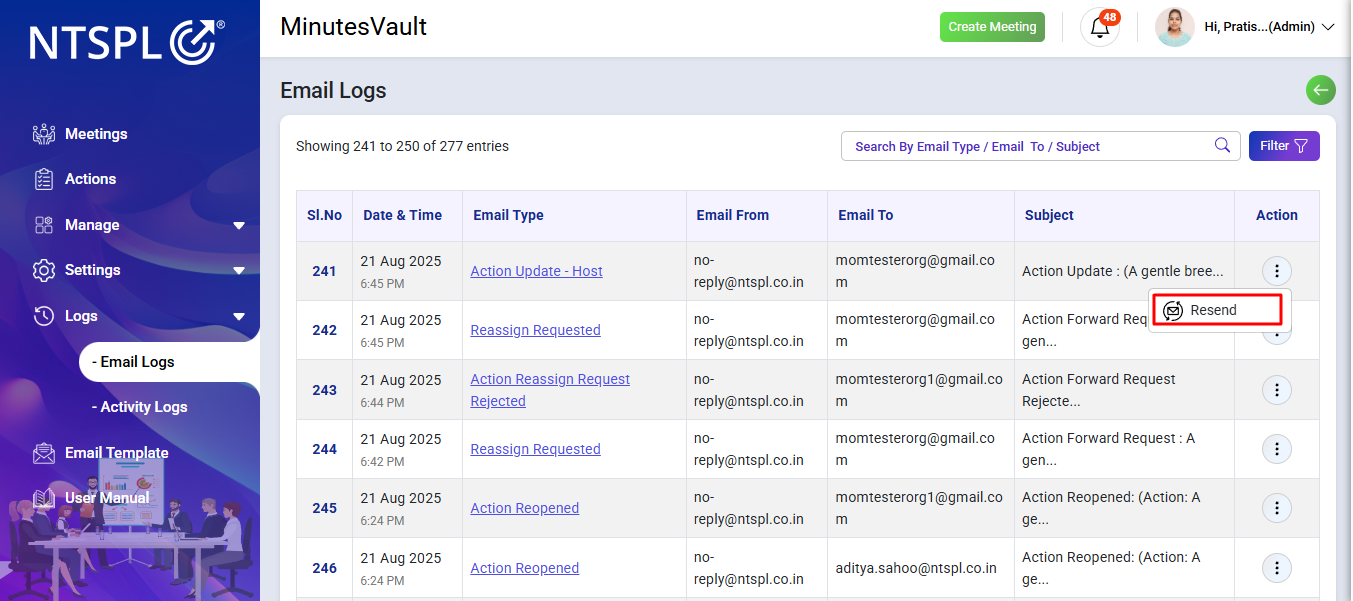
To view email logs, navigate to the Email Logs section under the dashboard. It provides a record of all emails sent from the system, including meeting invites, reminders, and notifications.
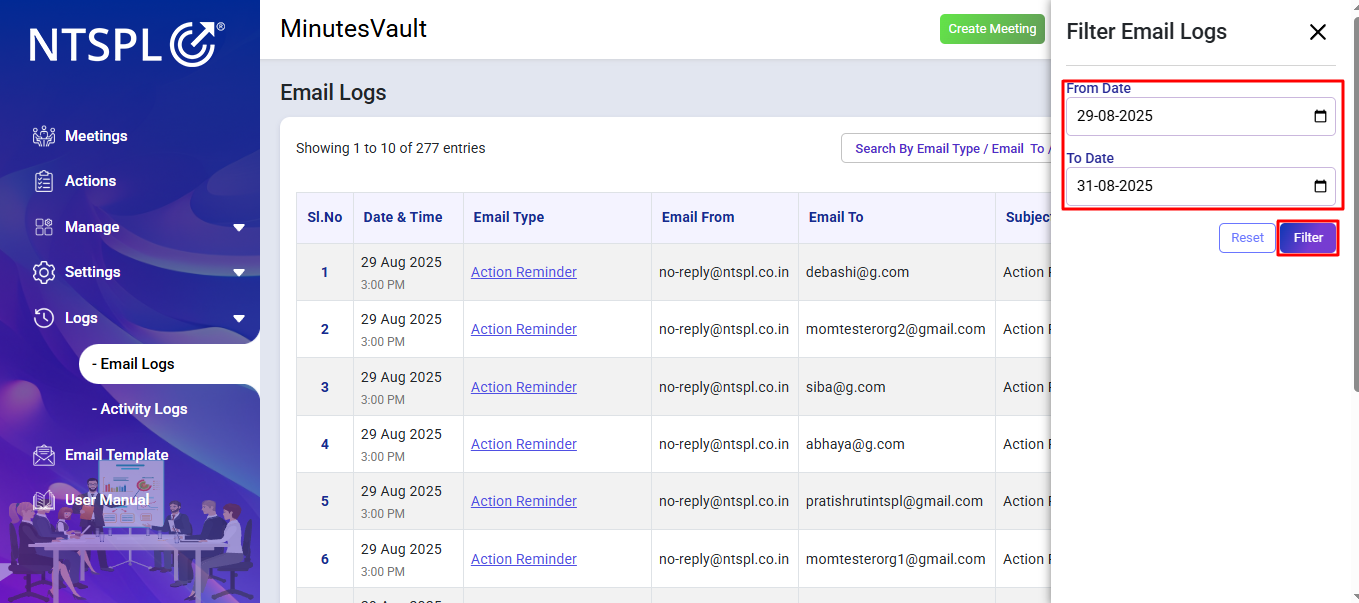
You can filter logs by date, recipient, or email type to quickly locate specific email records.
By clicking on a log entry, a Modal opens where you can:
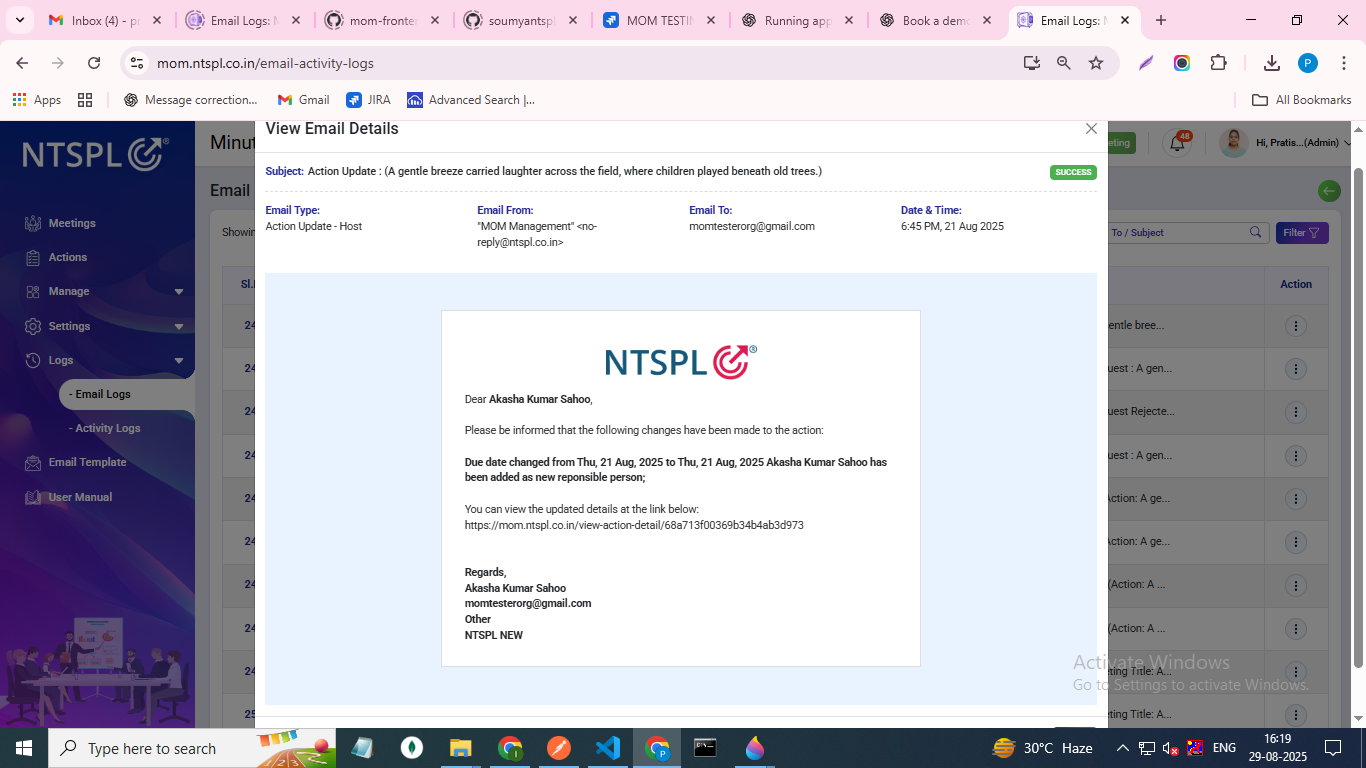
Resend Email Click the Resend button to send the same email again to the same recipient.
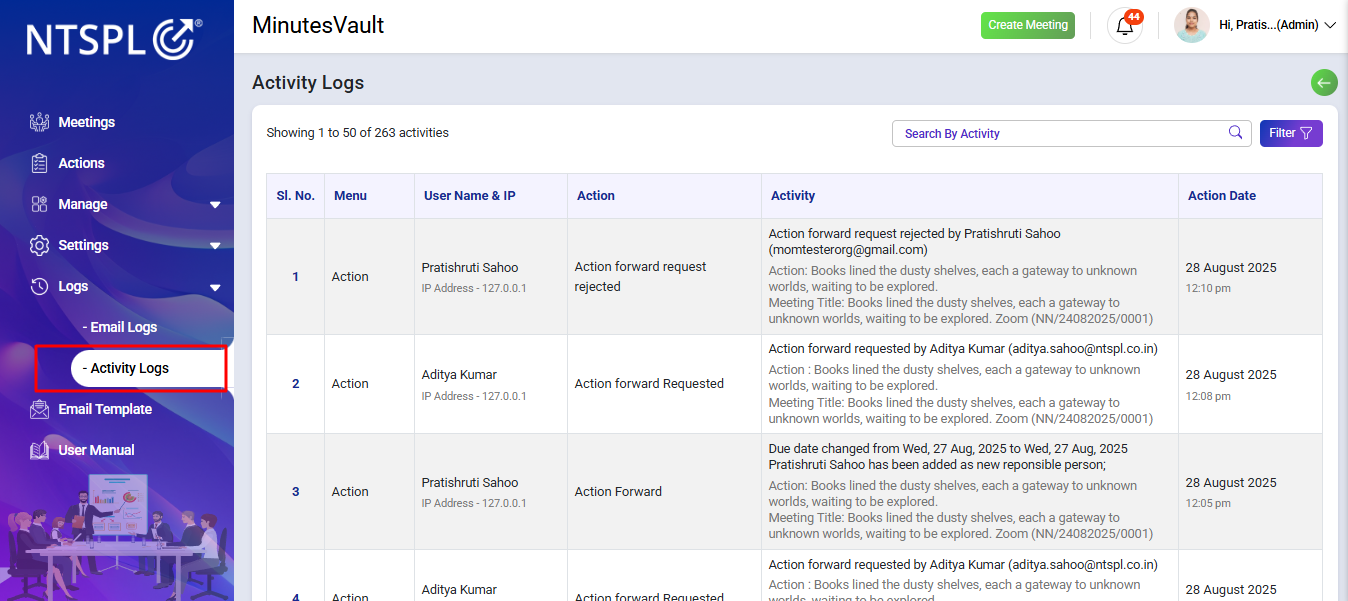
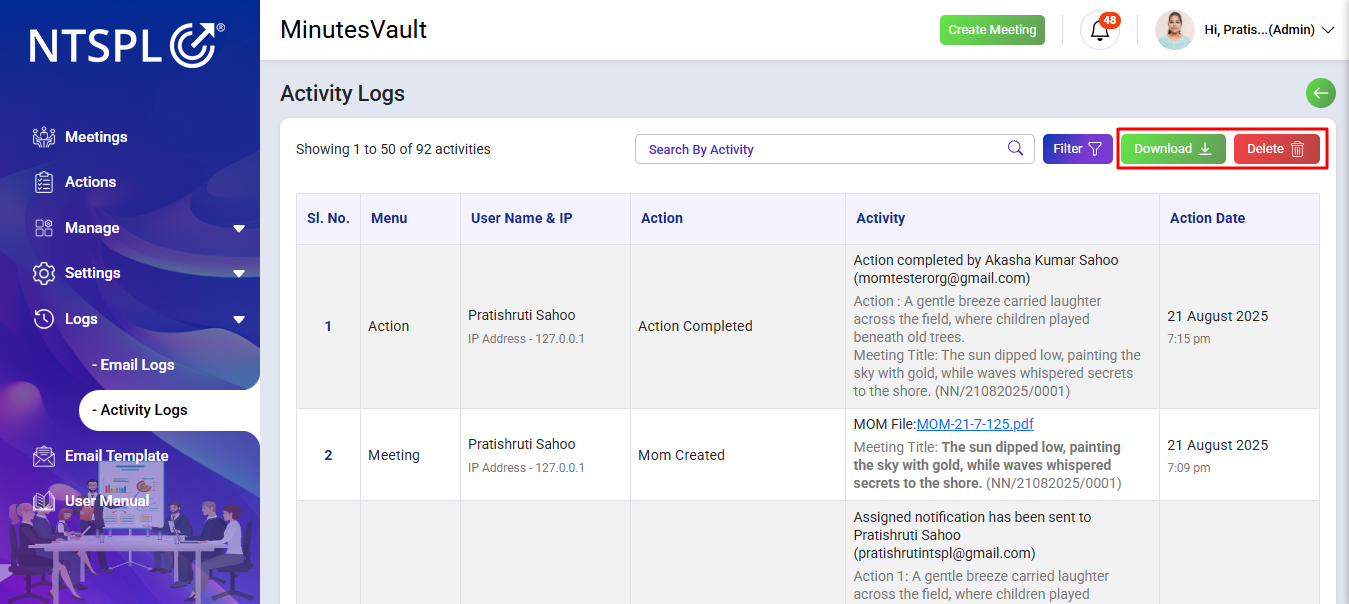
To view activity logs, go to the dashboard and navigate to the Activity Logs section. It provides detailed information about each action performed.
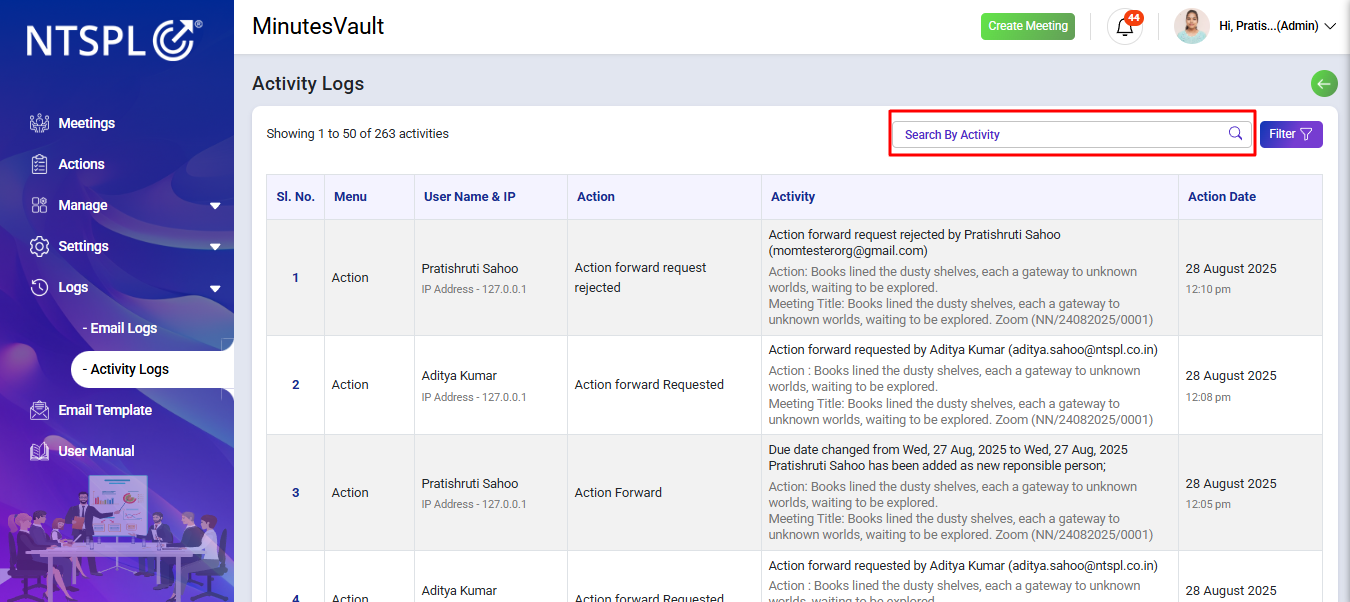
To search activity logs, use the search bar to quickly filter and locate specific activities.
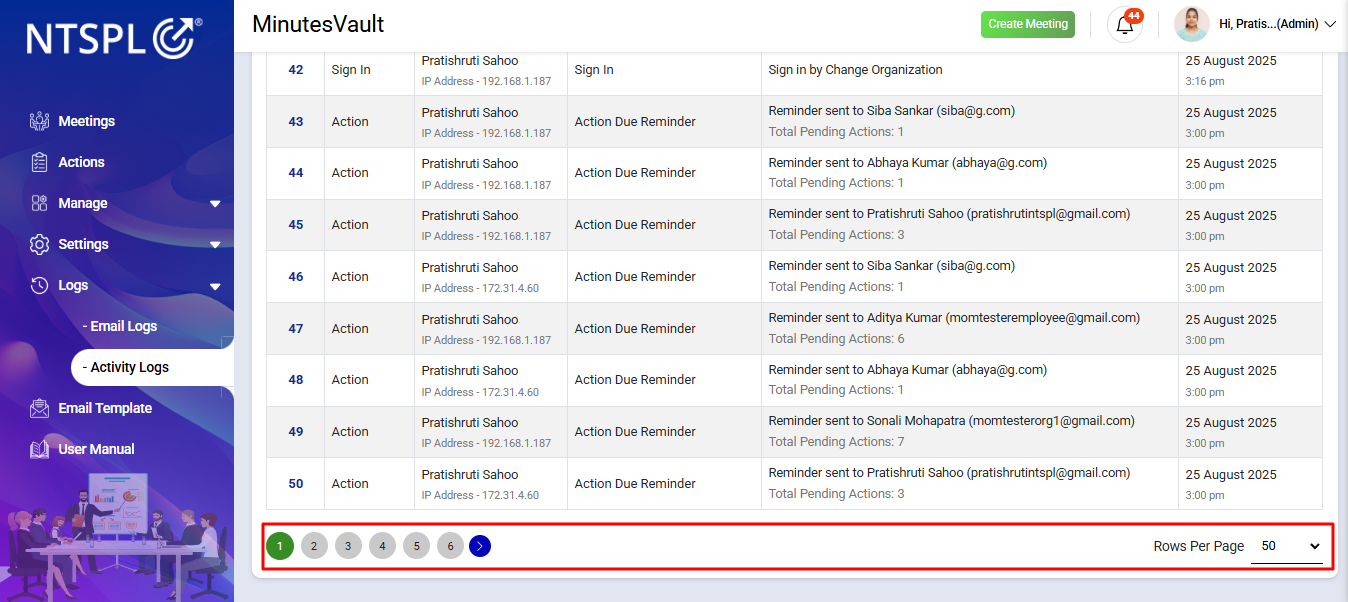
The Activity Log List supports pagination to efficiently display and manage large volumes of log entries. You can navigate through the logs using the pagination controls, allowing you to view a limited number of entries per page. Adjust the page size or jump to specific pages as needed for easier log exploration.
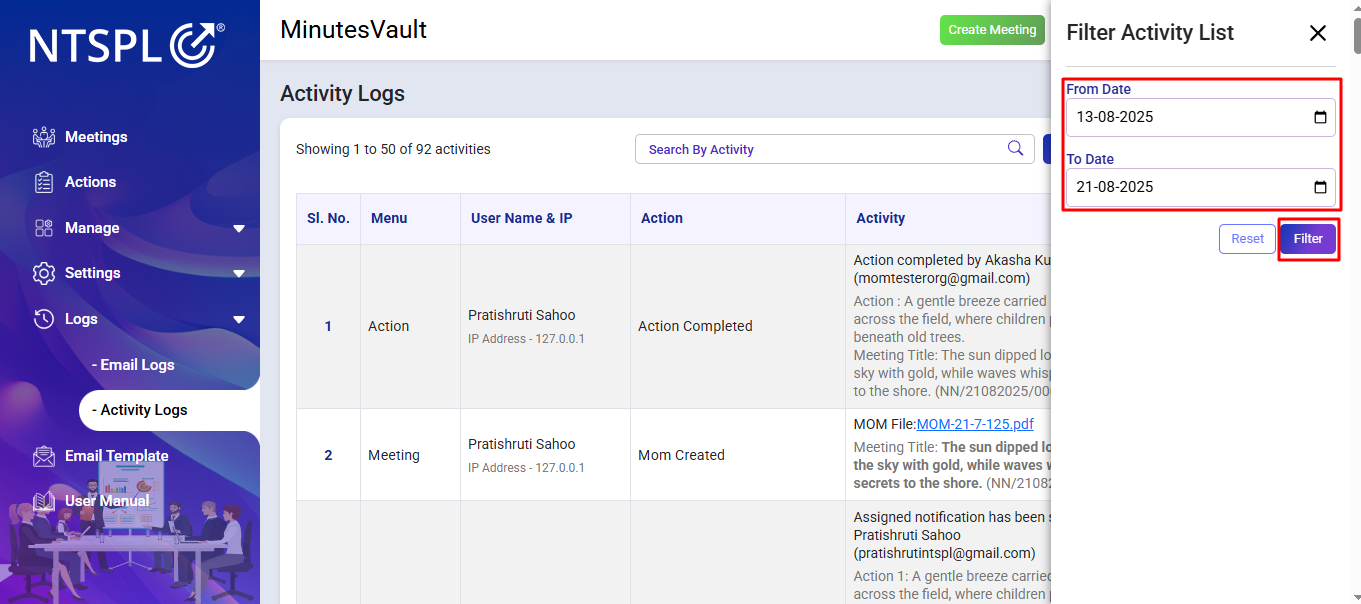
Additionally, you can filter activity logs by selecting a From Date and To Date. After applying the date range filter, you have the option to Download the filtered logs for record-keeping or Delete them permanently from the system.
This section provides solutions to common problems.
This section answers frequently asked questions.
